ibl.ai's Agentic Ontology now installs on your own Ubuntu server in four pasted blocks, reads the databases and HTTP APIs you already run, lets your people certify the business terms it finds, and publishes those terms as MCP servers that ibl.ai agents, Claude, Codex or Cursor can call, and with ibl.ai you own all the code and the data.
The product page is at Agentic Ontology. The source is at github.com/iblai/ontology, under the MIT license, and every guide below is mirrored on this site from that repository.
Watch it: from a fresh server to an agent answering questions
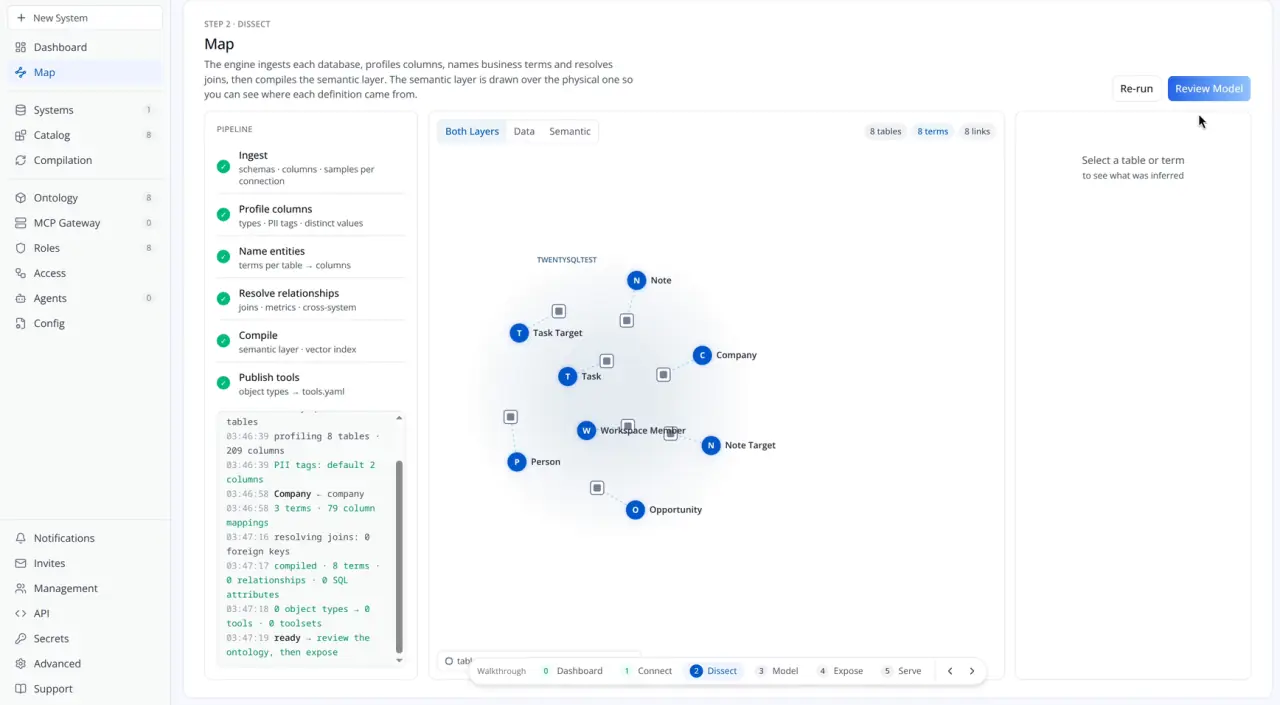
Install the Ontology on Your Own Server and Connect a Database to an Agent (12:39, on the ibl.ai YouTube channel). The walkthrough goes from a fresh Ubuntu server to an ibl.ai agent answering questions about a CRM.
- 1:58 to 4:08: the install. Name the platform and the host, install Docker, build the console from source, start everything.
- 6:57: a sample system. A Twenty CRM running in Docker stands in for the systems an organization already runs.
- 8:19 and 8:54: Systems and the Map. The CRM's database is connected, and its tables become business terms.
- 10:04 to 11:01: publish and attach. An MCP server is published, attached to an ibl.ai agent, and the agent answers questions about the CRM.
What changed in the ontology?
The ontology is now a console in the ibl.ai shell, with five steps and one page for each. A fresh server runs it; nothing is copied out of your systems to make it work.
- Connect (Systems). Add a SQL connection or an HTTP API connection. SQL connections use a read-only login, credentials are tested before they are saved, and the password stays on your server.
- Dissect (Map). The engine reads the tables, profiles the columns and names the business terms above them, and the Map draws those terms over the tables they came from.
- Model (Ontology). Your people review what was inferred and certify object types, properties, links and metrics. Only certified definitions become tools.
- Expose (New MCP Server). Pick the toolsets, how callers sign in and which origins and hosts may reach the server. The config file is shown exactly as it will be written.
- Serve (the server page). Deploy, attach the server to an ibl.ai agent with a key of its own, or paste a snippet into Claude, Codex or Cursor, then watch the calls arrive.
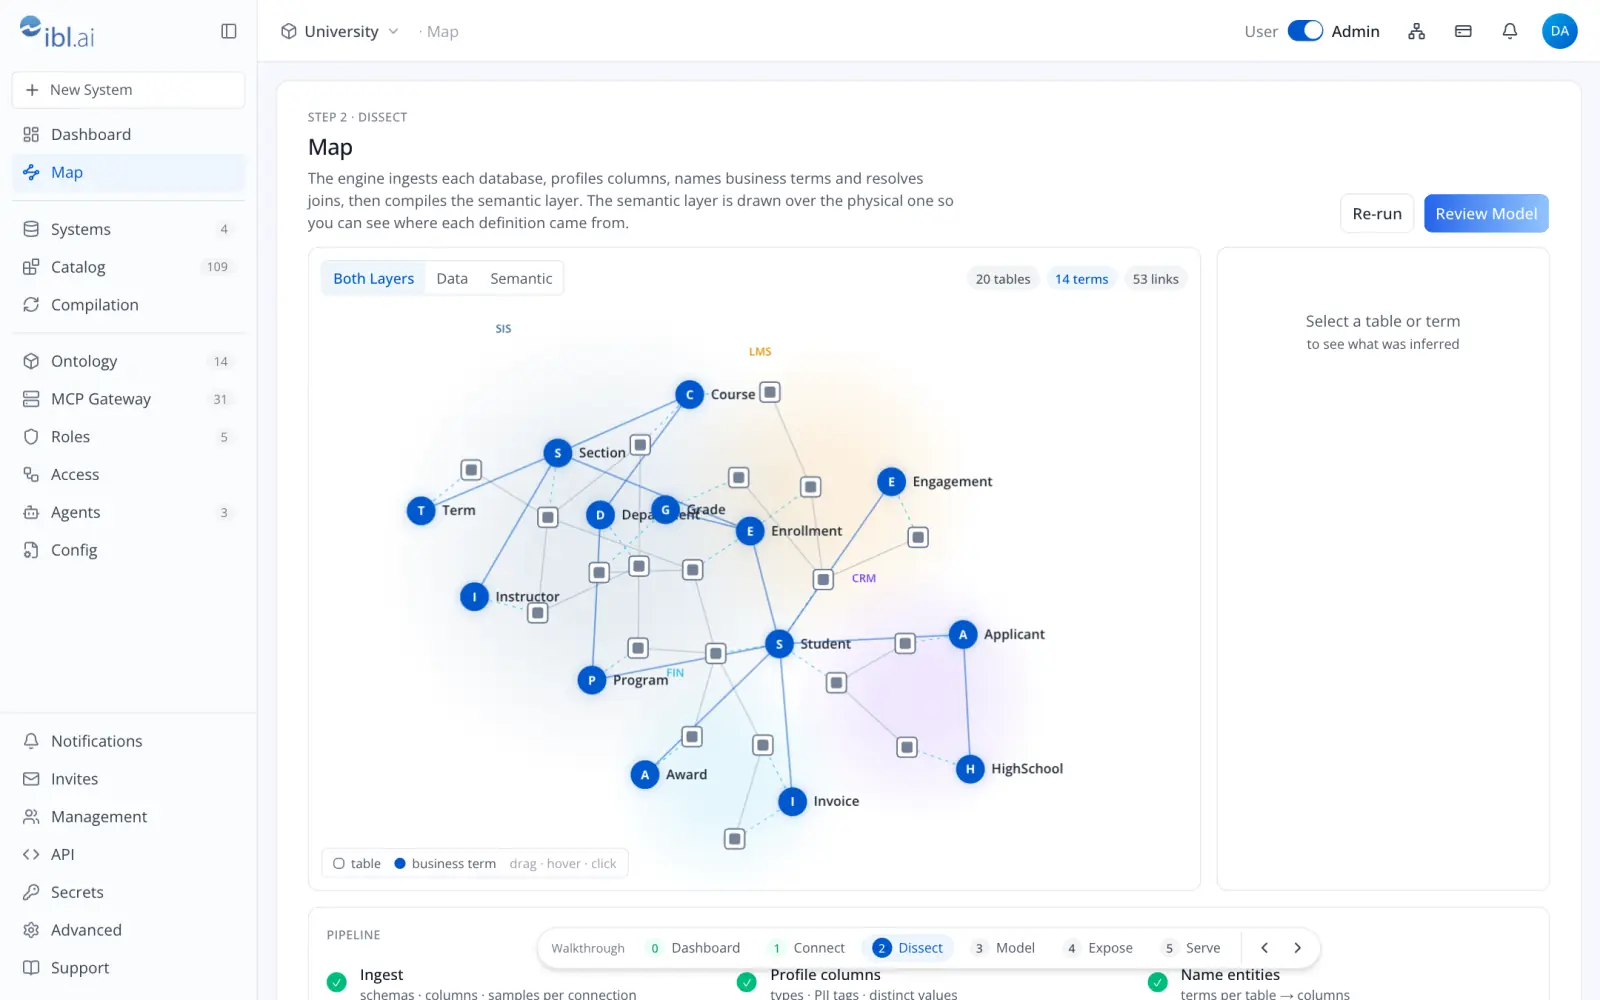
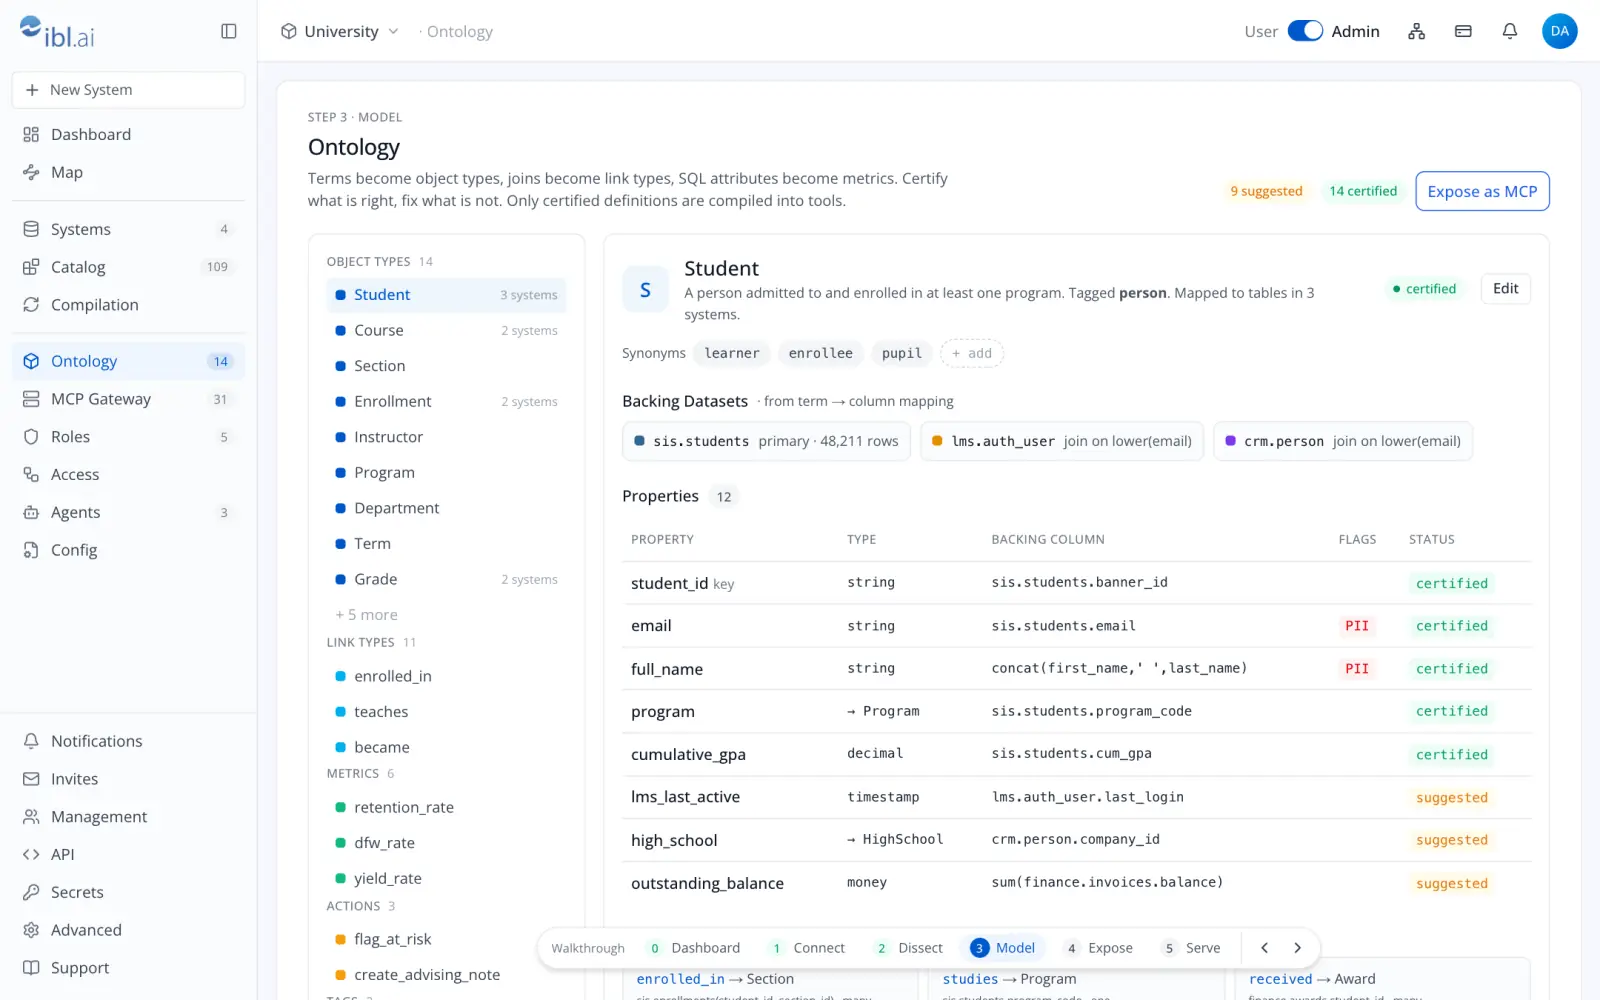
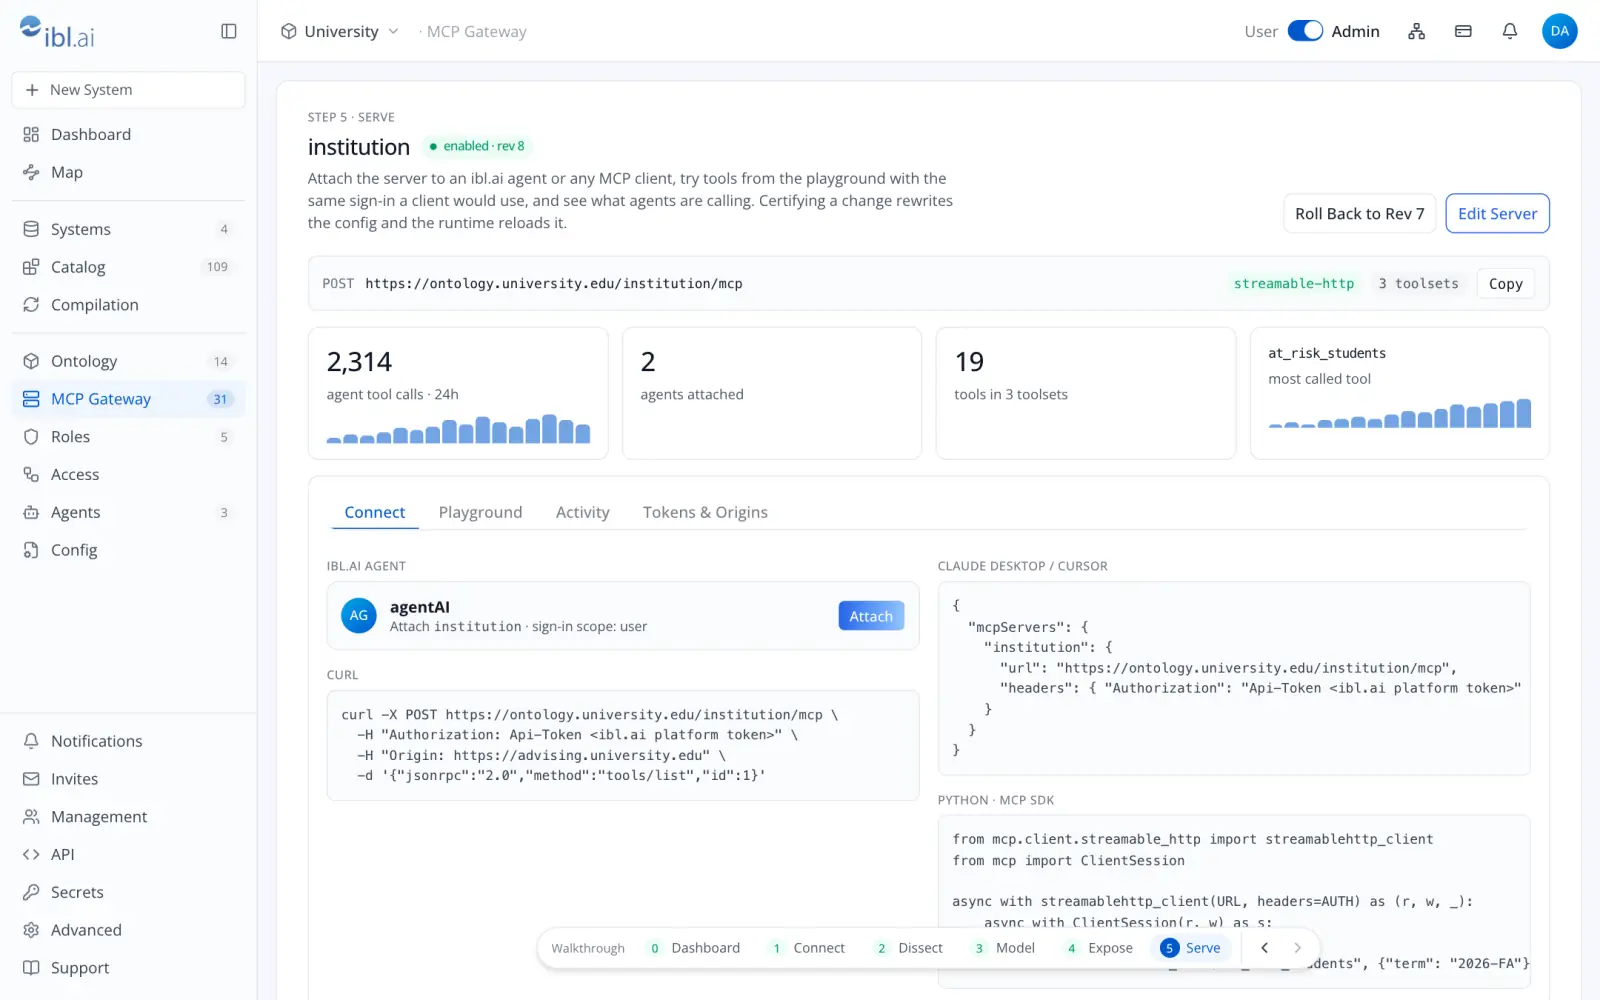
The screenshots come from the console's demo mode, which serves fixed sample data. Every page, with what each control does, is in the console walkthrough.
What can you do with it now?
- Install it on your own server. Ubuntu 22.04, 24.04 or 26.04 on x86-64, 4 GB of memory, 15 GB free and ports 80 and 443 open. The install guide is four blocks to paste, and only the first needs your values.
- Connect what you already run. PostgreSQL, MySQL, Snowflake and ClickHouse are dissected into terms and served as tools. Any system with an HTTP API can be served as tools today, from an OpenAPI document or endpoints you name (connect data sources).
- Publish it to any agent over MCP. ibl.ai agents attach a server in one dialog. Claude Desktop and Claude Code, Codex CLI, Cursor, the Python MCP SDK and cURL get ready-made configuration (connect agents).
- Decide who sees what. One ibl.ai policy per toolset, sign-in by ibl.ai credentials, Microsoft Entra ID or your own OIDC issuer, and rows limited by a claim of the caller's verified sign-in (permissions).
- Ask in plain words, if you want to. Without a model key, connecting, mapping, certifying and the tools all work. With an OpenAI key or a gateway that speaks its API,
ask_questionanswers with certified SQL and returns the SQL it ran. - Look after it like any other server. Settings, upgrades, backups and what to do when something stops are in the operations guide. Each MCP server keeps its revisions, and Roll Back restores the previous one.
Why does this matter?
Until now, giving an agent access to an organization's data usually meant one of two things. Either each agent was wired to each system on its own, and each one decided for itself what a customer or a case meant, or the data was copied into a vendor's cloud so the vendor's tools could reach it.
The ontology changes the order of the work. The definitions come first: written once, over the systems the organization already runs, and checked by the people who own the data. Every agent then calls the same certified terms, through the same MCP endpoint, on a server inside the organization's network.
Access follows the person, not the agent. Each toolset has one policy on the ibl.ai platform, a caller sees only the toolsets its grant reaches, and a parameter can be bound to the caller's verified sign-in, so two people asking the same agent get the rows each of them is allowed to see.
No copy of the data goes to a vendor. Your systems are read in place, the passwords are kept on your server, SQL connections are read-only, and every tool call and refusal is logged where your own security team can read it.
The code is yours too. The console is MIT-licensed and built from source on your server, and nothing of ibl.ai's arrives as a prebuilt image.
Built on NVIDIA and Google. NVIDIA's auto-ontology engine infers the terms and Google's MCP Toolbox serves the tools, both running on your own server beside the ibl.ai console.
Try it
- Watch the walkthrough: Install the Ontology on Your Own Server and Connect a Database to an Agent.
- Run it in demo mode: clone github.com/iblai/ontology and start it with
NEXT_PUBLIC_DEMO=1, with sample data and no account. - Install it: the install guide.
- See the product: Agentic Ontology.
- Plan it with our team: Contact us.