Creation
Description
The Creation workflow lets you build a brand‑new mentorAI from scratch. In a single guided flow you name the mentor, set its personality, choose a language model, upload knowledge resources, and generate an embed code—so you can deploy a customized AI tutor anywhere learners need it.
Target Audience
Instructor
Features
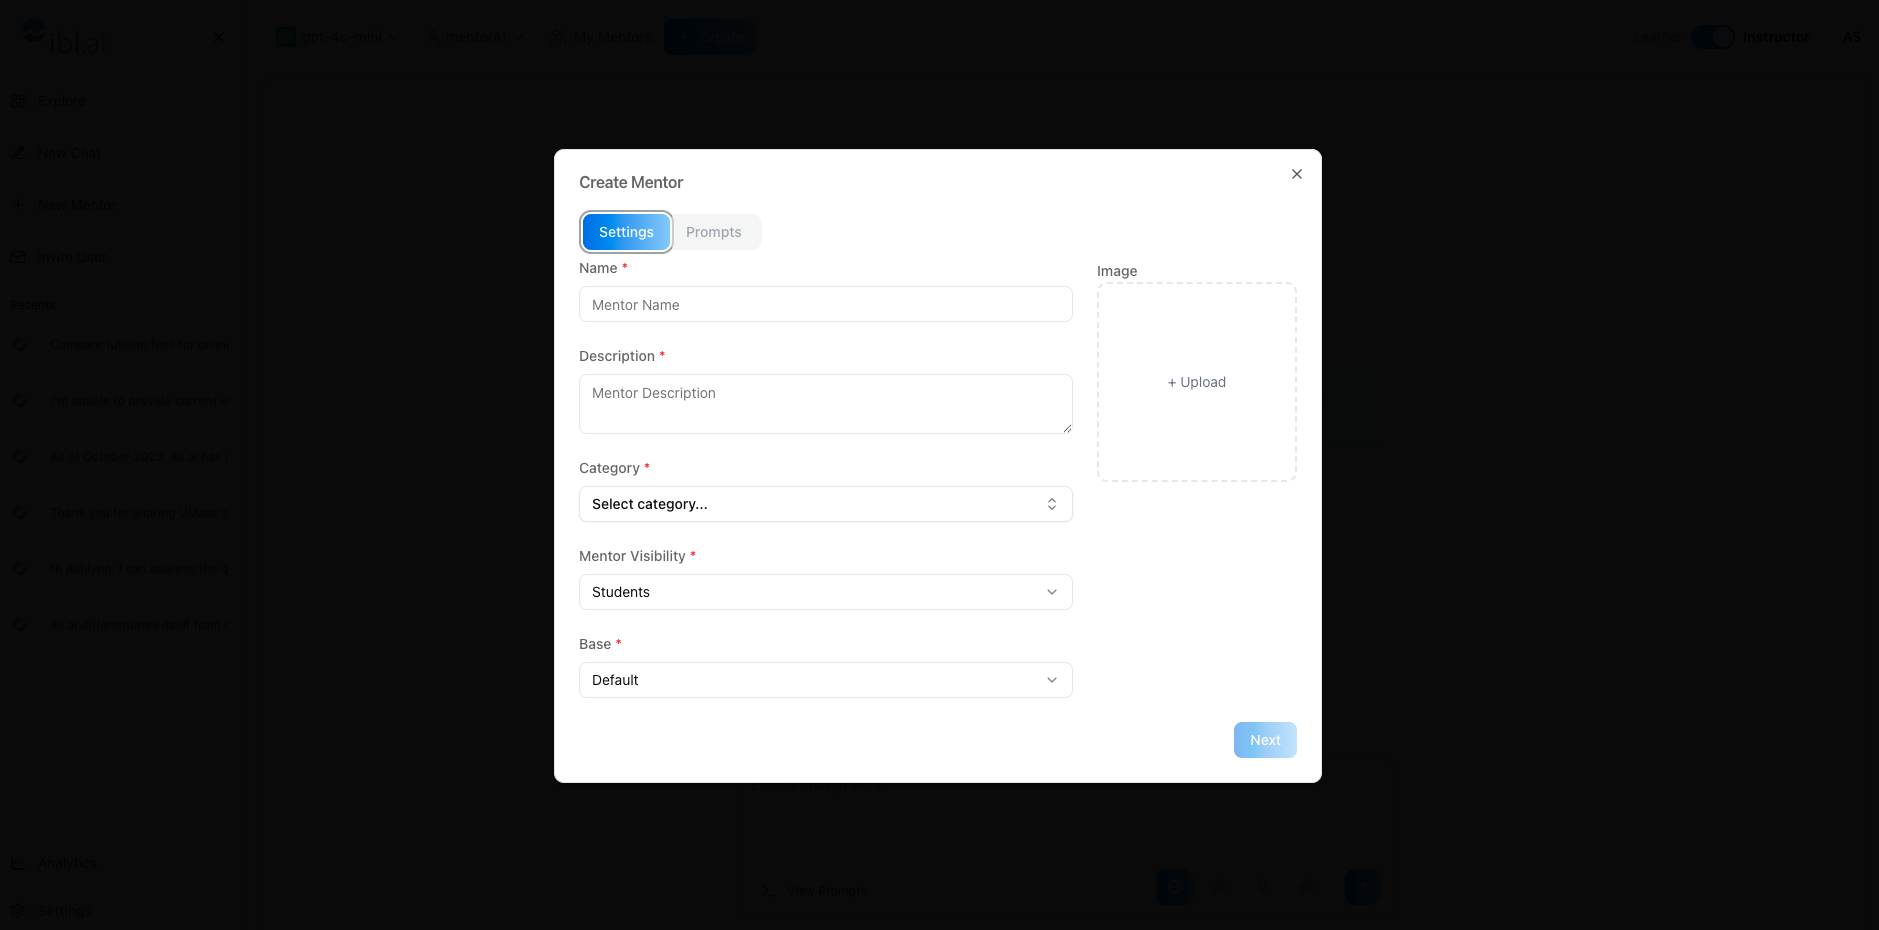
Create Mentor Wizard
A streamlined interface (Settings ➜ Prompts ➜ Tools ➜ Datasets ➜ Embed) that takes you step by step from concept to launch.
Rich Settings Panel
Upload profile images, set visibility (Administrator‑only or Student‑facing), pick a base LLM (OpenAI or Gemini), and categorize the mentor for easy search.
Prompt Configuration
Define a System Prompt (mentor persona), Proactive Greeting, and Guided Prompts that appear as starter questions.
Tool Toggles & Safety Controls
Enable features like Web Search or Screen Share, and specify how the mentor should respond to inappropriate queries.
Dataset Uploads
Add PDFs, URLs, Google Drive, Dropbox, or OneDrive files to form the mentor’s knowledge base.
Conversation History Analytics
Review every chat, export transcripts, view sentiment, and filter by date, topic, or category.
Embeddable Widget Generator
Produce a code snippet with options for anonymous or trackable usage, context awareness, disclaimers, and launcher icon customization.
How to Use (step by step)
Start the Creation Process
- Log in and click Create
- The Create Mentor screen opens on the Settings tab
Fill Out the Settings Tab
- Profile Image – upload an avatar for the mentor
- Mentor Name – e.g., “Bio AI”
- Description – short phrase like “Biology tutor that assists learners with Intro to Biology”
- Category – choose relevant tags (biology, science, learning)
Mentor Visibility –
Administrators → only staff can see/use (assessments, admissions, internal data)
Students → everyone can access (general tutoring)
Base Model – select OpenAI default or Gemini
Define Prompts
- Open the Prompts section
- System Prompt – outline persona (e.g., Socratic biology tutor)
- Proactive Message – greeting shown before a learner’s first message
- Guided Prompts – AI‑suggested starter questions
Configure Additional Settings
- LLM Selection – choose the specific model version
- Tools – toggle extras (Web Search, Code Interpreter, Image Generation, etc.)
- Safety – set rules for inappropriate content and define the mentor’s fallback response
Review the History Tab (post‑launch)
Inspect all conversations, export chats, and filter by sentiment, date, or topic.
Upload Knowledge in Datasets
Add files, folders, or cloud links. These resources train the mentor’s retrieval system.
Embed the Mentor Elsewhere
Open the Embed tab
Choose Default or Advanced view
Decide on Anonymous vs. Trackable usage
Enter the target Website URL
Optional toggles: Context Aware, Safety Disclaimer, Open by Default, Icon
Click Create Embed and copy the snippet
Go Live
Deploy the embed code or share the mentor link.
Learners (or administrators) can now chat with the mentor immediately.
Pedagogical Use Cases
Course‑Specific Tutors
Build mentors like “Bio AI” or “Macro Econ Coach” that draw on syllabus PDFs and lecture slides.
Admissions & Advising Assistants
Create Administrator‑visible mentors to handle FAQs, application guidance, or scholarship queries.
Assessment Authoring Helpers
Generate mentors restricted to instructors that draft quiz questions or grading rubrics.
Research Support Bots
Upload journal articles and datasets so the mentor can summarize findings and suggest next steps for student projects.
Campus‑Wide FAQ Bots
Embed a general “Campus Help Desk” mentor across the LMS to answer policy, tech, or financial‑aid questions 24/7.
Once you complete these steps, your mentor is fully configured—ready to guide learners or staff, depending on the visibility you selected.