Agent Settings: LTI Keys
Overview
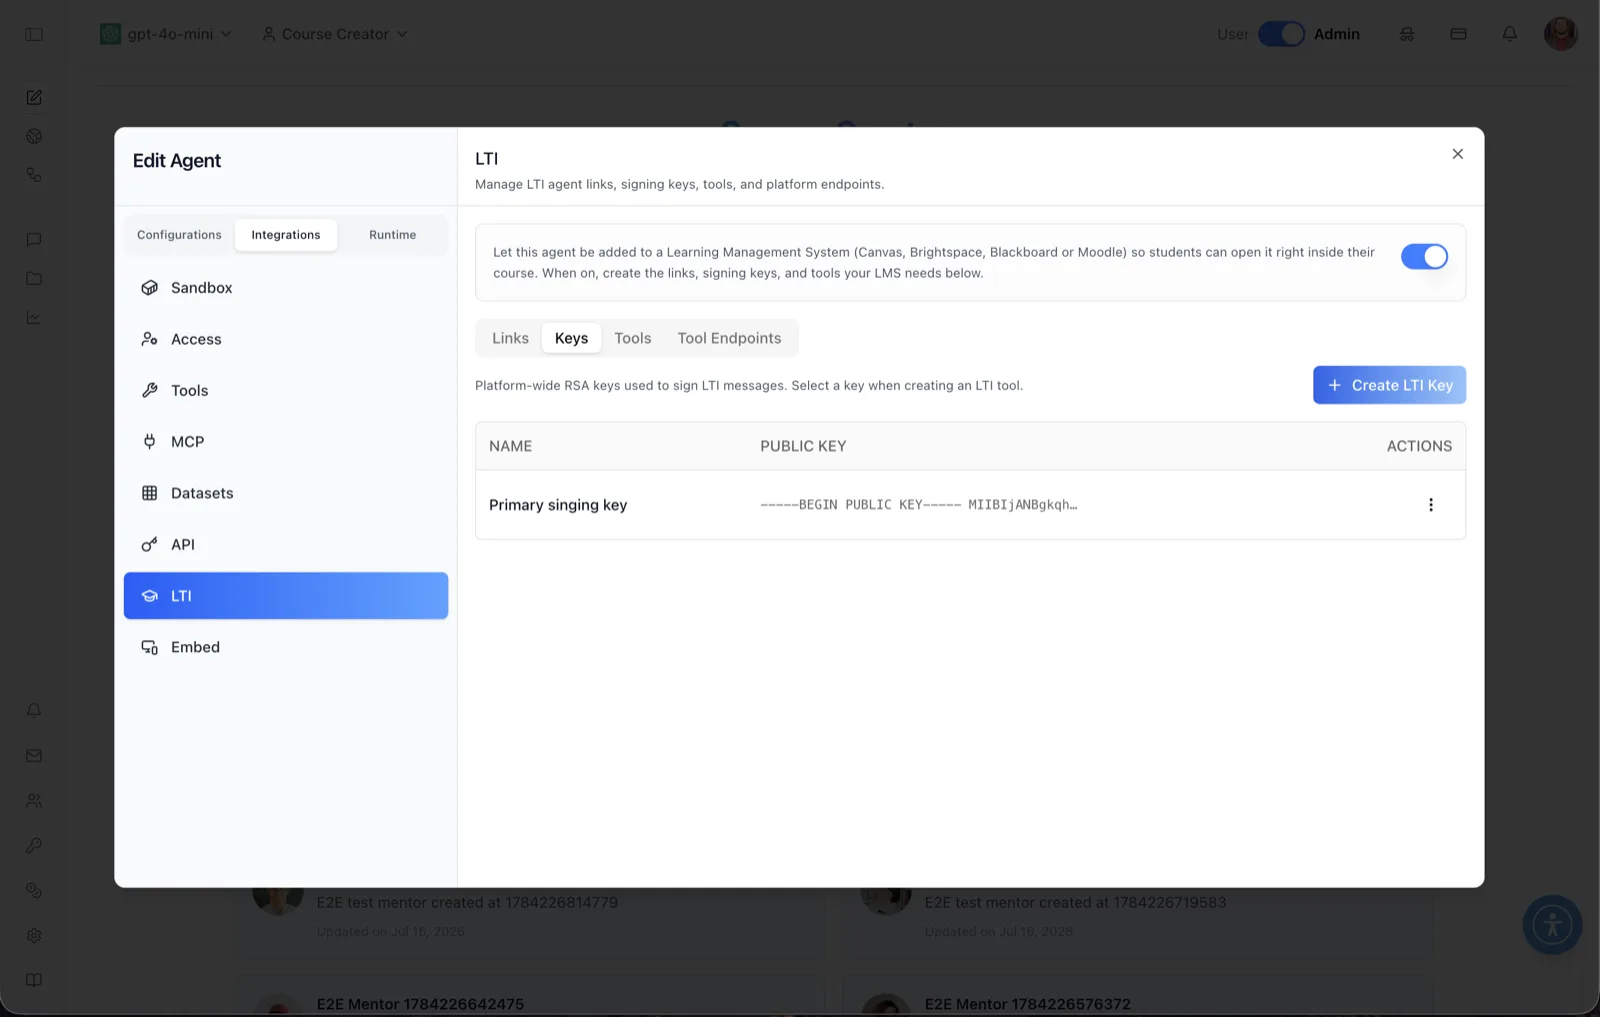
The Keys sub-tab of the LTI panel manages the RSA key pairs used to sign LTI messages. The caption on this sub-tab explains: "Platform-wide RSA keys used to sign LTI messages. Select a key when creating an LTI tool." Keys are platform-wide — they belong to the organization, not to a single agent — and the same key list is visible from any agent's LTI panel.
In LTI 1.3, the tool signs its messages with a private key and the LMS verifies them against the matching public key (published via the JWKS endpoint). Each key created here holds that key pair; when you register an LTI tool on the Tools sub-tab, you select one of these keys as its signing key.
To reach this screen, open the Edit Agent modal, switch to the Integrations tab group (its sidebar lists Sandbox, Access, Tools, MCP, Datasets, API, LTI, and Embed), select LTI, and click the Keys sub-tab. The panel header reads: "Manage LTI agent links, signing keys, tools, and platform endpoints." The LTI panel is admin-only.
Target Audience
Administrator
Panel Reference
LTI enable toggle
The banner at the top of the LTI panel reads: "Let this agent be added to a Learning Management System (Canvas, Brightspace, Blackboard or Moodle) so students can open it right inside their course. When on, create the links, signing keys, and tools your LMS needs below." The toggle controls whether LTI launches are allowed for this agent — the same setting as Enable LTI launches in the agent's Settings. Creating LTI sub-resources requires it to be on.
Sub-tab bar
Four sub-tabs organize the LTI panel: Links (the launch link for this agent), Keys (this sub-tab), Tools (registered LMS platforms), and Tool Endpoints (the fixed URLs to give your LMS).
Create LTI Key
Opens a dialog to create a new signing key. You provide a name; the platform generates the RSA key pair. The new key then appears in the table and can be selected when creating an LTI tool.
Keys table
Each key is a row with:
- NAME — the key's display name.
- PUBLIC KEY — a truncated preview of the PEM-encoded public key (beginning
-----BEGIN PUBLIC KEY-----). - ACTIONS — a menu per row. Edit opens the key detail, where you can rename the key and view its full PEM public key and its public JWK (the JSON Web Key form published at the JWKS endpoint). Delete removes the key after confirmation — note that a key cannot be deleted while an LTI tool still references it.
The list is paginated at 10 rows per page.
Key detail
Choosing Edit opens the key's detail dialog: the key name can be changed here, and the full Public Key (PEM) and Public JWK are shown with copy buttons. Only the public halves are exposed — the private key never leaves the platform, which is what lets the LMS verify a launch without ever holding a secret of yours.
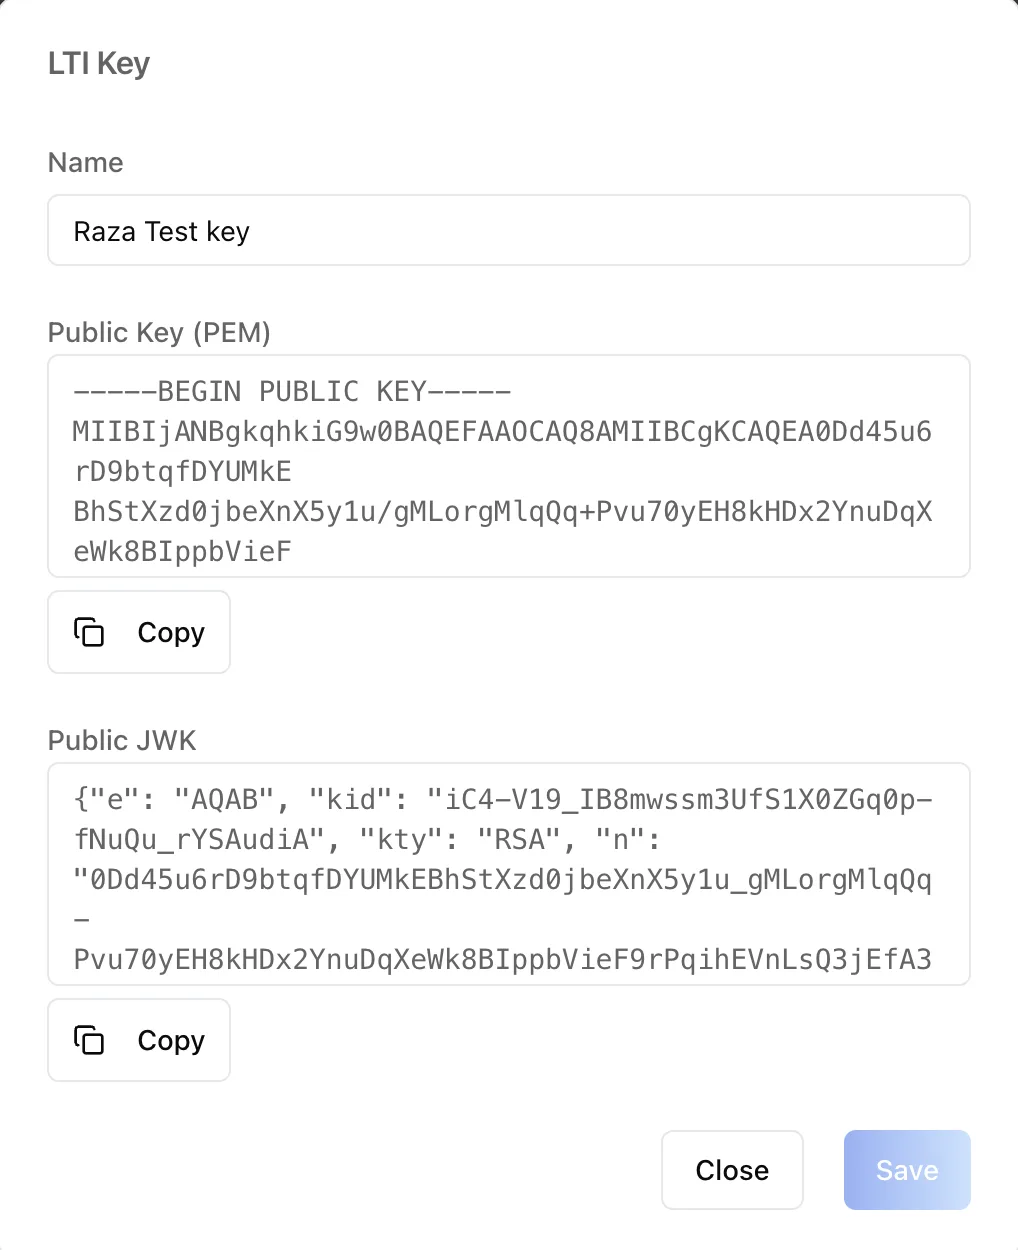
Deleting is blocked while a tool still references the key, and the reason is surfaced in the dialog rather than failing silently — re-point the tool at another key first.
How to Use
Step 1: Open the Keys sub-tab
In the Edit Agent modal, go to Integrations → LTI and click Keys. Make sure the LTI toggle at the top of the panel is on.
Step 2: Create a key
Click Create LTI Key, give the key a recognizable name, and submit. The key appears in the table with a preview of its public key.
Step 3: Retrieve the public key when needed
Open the key's actions menu and choose Edit to view the full PEM public key and the public JWK. Most LMS registrations do not need these directly — the LMS fetches public keys from the organization's JWKS endpoint (see the Tool Endpoints sub-tab) — but they are available for platforms that require pasting a key.
Step 4: Use the key in a tool
Switch to the Tools sub-tab and create or edit an LTI tool; select this key as the tool's signing key so launches from that LMS are signed with it.
Step 5: Rename or delete
Use the row's actions menu to rename a key, or delete one that is no longer used. Delete the referencing tool first if the key is still attached to one.