Organization Settings: Policies
Overview
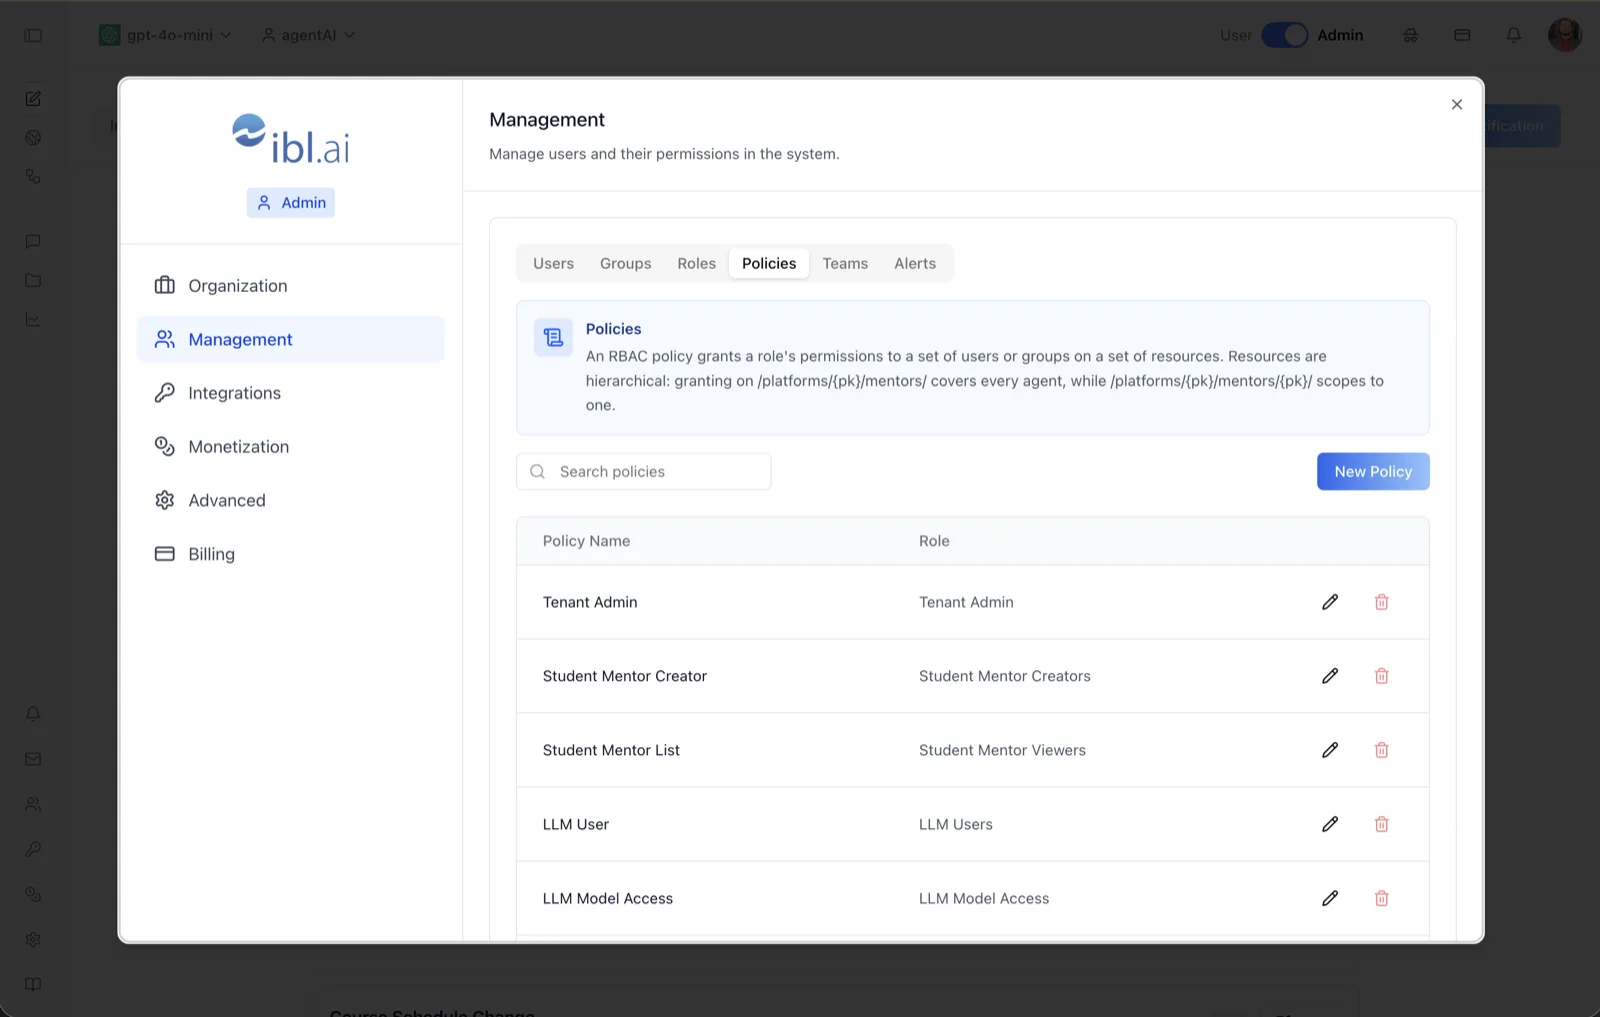
The Policies tab is where RBAC comes together. As the on-screen description says: "An RBAC policy grants a role's permissions to a set of users or groups on a set of resources. Resources are hierarchical: granting on /platforms/{pk}/mentors/ covers every agent, while /platforms/{pk}/mentors/{pk}/ scopes to one."
A policy binds three things: a role (the permission bundle), who receives it (users and/or groups), and which resources it applies to (hierarchical paths with wildcard support). The screenshot shows examples like "Organization Admin", "Student Mentor Creator", "Student Mentor List", "LLM User", and "LLM Model Access", each paired with its role.
To reach it, switch the top-bar toggle to Admin, open the settings dialog, choose Management, and select the Policies tab (alongside Users, Groups, Roles, Teams, and Alerts).
Target Audience
Administrator
Fields and Controls
Search policies
A search box that filters the policy list by name as you type.
New Policy
Opens the New Policy dialog. It includes a policy name, a Role picker (type to search existing roles; each result shows the role's name and description), a Resources field, a Users section, and a Groups section.
Resources field (in the dialog)
Takes hierarchical resource paths — press Enter or click + to add each — such as /platforms/{pk}/projects or /platforms/{pk}/mentors/*. Wildcards and path parameters are supported. A grant on a parent path covers everything beneath it; a grant on a specific ID scopes to that one resource.
Users and Groups sections (in the dialog)
Type-to-search pickers that attach the policy to individual users, to RBAC groups (from the Groups tab), or both. Selected entries appear with name and email and can be removed before saving.
Policy Name column
The policy's display name.
Role column
The role whose permissions this policy grants (shows "N/A" if the role was removed).
Edit (pencil) icon
Opens the policy dialog pre-filled to adjust the role, resources, users, or groups.
Delete (trash) icon
Deletes the policy after confirmation. Built-in policies are protected: the delete button is disabled with the tooltip "Cannot delete internal policies."
How to Use
Step 1: Open the Policies tab
In Admin mode, open the settings dialog, click Management, and select Policies.
Step 2: Create a policy
Click New Policy and name it after the grant it represents (e.g., "Student Mentor Creator").
Step 3: Pick the role
Search for and select the role whose actions this policy should grant. Define the role first on the Roles tab if it doesn't exist yet.
Step 4: Scope the resources
Add resource paths. Use a broad path such as /platforms/{pk}/mentors/ to cover every agent in the organization, or a specific path ending in an ID to scope the grant to a single resource.
Step 5: Assign recipients
Add individual users and/or groups. Using groups is recommended for anything beyond a handful of people — membership changes then flow through automatically.
Step 6: Save and verify
Save the policy and confirm it appears in the table with the right role. For non-admin users, the policy is now available to attach in the Users tab's Policies dropdown as well.