Agent Settings: MCP
Overview
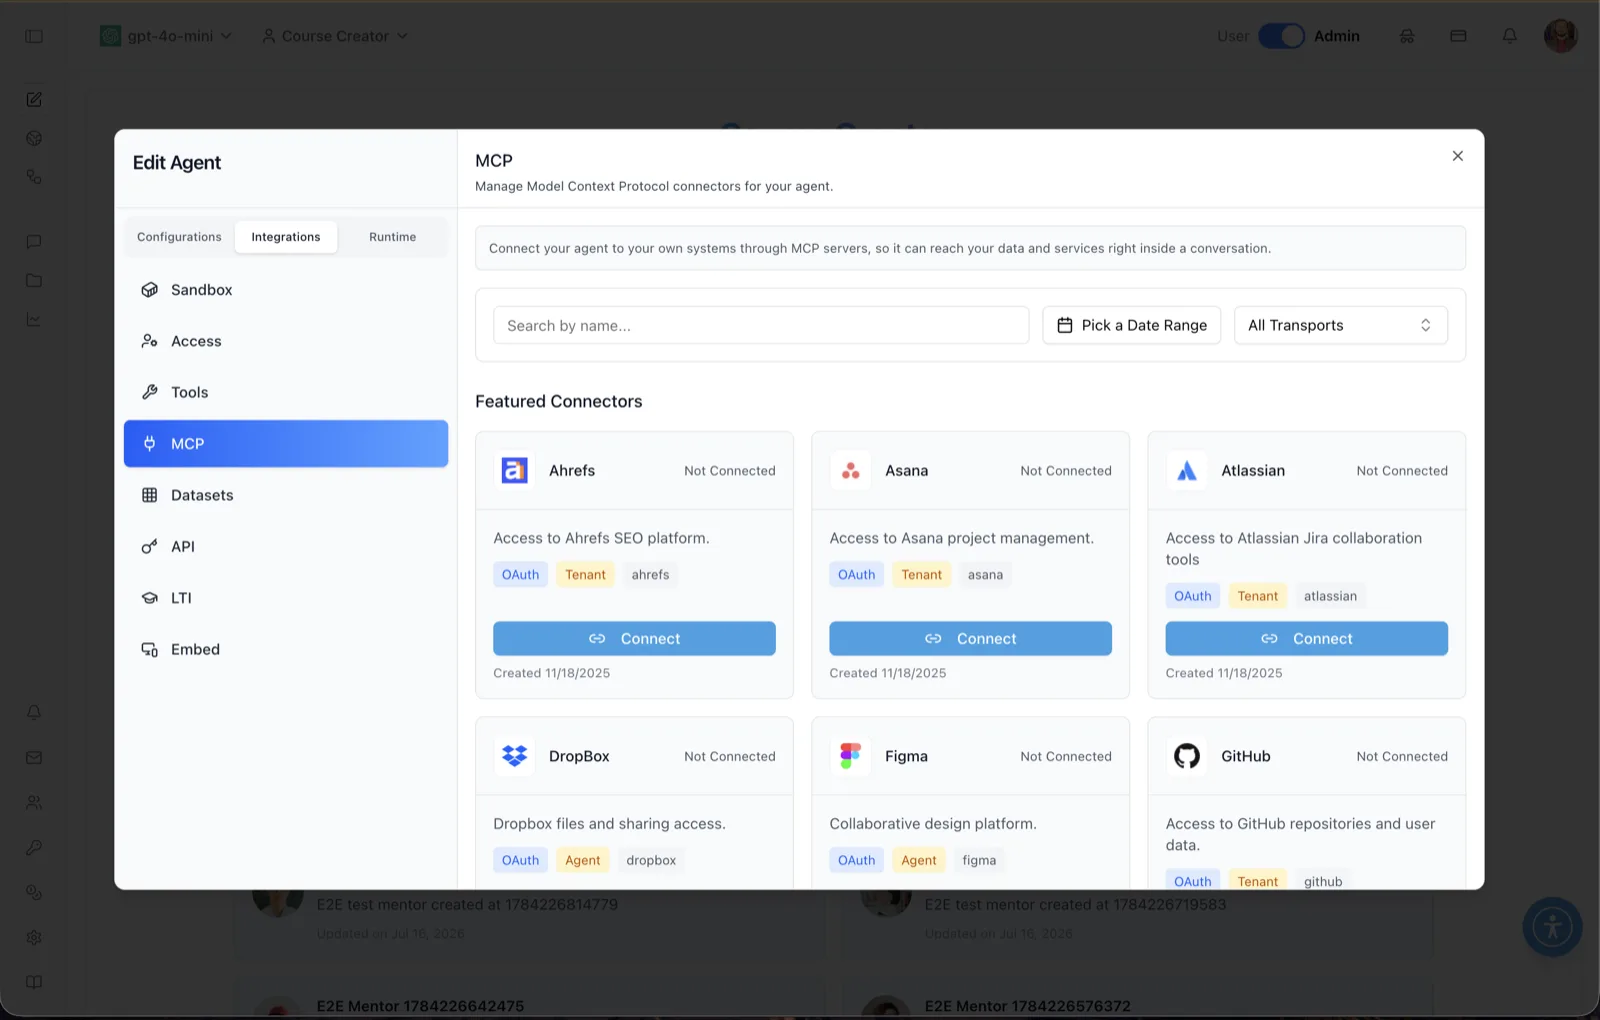
The MCP panel connects an agent to external systems through Model Context Protocol (MCP) servers. The panel header reads: "Manage Model Context Protocol connectors for your agent," and the helper text explains: "Connect your agent to your own systems through MCP servers, so it can reach your data and services right inside a conversation."
The panel leads with a Featured Connectors grid of ready-made integrations — the screenshot shows Ahrefs, Asana, Atlassian, DropBox, Figma, and GitHub, each with a short description, status ("Not Connected"), badges, a Connect button, and a created date. Beyond featured connectors, the panel supports adding custom MCP connectors pointing at any MCP server URL. Note that for connected servers to be usable in chat, the MCP tool must also be enabled on the Tools panel.
To reach this screen, open the Edit Agent modal, switch to the Integrations tab group, and select MCP in the left sidebar.
Target Audience
Administrator | Agent Builder
Panel Reference
Search by name
Filters the connector list by name as you type.
Pick a Date Range
Filters connectors by their creation date.
All Transports
A dropdown filtering connectors by MCP transport. The supported transports are Websocket and Streamable Http; "All Transports" shows everything.
Featured Connectors
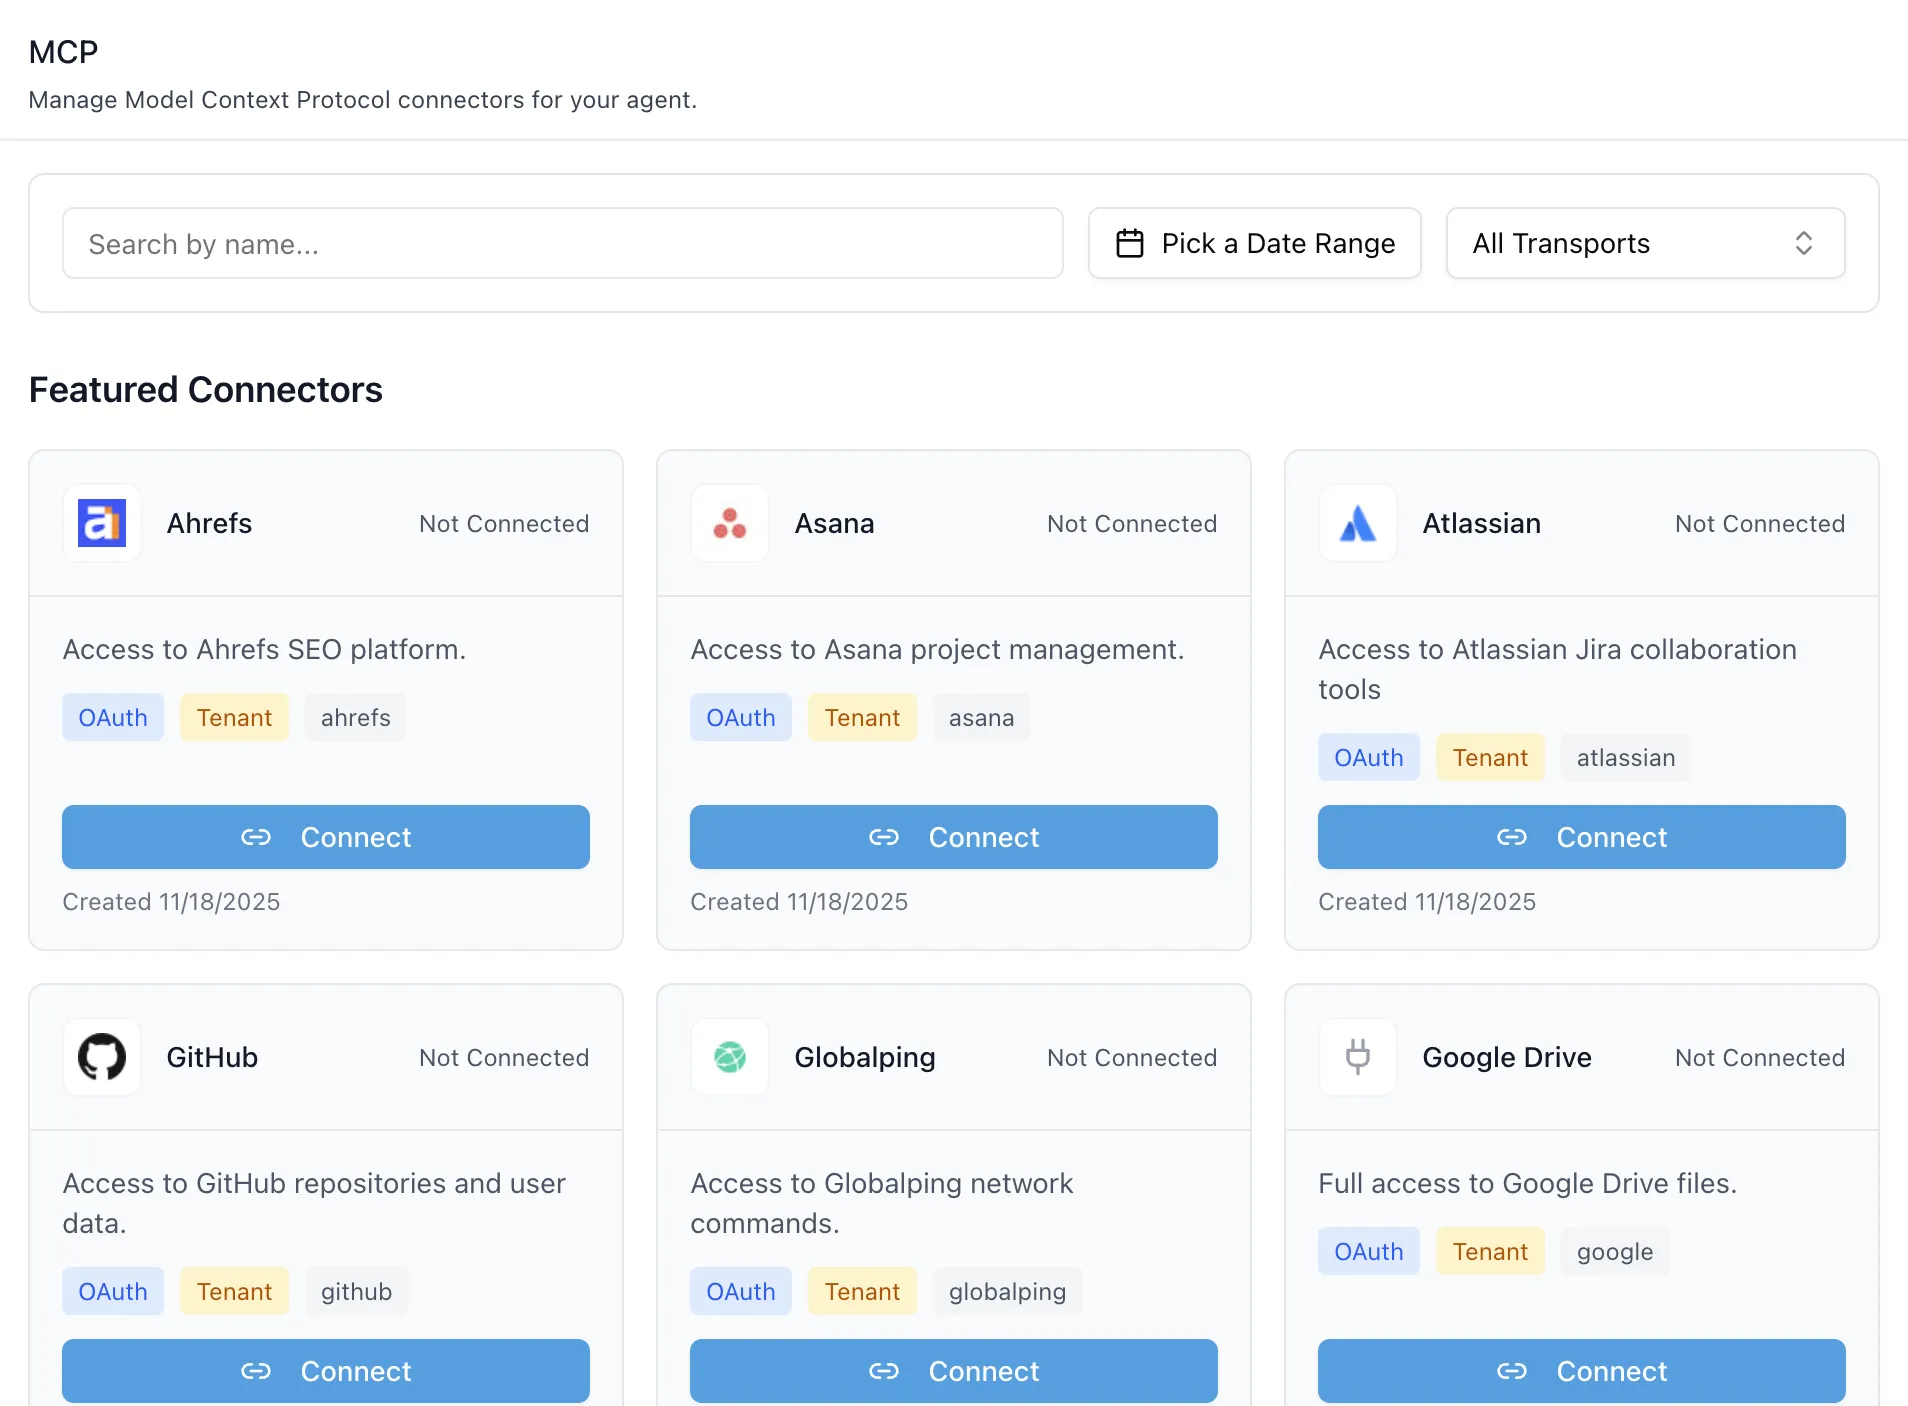
Pre-configured connector cards for common services. Each card shows the service logo and name, connection status ("Not Connected" until you connect), a one-line description (for example, "Access to GitHub repositories and user data."), badges, a Connect button, and its created date.
Connector badges
The badges on each card describe how the connector authenticates and at what level: a blue OAuth badge marks the authentication method, a yellow scope badge — Organization, Agent, or User — marks the authentication scope (Organization: one OAuth connection shared by all agents in the organization; Agent: available only to this agent; User: each user authenticates individually when chatting), and a gray tag shows the connector's slug (for example, github).
Connect
Starts the connection flow for a featured connector. For OAuth connectors this launches the service's OAuth authorization; on success the connector shows as connected ("{name} connected successfully") and can be activated or deactivated for the agent. A connected service can later be disconnected.
Custom connectors (Add MCP Connector)
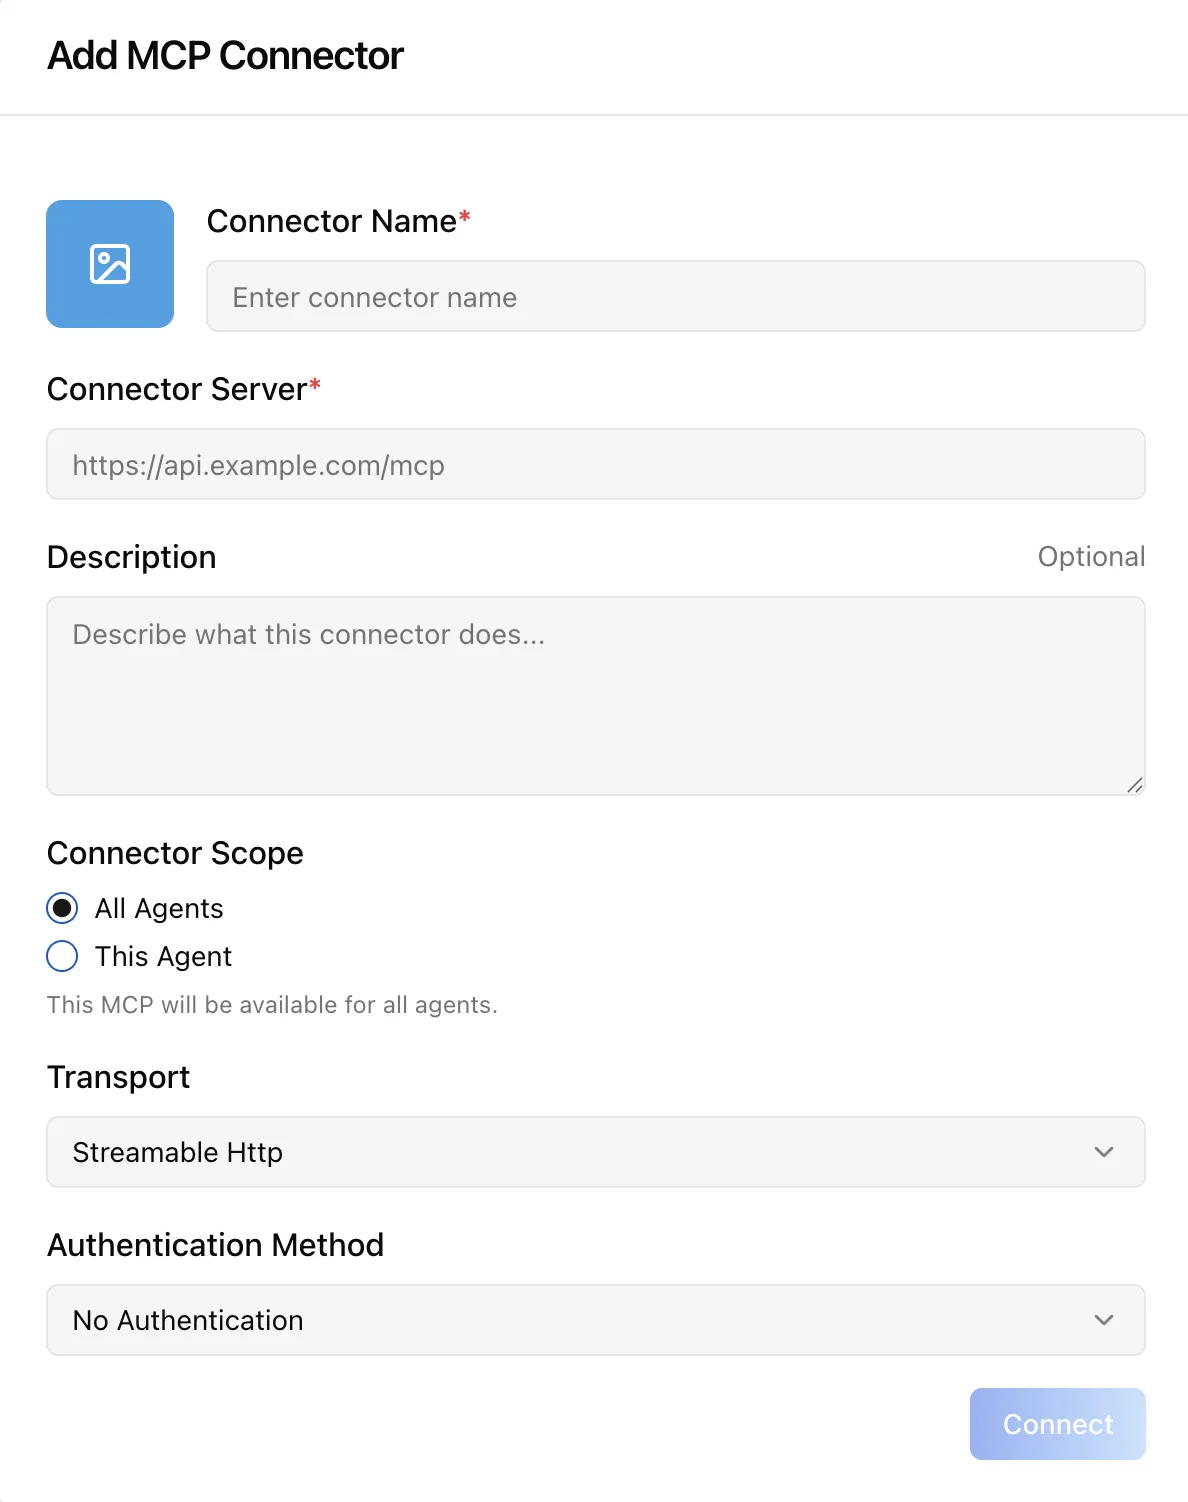
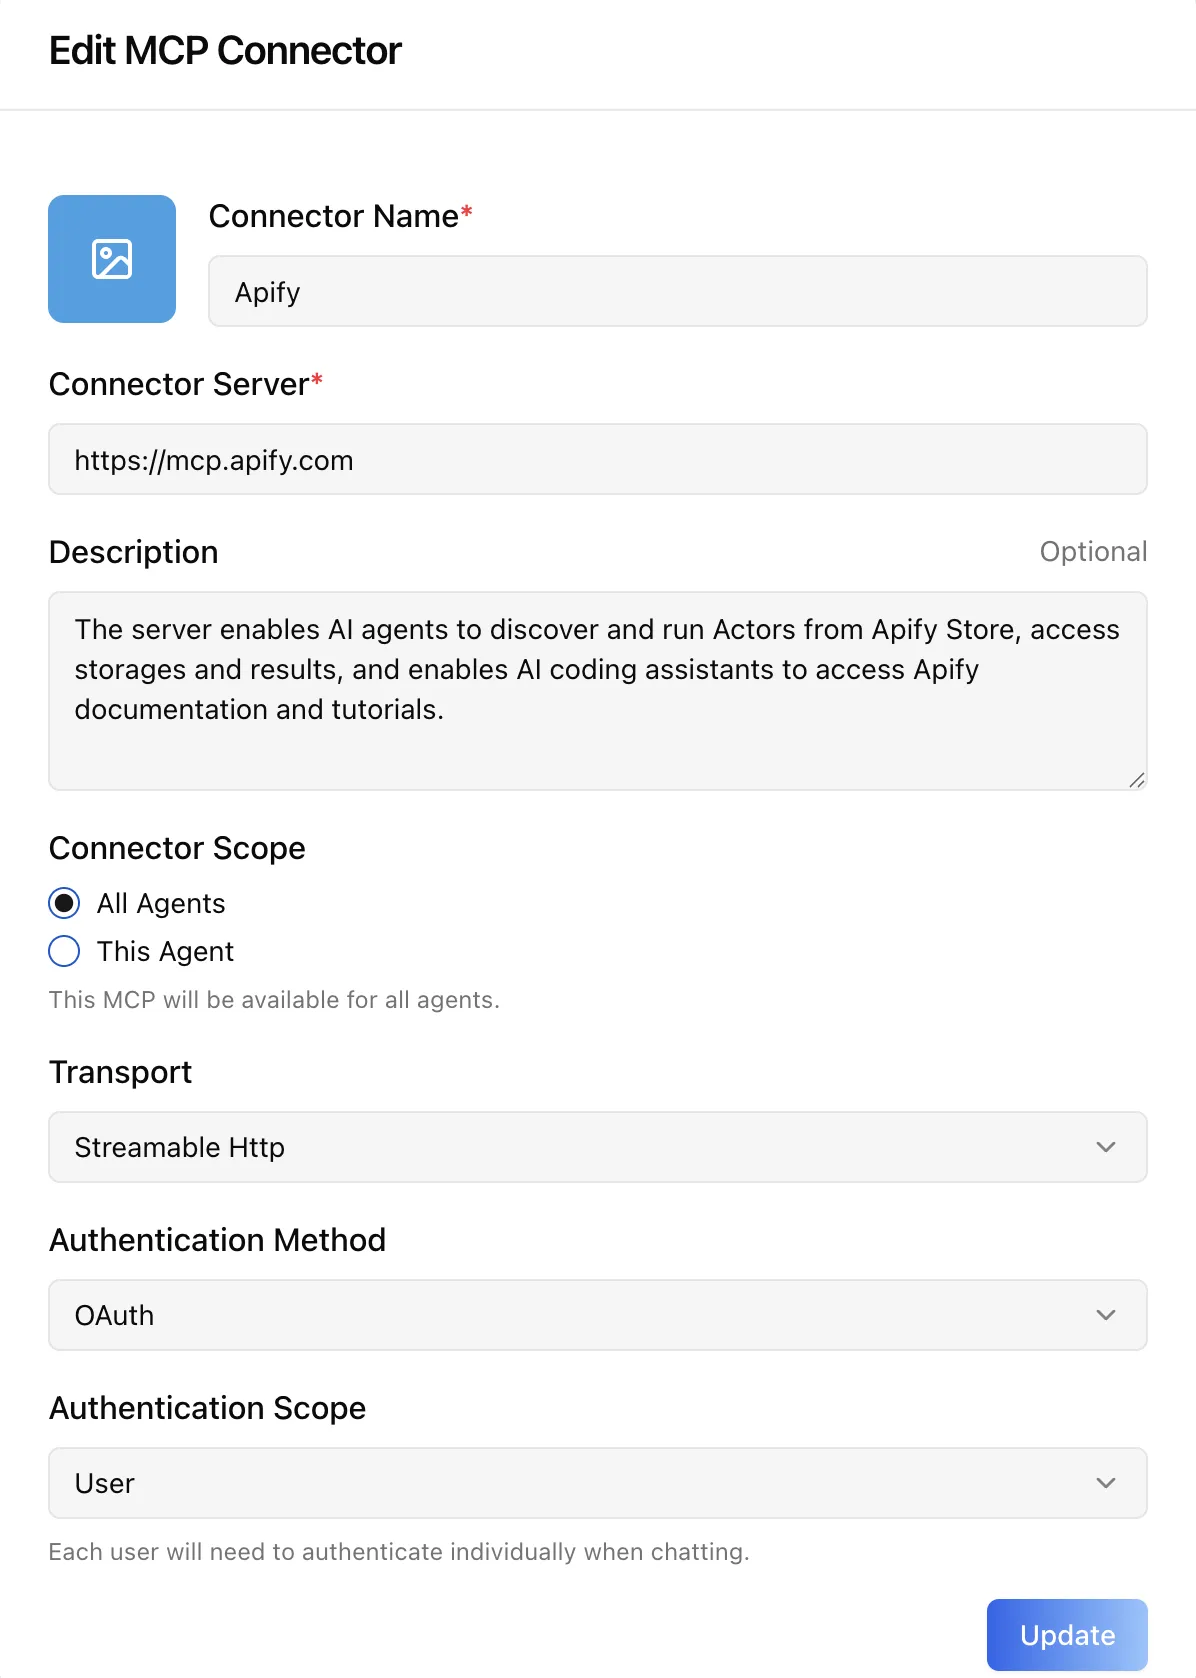
Beyond the featured grid, the panel's connector management supports adding your own MCP connector with: a Connector Name and optional image and description; the Connector Server URL; a Connector Scope of All Agents or This Agent; a Transport (Websocket or Streamable Http); an Authentication Method of No Authentication, API Key, or OAuth; and for authenticated connectors an Authentication Scope (Organization, Agent, or User) plus token details (token type and token for API-key auth). Existing tokens are hidden on edit and kept unless replaced.
How to Use
Step 1: Open the MCP panel
Open the Edit Agent modal, click the Integrations tab group, then select MCP.
Step 2: Connect a featured service
Find the service in Featured Connectors (use search if needed) and click Connect. Complete the OAuth authorization when prompted. The card's status changes once the connection succeeds.
Step 3: Add a custom MCP server (optional)
Use the add-connector flow to register your own MCP server: name it, paste the server URL, choose the transport, pick whether it serves all agents or only this one, and configure authentication (none, API key, or OAuth with a Organization/Agent/User scope).
Step 4: Enable the MCP tool
On the Tools panel, toggle MCP on so the agent can actually call connected MCP servers during conversations.
Step 5: Manage connections
Return here to activate/deactivate, edit, disconnect, or remove connectors. Removal asks for confirmation and cannot be undone.