Agent Settings: LTI Tools
Overview
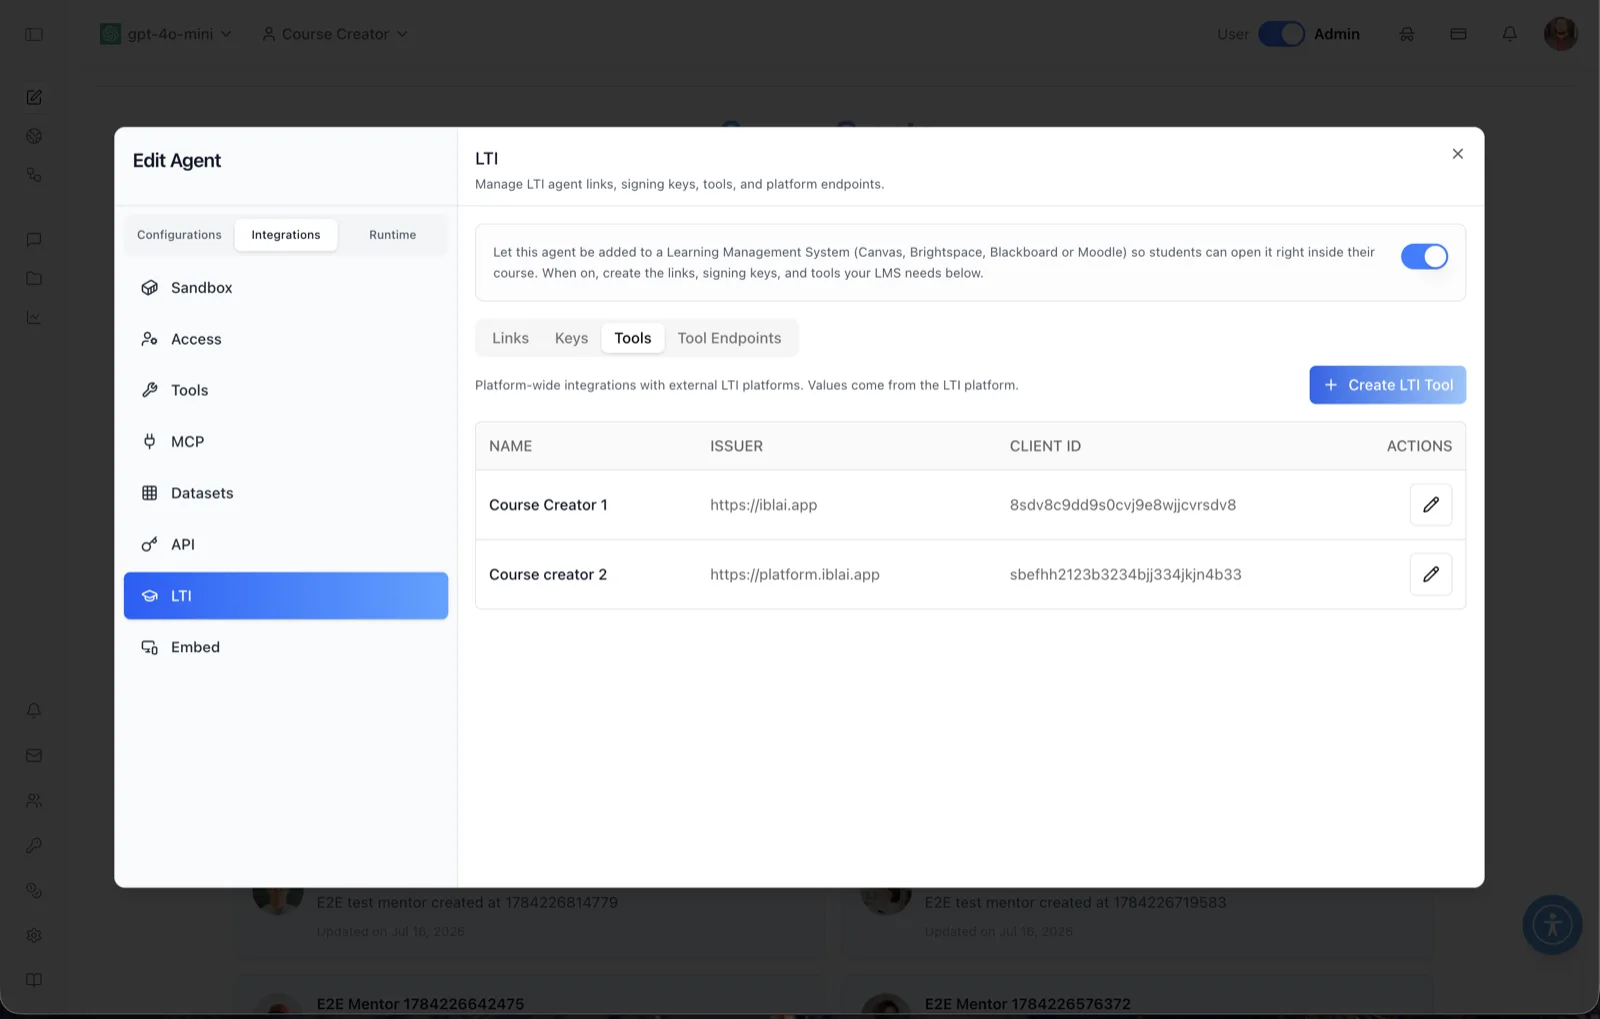
The Tools sub-tab of the LTI panel registers the external LTI platforms (your LMS instances) that are allowed to launch agents on this organization. The caption on this sub-tab explains: "Platform-wide integrations with external LTI platforms. Values come from the LTI platform." Like keys, tools are platform-wide — they belong to the organization, not to a single agent — so the same list appears from any agent's LTI panel.
Each tool records the identity of one LMS registration: the platform's issuer, the client ID the LMS assigned to this integration, the platform's OIDC auth URLs, its public keyset, and the signing key (from the Keys sub-tab) used to sign messages for that platform. In LTI 1.3 terms, this is where you store the platform's registration values so the two sides can trust each other.
To reach this screen, open the Edit Agent modal, switch to the Integrations tab group (its sidebar lists Sandbox, Access, Tools, MCP, Datasets, API, LTI, and Embed), select LTI, and click the Tools sub-tab. The panel header reads: "Manage LTI agent links, signing keys, tools, and platform endpoints." The LTI panel is admin-only.
Target Audience
Administrator
Panel Reference
LTI enable toggle
The banner at the top of the LTI panel reads: "Let this agent be added to a Learning Management System (Canvas, Brightspace, Blackboard or Moodle) so students can open it right inside their course. When on, create the links, signing keys, and tools your LMS needs below." The toggle controls whether LTI launches are allowed for this agent — the same setting as Enable LTI launches in the agent's Settings.
Sub-tab bar
Four sub-tabs organize the LTI panel: Links (the launch link for this agent), Keys (platform-wide signing keys), Tools (this sub-tab), and Tool Endpoints (the fixed URLs to give your LMS).
Create LTI Tool
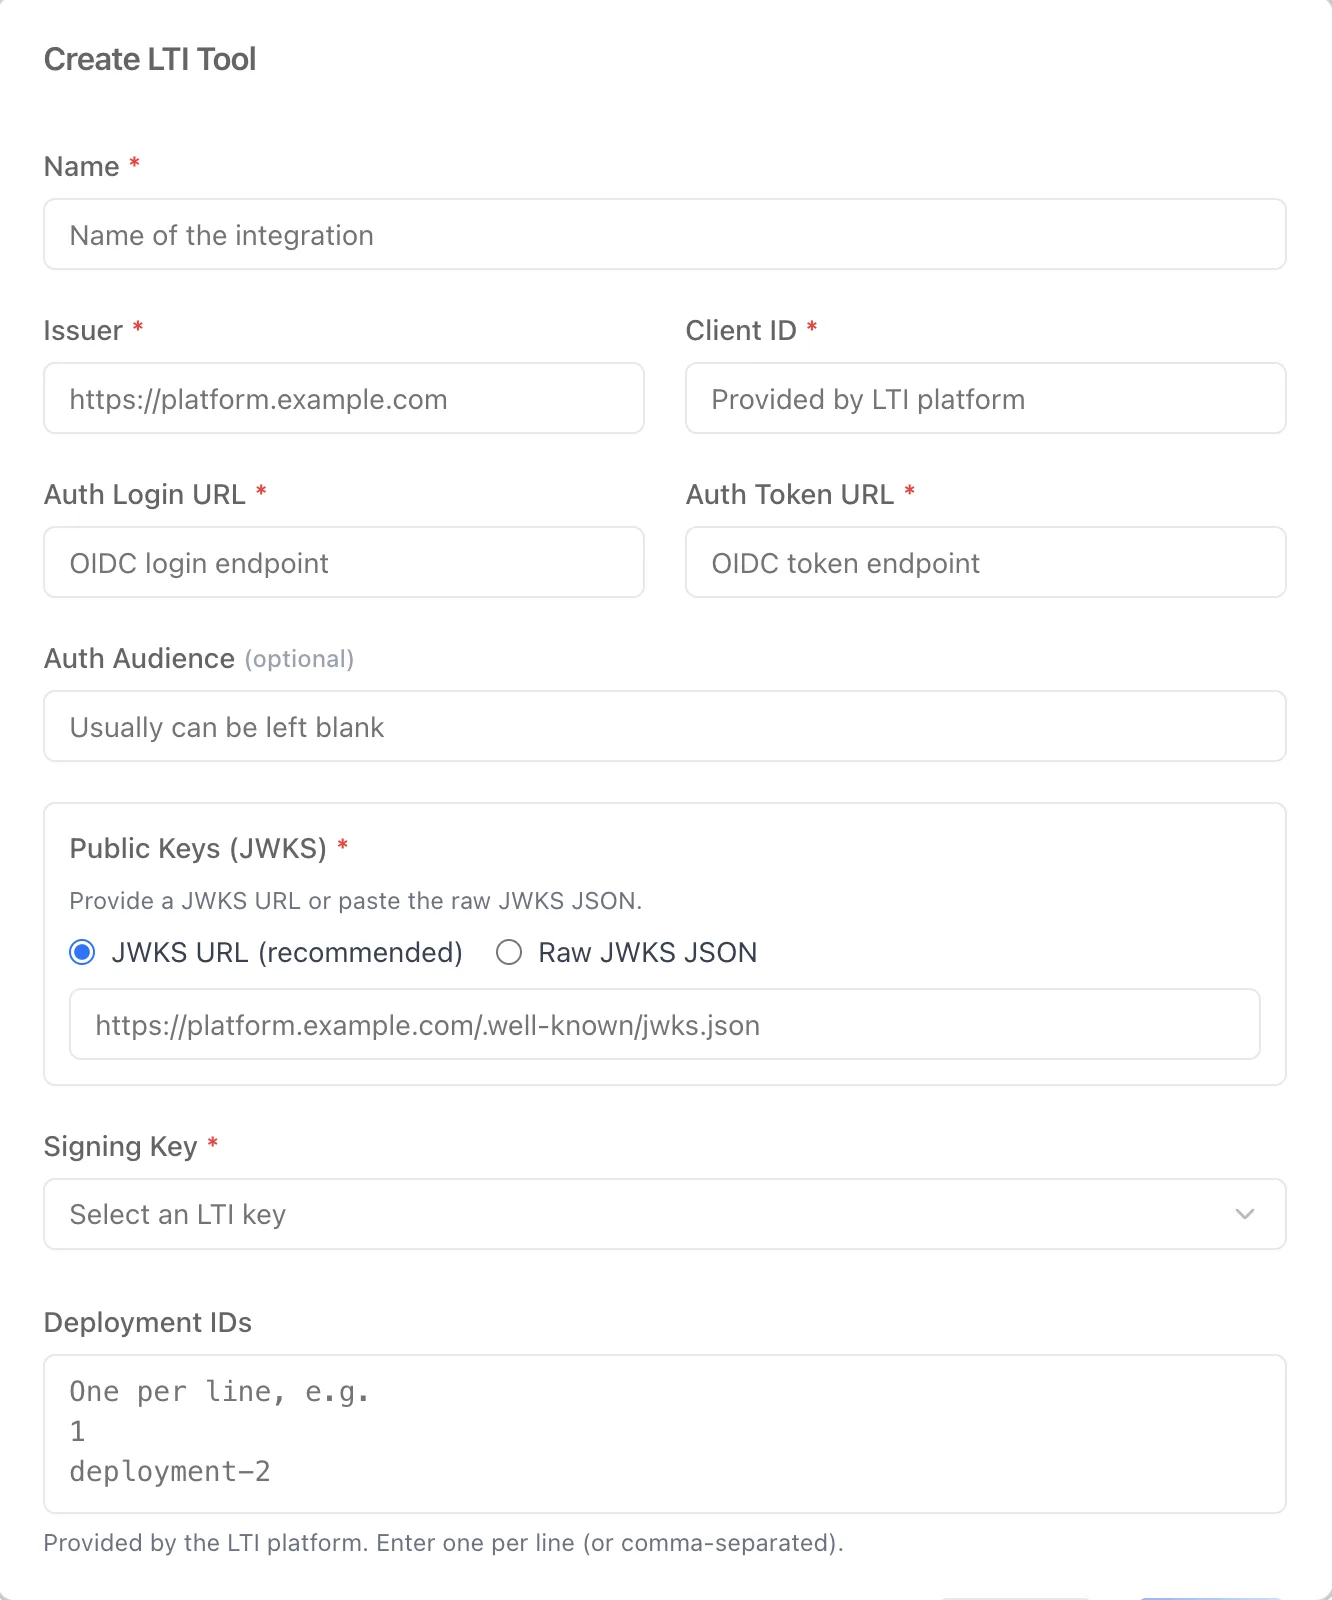
Opens the tool registration form. Its fields hold values that come from the LTI platform's own registration:
- Title — a display name for the integration (for example the LMS instance it represents).
- Issuer — the platform's issuer URL (for example
https://iblai.app), exactly as the LMS publishes it. - Client ID — the client identifier the LMS assigned to this tool registration.
- Auth login URL — the platform's OIDC authorization endpoint.
- Auth token URL — the platform's OAuth2 token endpoint.
- Key set — the platform's public keys, provided either as a JWKS URL (for example
https://lms.example.com/.well-known/jwks.json) or as raw JWKS JSON. - Auth audience — optional, and usually left blank; set it only when the platform requires a specific audience value on the token request.
- Signing key — one of the platform-wide keys from the Keys sub-tab, used to sign LTI messages for this platform. Create the key first if none exists.
- Deployment IDs — the deployment identifiers the LTI platform assigns, entered one per line or comma-separated. A single registration can carry several deployments, which is how one LMS covers multiple sub-accounts or course shells.
Every field except the auth audience is required. Title, issuer, client ID, and the two OIDC URLs come straight from the LMS registration — copy them rather than retyping, since a single character's difference makes launches fail verification.
Tools table
Each registered platform is a row with:
- NAME — the tool's title (for example "Course Creator 1").
- ISSUER — the platform issuer URL (for example
https://iblai.apporhttps://platform.iblai.app). - CLIENT ID — the client identifier from the LMS registration.
- ACTIONS — a pencil (edit) button that reopens the registration form to update any of the values.
How to Use
Step 1: Register the tool in your LMS first
In the LMS admin area, create an LTI 1.3 registration using the URLs from the Tool Endpoints sub-tab. The LMS then issues the values you need here: issuer, client ID, auth login URL, auth token URL, and its JWKS.
Step 2: Create a signing key
If you have not already, go to the Keys sub-tab and create an LTI key — the tool form requires one as its signing key.
Step 3: Create the LTI tool
On Tools, click Create LTI Tool and fill the form with the platform's values: title, issuer, client ID, auth login URL, auth token URL, and the key set (JWKS URL or raw JWKS JSON). Select your signing key and submit. The tool appears in the table.
Step 4: Place the agent in a course
With the platform registered here and the agent's launch link created on the Links sub-tab, add the placement in your LMS course using the link's Target Link URI. Students can then open the agent right inside their course.
Step 5: Edit when platform values change
If the LMS rotates its client ID, URLs, or keyset, click the pencil icon on the tool's row and update the stored values so launches keep verifying.