Agent Settings: Support
Overview
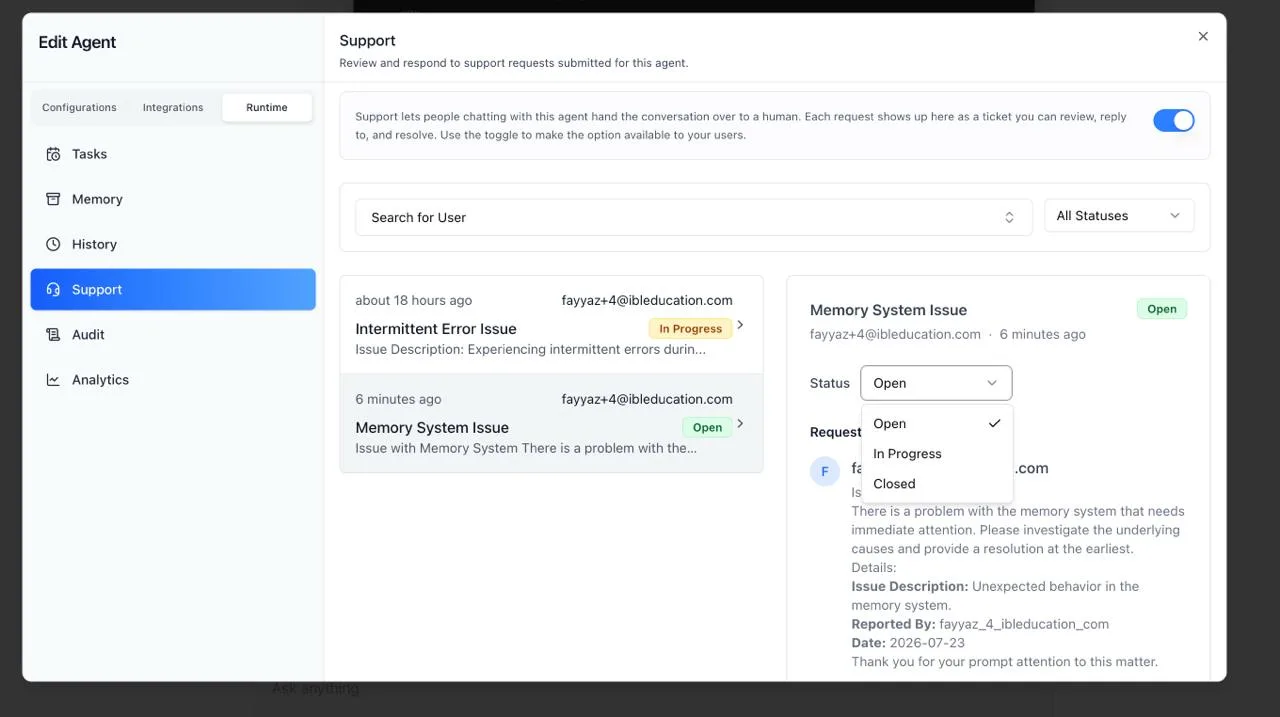
The Support panel is where a human team reviews and answers the requests people raise while chatting with an agent. The panel header reads "Support" with the subtitle "Review and respond to support requests submitted for this agent," and a helper banner explains: "Support lets people chatting with this agent hand the conversation over to a human. Each request shows up here as a ticket you can review, reply to, and resolve. Use the toggle to make the option available to your users."
When a user asks the agent for a human mid-conversation, the agent's human-support tool files a ticket — there is no way to create a ticket by hand from this panel. Each ticket captures who raised it, the chat session it came from, an agent-authored subject and description, and a status that moves through Open → In Progress → Closed. The panel lists those tickets, lets you filter them by user and status, and opens each one in a detail pane where you can read the request, change its status, and reply as the support team.
To reach this screen, open the Edit Agent modal, switch to the Runtime tab group (its sidebar lists Tasks, Memory, History, Support, Audit, and Analytics), and select Support.
Target Audience
Administrator | Support Team | Agent Builder
Panel Reference
Enable Support toggle
The switch in the helper banner turns human escalation on or off for this agent. While it is on, users chatting with the agent can hand the conversation to a human and their requests arrive here as tickets; while it is off, the escalation option is hidden from users.
Search for User
A searchable dropdown that filters the ticket list to a single requester. Org admins see every ticket raised with the agent; a non-admin sees only the tickets they raised themselves.
All Statuses
A dropdown that filters the ticket list by status — Open, In Progress, or Closed — defaulting to All Statuses.
Ticket list
Each ticket card shows a relative timestamp (for example "6 minutes ago"), the requester's email, the ticket subject, a preview of the description, and a colored status badge (Open, In Progress, or Closed). Selecting a card opens it in the detail pane. The list paginates when there are many tickets.
Ticket detail pane
The right-hand pane shows the selected ticket: its subject, a status badge, the requester's identity and a relative timestamp, and a Status selector for changing the ticket's state. Below that, the Request section renders the agent-authored description — often formatted HTML or Markdown, not plain text — followed by the conversation thread and a box for posting a reply.
On a narrow screen there is no room for a second column, so selecting a ticket opens the same detail in a dialog over the list instead of beside it.
Status selector
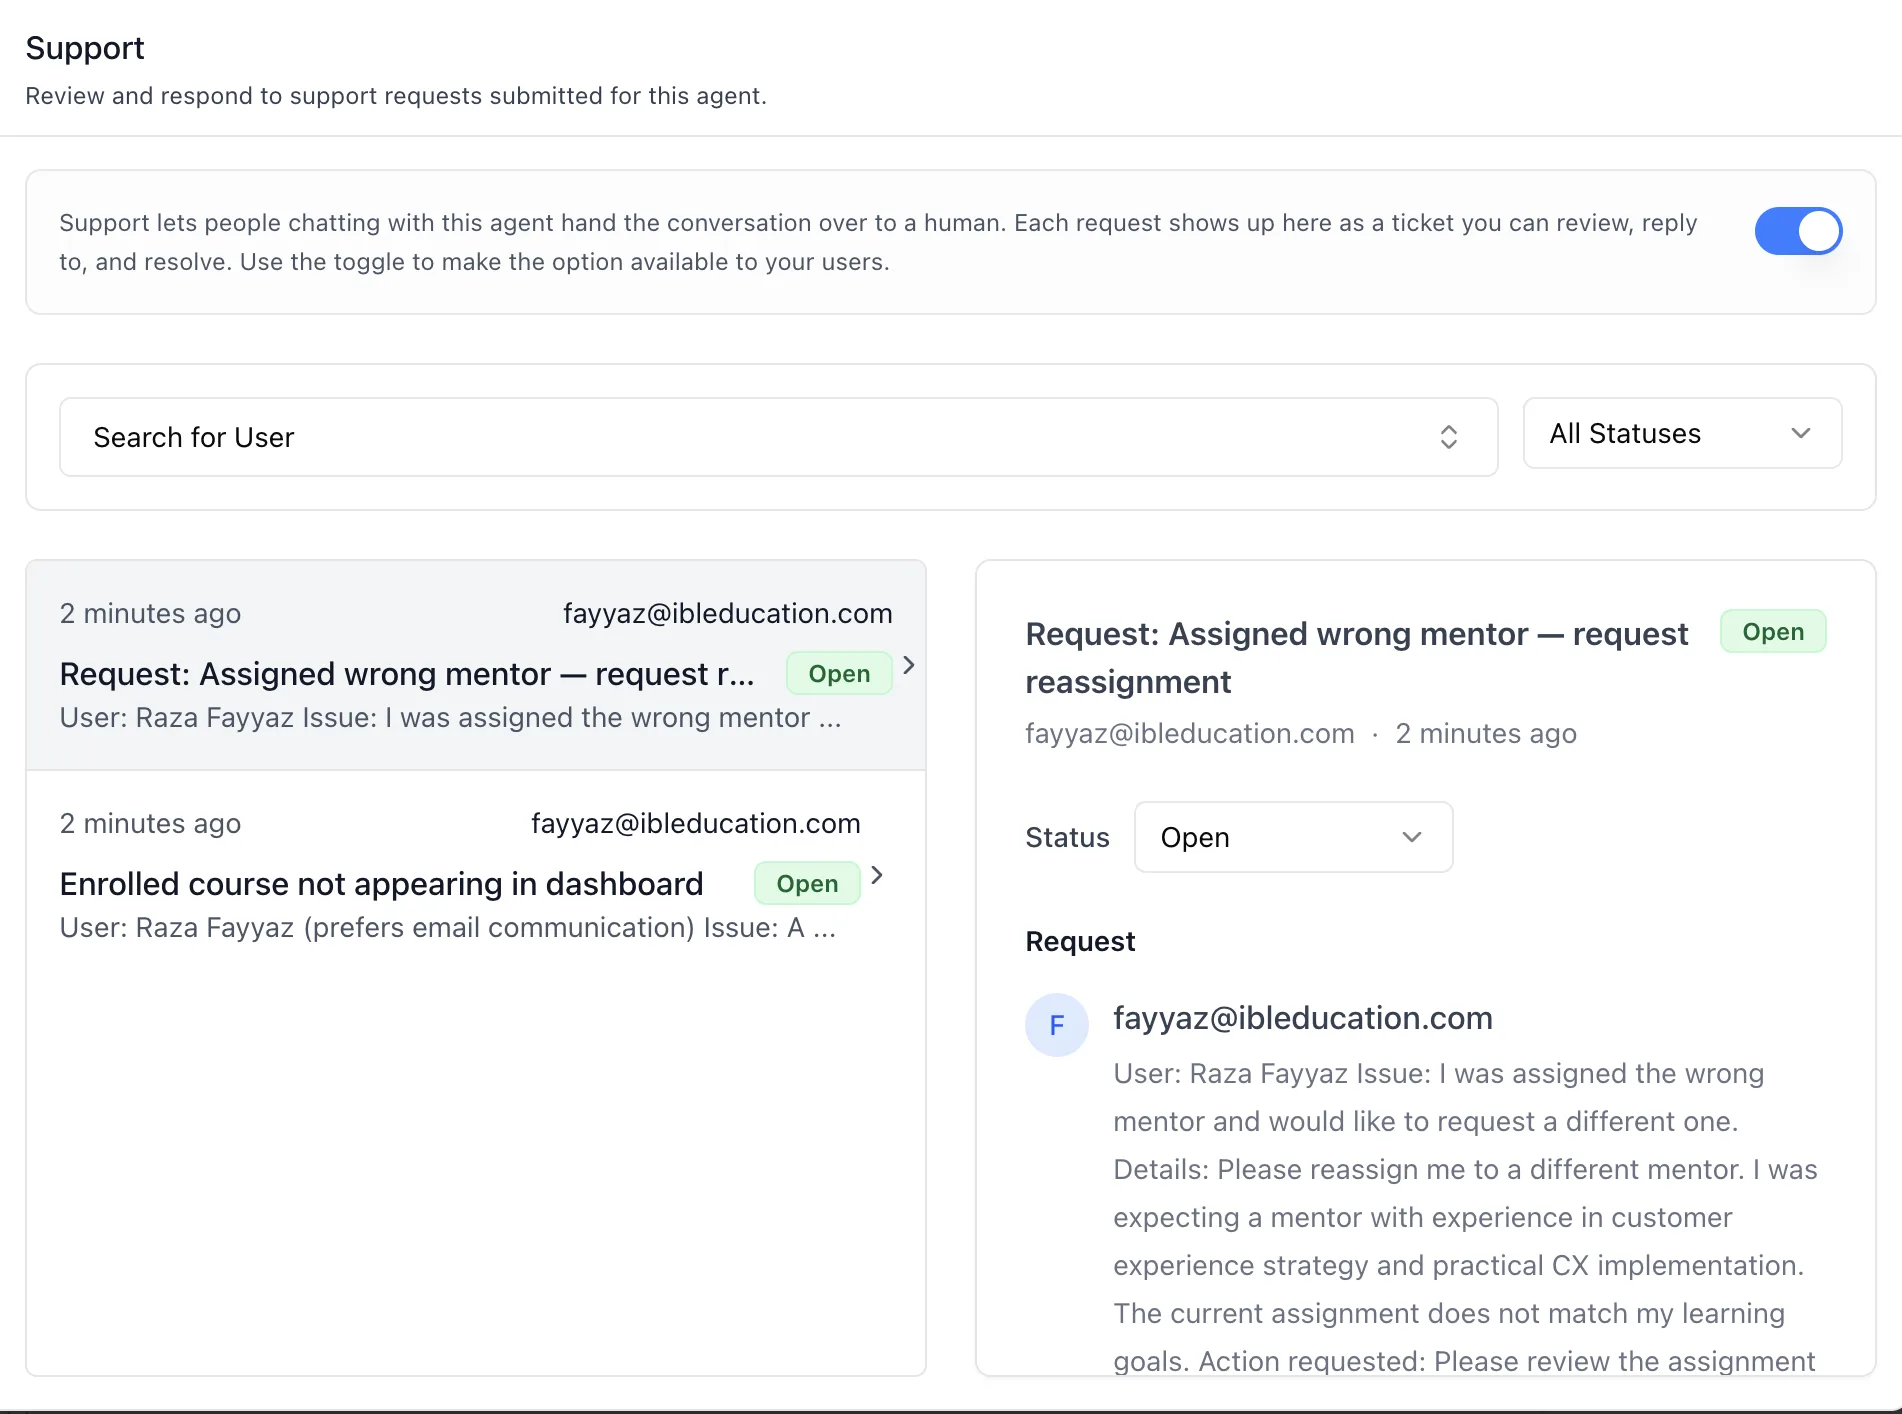
A dropdown on the ticket detail that moves the ticket between Open, In Progress, and Closed. Choosing Closed resolves the ticket and records when it was resolved.
Conversation and reply box
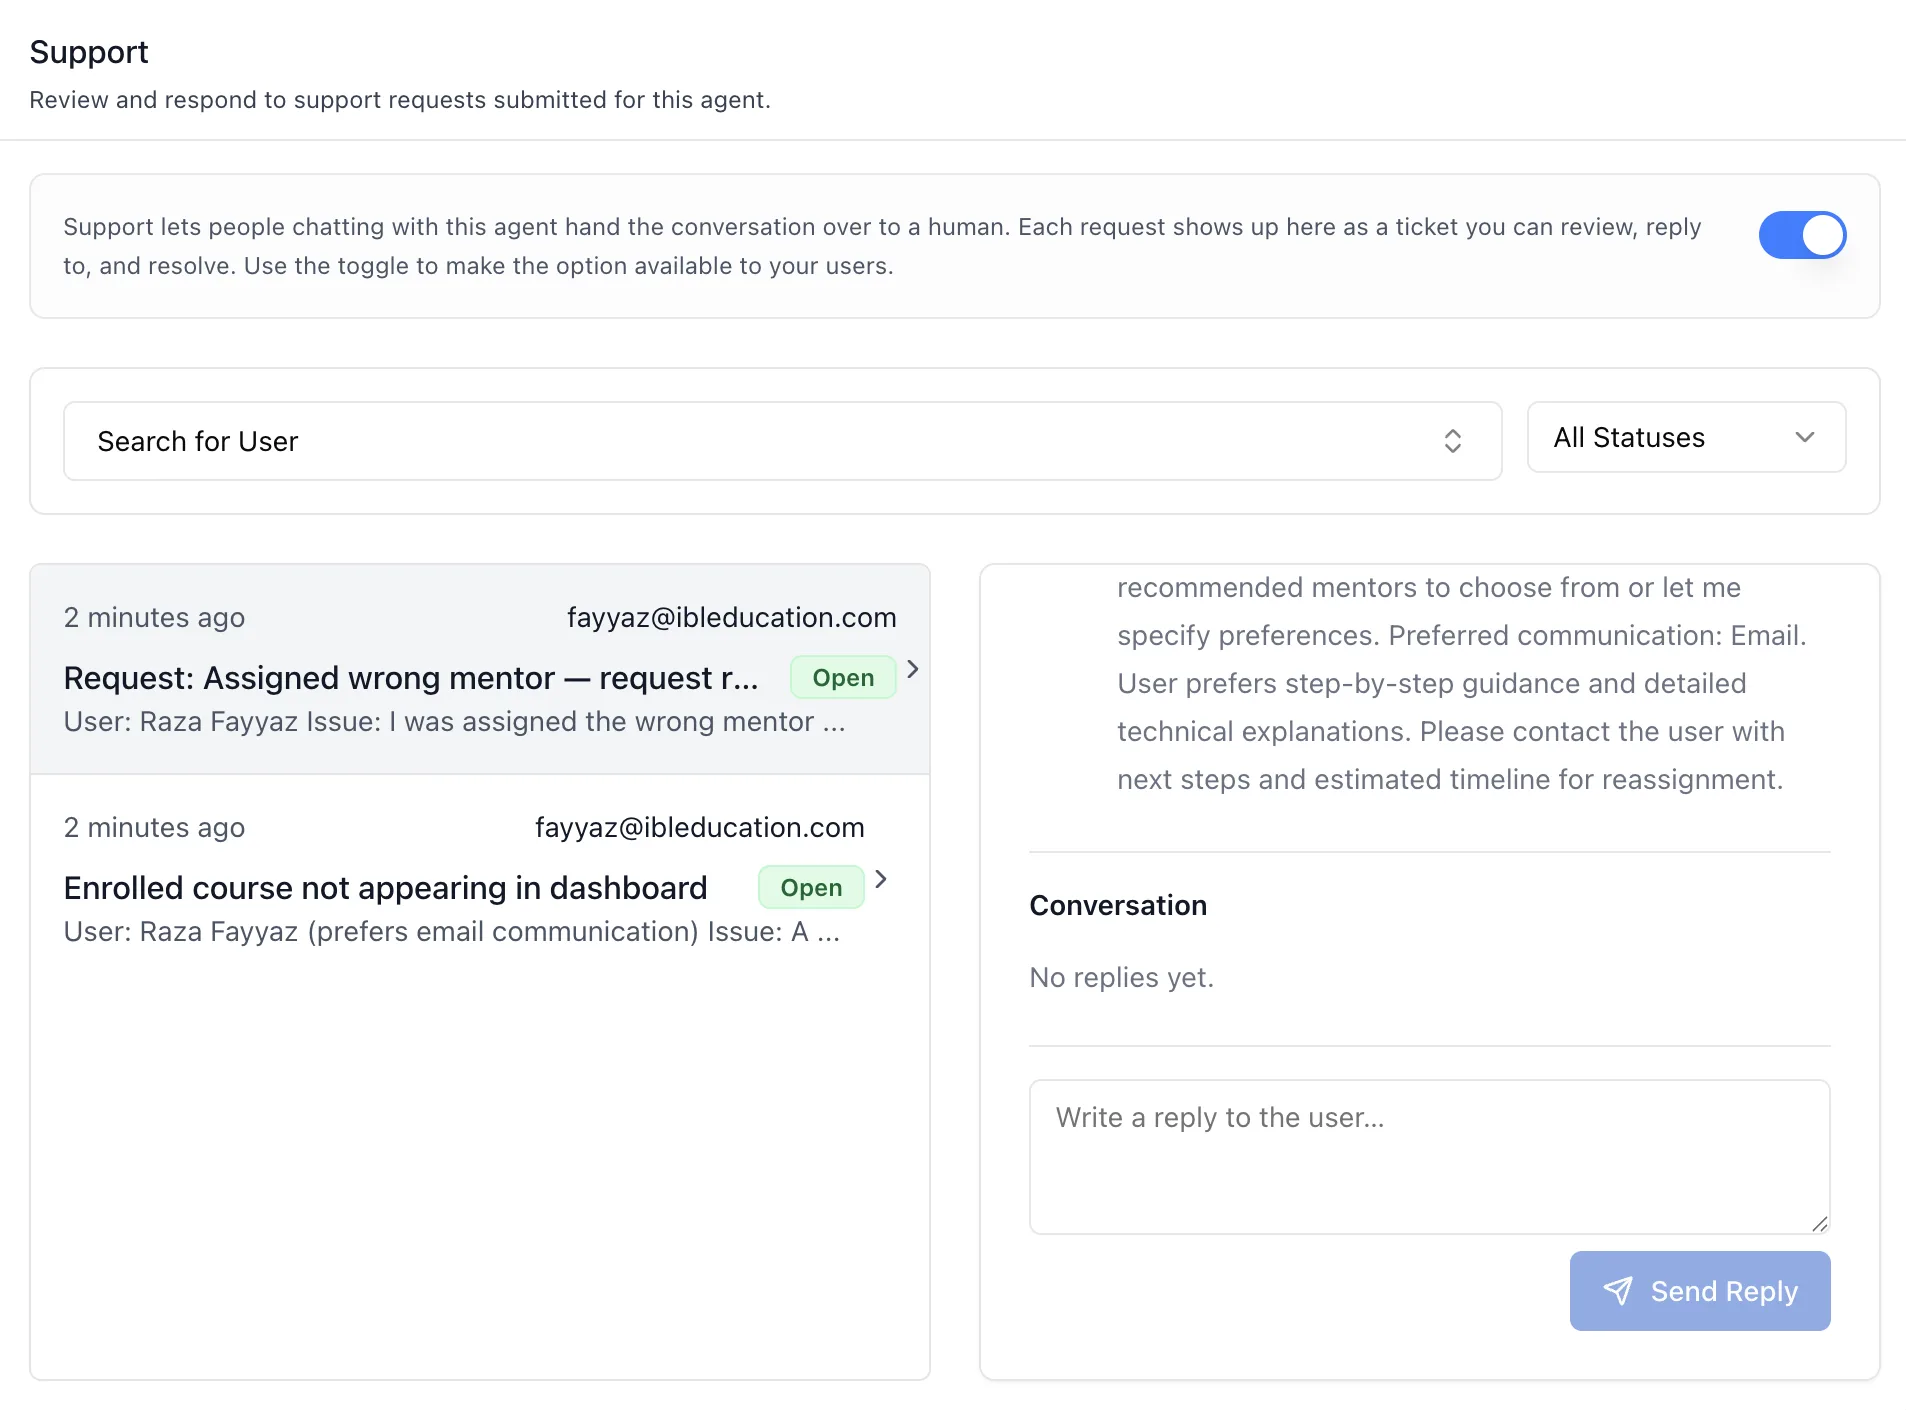
Below the request, the Conversation lists the thread oldest-first, distinguishing the requester's messages from the support team's. A textarea and a Send Reply button sit beneath it. A closed ticket shows a notice in place of the reply box — "Set it back to Open or In Progress to reply" — so reopening is a deliberate step rather than a side effect of answering.
How to Use
Step 1: Turn on human support
In the Edit Agent modal, open the Runtime tab group and select Support. Switch the toggle in the helper banner on so users chatting with the agent can escalate to a human. Tickets they raise then appear in the list.
Step 2: Find the ticket to work
Use Search for User to narrow to one requester, or the All Statuses dropdown to show only Open tickets that still need a first reply. Scan the cards for the subject, timestamp, and status badge.
Step 3: Read the request
Click a ticket card to open it in the detail pane. Read the agent-authored description in the Request section and the existing conversation thread to understand what the user needs.
Step 4: Reply as the support team
Post a reply from the detail pane. Your response is recorded as a support-team message on the ticket's thread, distinct from the requester's own replies.
Step 5: Move the ticket through its lifecycle
Use the Status selector to set the ticket to In Progress while you work it, then to Closed once it is resolved — closing stamps the resolution time so you can tell handled tickets from open ones at a glance.
Automating Support via the API
Everything in this panel is also available over the platform API, so a support team can triage and answer tickets from their own tools or an agent of their own. Tickets hang off https://api.iblai.app/dm/api/ai-mentor/orgs/{org}/users/{username}, authenticated with an Authorization: Api-Token header:
- List and filter tickets —
GET .../support-tickets/withmentor_id,status,username, andsessionfilters, pluspageandpage_size. - Read one ticket —
GET .../support-tickets/{id}/. - Read a conversation thread —
GET .../support-ticket-messages/?ticket={id}; sort by timestamp and matchsenderagainst the ticket's requester to tell requester replies from support replies. - Reply on a ticket —
POST .../support-ticket-messages/with{ "ticket": id, "message": "..." }. - Change status —
PATCH .../support-tickets/{id}/with{ "status": "in_progress" }. - Close a ticket —
POST .../support-tickets/{id}/close/(no body); this sets the status to closed and stamps the resolution time in one call.
There is no create endpoint — tickets originate only from agent chats — so to test the flow end to end, enable the human-support tool, ask the agent to escalate, then triage the resulting ticket. The reusable API skill for this workflow is iblai-api-agent-support.
Building Support Into Your Own App
The Support panel is one of the agent-settings tabs published in the ibl.ai SDK, so the same inbox can be mounted in a product you build yourself. Install the iblai/vibe skills and mount <AgentHumanSupportTab> from @iblai/iblai-js/web-containers/next inside an AgentSettingsProvider; every label is overridable through a labels prop, and pagination can be swapped for your own component. The reusable skill for this workflow is iblai-vibe-agent-support, and the SDK overview is at Vibe SDK.