Organization Settings: Roles
Overview
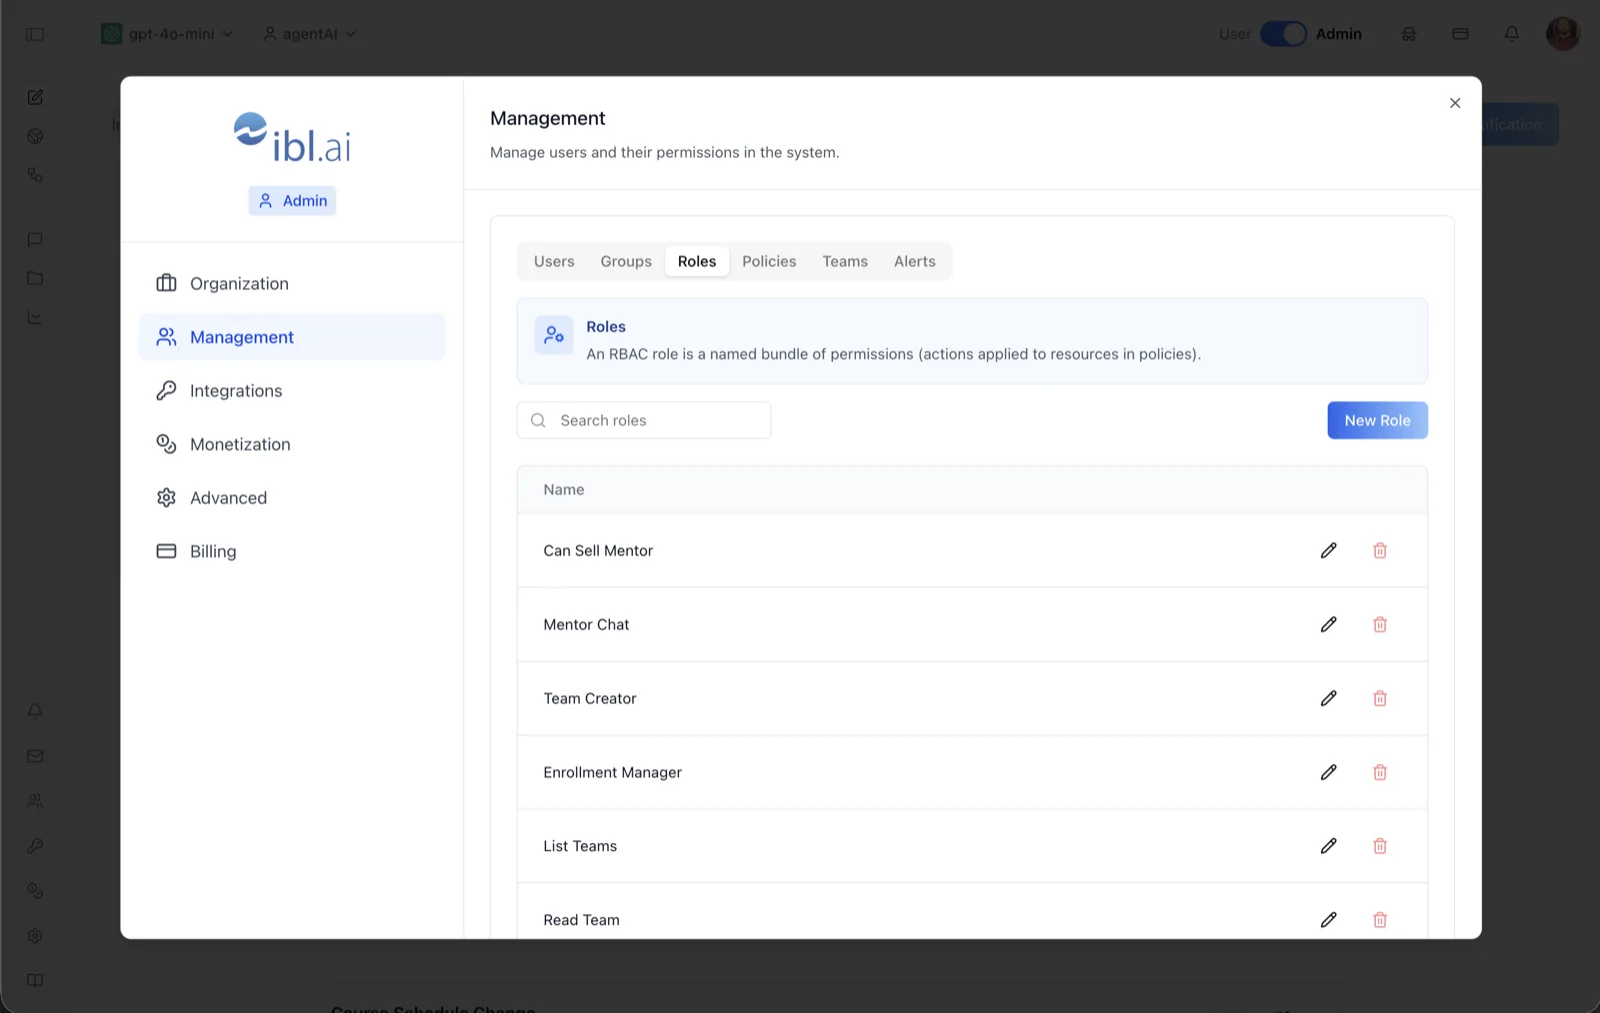
The Roles tab manages the permission bundles used by RBAC. As the on-screen description says: "An RBAC role is a named bundle of permissions (actions applied to resources in policies)."
A role defines what can be done — read settings, create teams, chat with an agent — while a policy (on the Policies tab) defines who can do it and on which resources. The screenshot shows example roles such as "Can Sell Mentor", "Mentor Chat", "Team Creator", "Enrollment Manager", "List Teams", and "Read Team".
To reach it, switch the top-bar toggle to Admin, open the settings dialog, choose Management, and select the Roles tab (alongside Users, Groups, Policies, Teams, and Alerts).
Target Audience
Administrator
Fields and Controls
Search roles
A search box that filters the role list by name as you type.
New Role
Opens the New Role dialog with three parts. Role Name (required) names the bundle. Actions takes permission strings — press Enter or click + to add each one — in the form Namespace/Resource/verb, e.g. Ibl.Mentor/Settings/read; wildcards are supported (e.g. Ibl.Mentor/*/write). Data Actions grants field-level access, e.g. Ibl.Mentor/Settings/email/read — the same syntax with a field segment.
Name column
The role's name. Roles are listed one per row with actions on the right.
Edit (pencil) icon
Opens the role dialog pre-filled so you can rename it or add and remove actions and data actions.
Delete (trash) icon
Deletes the role after confirmation. Built-in roles are protected: the delete button is disabled with the tooltip "Cannot delete internal roles."
Pagination
Roles page ten at a time with pagination controls below the table.
How to Use
Step 1: Open the Roles tab
In Admin mode, open the settings dialog, click Management, and select Roles.
Step 2: Create a role
Click New Role and give it a descriptive name for the capability it represents (e.g., "Team Creator").
Step 3: Add actions
In the Actions field, type each permission string (such as Ibl.Mentor/Settings/read) and press Enter or click +. Use wildcards like Ibl.Mentor/*/read to cover an entire resource family. Added actions show as removable chips.
Step 4: Add data actions (optional)
For field-level control, add entries in Data Actions such as Ibl.Mentor/Settings/email/read to permit access to a specific field only.
Step 5: Attach the role to a policy
Save the role, then open the Policies tab and create a policy that pairs this role with users or groups and a set of resources. The role has no effect until a policy references it.