Agent Settings: Sandbox
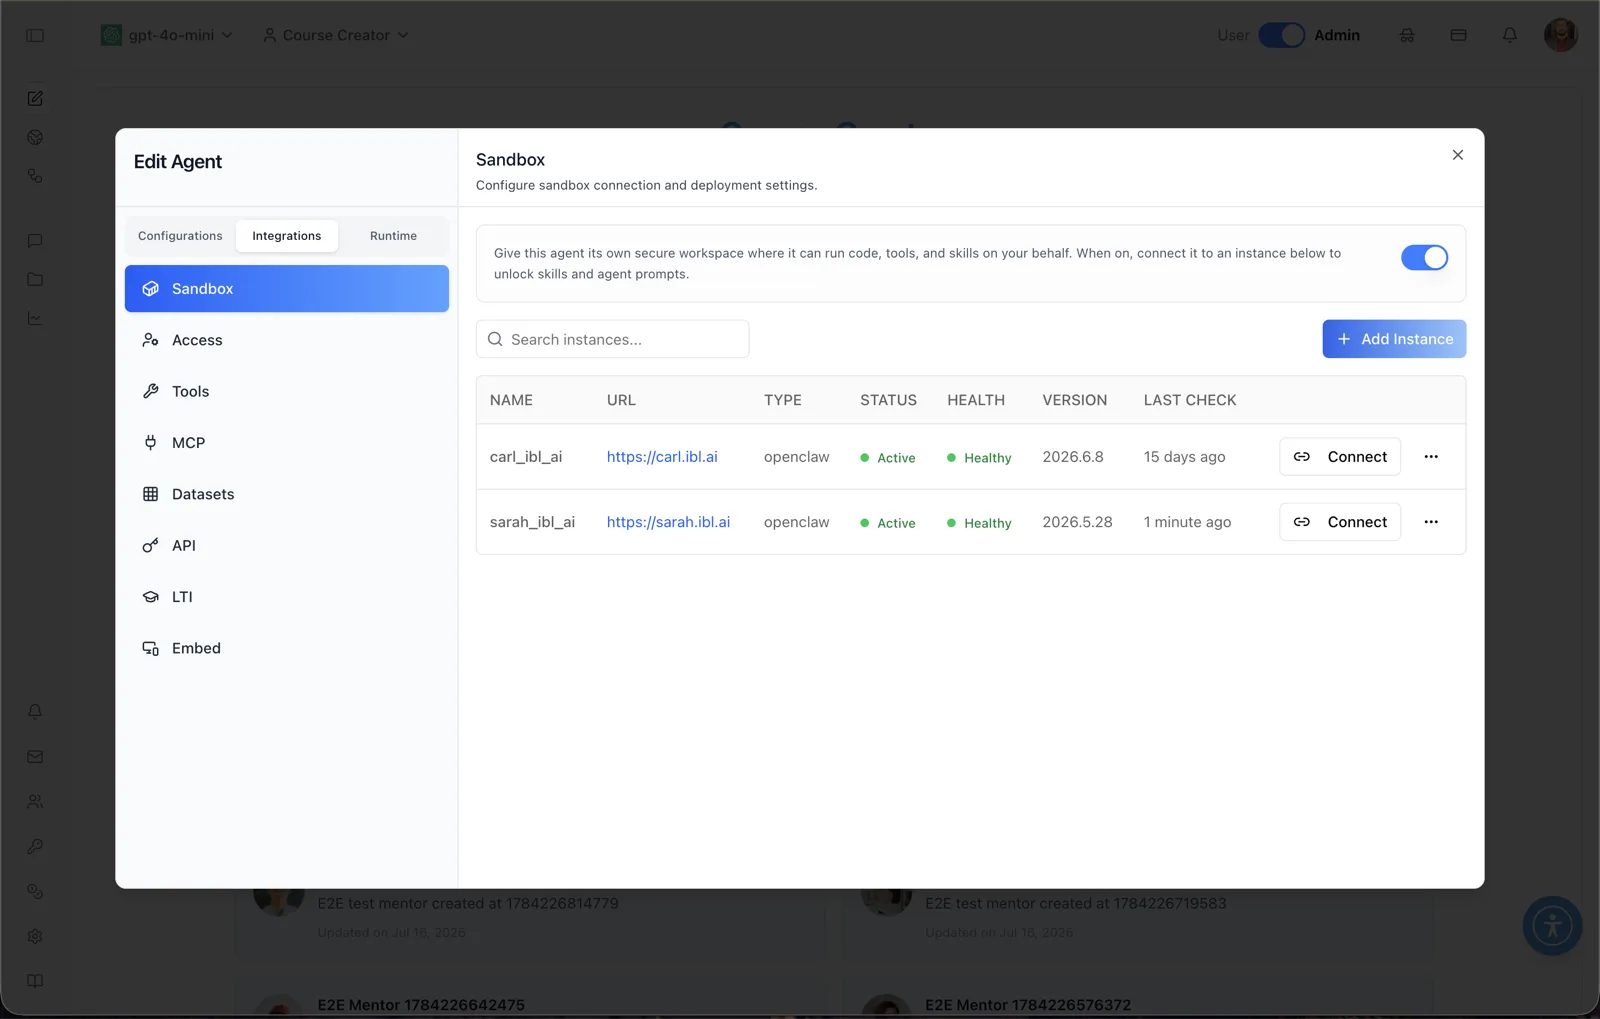
Overview
The Sandbox panel gives an agent its own secure execution workspace on independent infrastructure: somewhere it can run code, tools, and skills on your behalf rather than only answering from a context window.
The panel opens on a Sandbox Type card offering three sandbox kinds:
The card's subheading reads: "Choose how this agent runs code. Only one sandbox type can be enabled at a time."
| Kind | What it gives the agent |
|---|---|
| Computing Runtime | A lightweight JavaScript calculator for quick computations — the low-cost option. Nothing to register and no network settings of its own. |
| Virtual Machine Shell | A full Linux virtual machine, one per chat, in which the agent writes files and runs real shell commands, isolated from everything else. It starts with no network at all; what it may reach is set per agent. See Network Access. |
| Claw | A dedicated, persistent agent host with its own skills and plugins, billed by usage and configured through its workspace files. You register an openclaw or ironclaw instance by URL and connect the agent to it. See Claw instances. |
The three kinds are mutually exclusive, and one of them is always active. The card's own subheading says so: "Only one sandbox type can be enabled at a time." You change kinds by selecting a different one, which deactivates whichever kind was active in the same save. There is no way to turn the sandbox off — no "none" state and no disable operation. Each switch is briefly unavailable only while its own save is in flight, and a successful change reports "Sandbox type updated."
The sections below the card belong to the selected kind and are absent from the page entirely when that kind is not active, rather than shown greyed out.
To reach this screen, open the Edit Agent modal, switch to the Integrations tab group (its sidebar lists Sandbox, Access, Tools, MCP, Datasets, API, LTI, and Embed), and select Sandbox. The tab is always visible to administrators — there is no separate capability to switch on first, and the sandbox master toggle now lives on this tab rather than under Capabilities.
Target Audience
Administrator | Agent Builder
Network Access (Virtual Machine Shell)
While Virtual Machine Shell is the active kind, the panel renders a Network Access section. It is a draft editor: nothing takes effect until you click Save Changes, which stays unavailable while the draft is unchanged or invalid.
Egress Profile
A radio group choosing what the VM may reach:
| Profile | What the VM can reach |
|---|---|
| No Network (default) | No network at all. |
| Package Registries | Package registries only — PyPI, npm, apt and apk. |
| Public Internet | The public internet, with private ranges, loopback and cloud metadata addresses denied. |
| Custom Allowlist | Deny by default: only the hosts in the network policy you select. |
Network Policy
A policy picker that appears only under Custom Allowlist, where it is required — leaving it empty shows "The Custom profile needs a network policy." Create Policy opens the policy form in place, Edit Policy reopens the chosen one, and Manage Policies goes to the organization-level list described in Organization settings.
Secrets
A multi-select of VM secrets to bind to this agent, one checkbox per secret's environment variable. It appears only under Public Internet or Custom Allowlist, and is capped at 20 bound secrets.
A bound secret lets the agent call an API with a key it can never read: inside the VM the environment variable holds a placeholder, and the real value is substituted only on encrypted requests to the hosts that secret is allowed to reach. The agent cannot print, log or leak it.
Two rules the panel enforces before it saves
- Narrowing with secrets bound. Moving to No Network or Package Registries while secrets are bound opens an "Unbind Secrets?" confirmation and unbinds them in the same request.
- Uncovered hosts under Custom. Every host a bound secret needs must be covered by the selected policy. When one is not, the panel lists the gaps and offers "Add Hosts to {policy} and Save", which patches the policy first and then saves.
Billing notice
VM time is a metered resource, so the section carries a billing notice. Time is charged to the credits of the person chatting, prorated per second, at $1 per ten minutes by default — a figure each organization sets for itself, and which can be set to zero. Each session's cost is recorded with the rest of the agent's usage, alongside its model calls.
Organization settings: network policies and secrets
Network policies and VM secrets are organization-level objects, written once and reused across agents and never shared across organizations. An agent's Network Access section only selects from them.
They live in the organization's Account settings, under the Virtual Machine tab, which is listed for administrators only, and are documented in full in Organization Settings: Virtual Machine. Creating, changing and deleting policies and secrets are separate permissions, one for each, held by organization admins by default — so either of the two sub-tabs below is hidden when your permissions do not allow reading its list. Binding a secret to an agent requires the secret-writing permission too.
Network Policies
A table of named allowlists, with create, edit, and delete. Entries are exact host:port pairs — no wildcards — and at most 100 per policy; loopback, link-local and cloud metadata addresses are refused outright. Hosts are entered as chips: type one entry and press Enter (a comma or space works too, and a pasted list is split), and a rejected entry stays in the box with the reason shown underneath instead of becoming a chip. Each chip carries its own remove button.
Secrets
A table of VM secrets. A secret's value is never returned by any endpoint, so the form never prefills it: on edit the value box stays blank ("Leave blank to keep the current value") and the environment-variable name is read-only.
A secret either carries its own value or points at one field of a credential the organization already stores for an integration. Pointing at the stored credential means the key is never typed twice, and rotating it once updates every agent that uses it.
Claw instances
While Claw is the active kind, the panel shows the instance surface below — first the registration table, then, once the agent is wired to an instance, the connected view. Connecting an agent to an instance is what makes its skills and workspace prompts usable: the Skills tab is reachable either way, but skills only run on a wired sandbox, so until one is connected it shows a greyed "connect a sandbox" state. The Agent Configuration prompt fields (Identity, Soul, User Context, Tools, Agents, Bootstrap, Heartbeat, Memory) in the Prompts tab appear once the agent is connected.
Search instances
A search box that filters the instance table by name or URL.
Add Instance
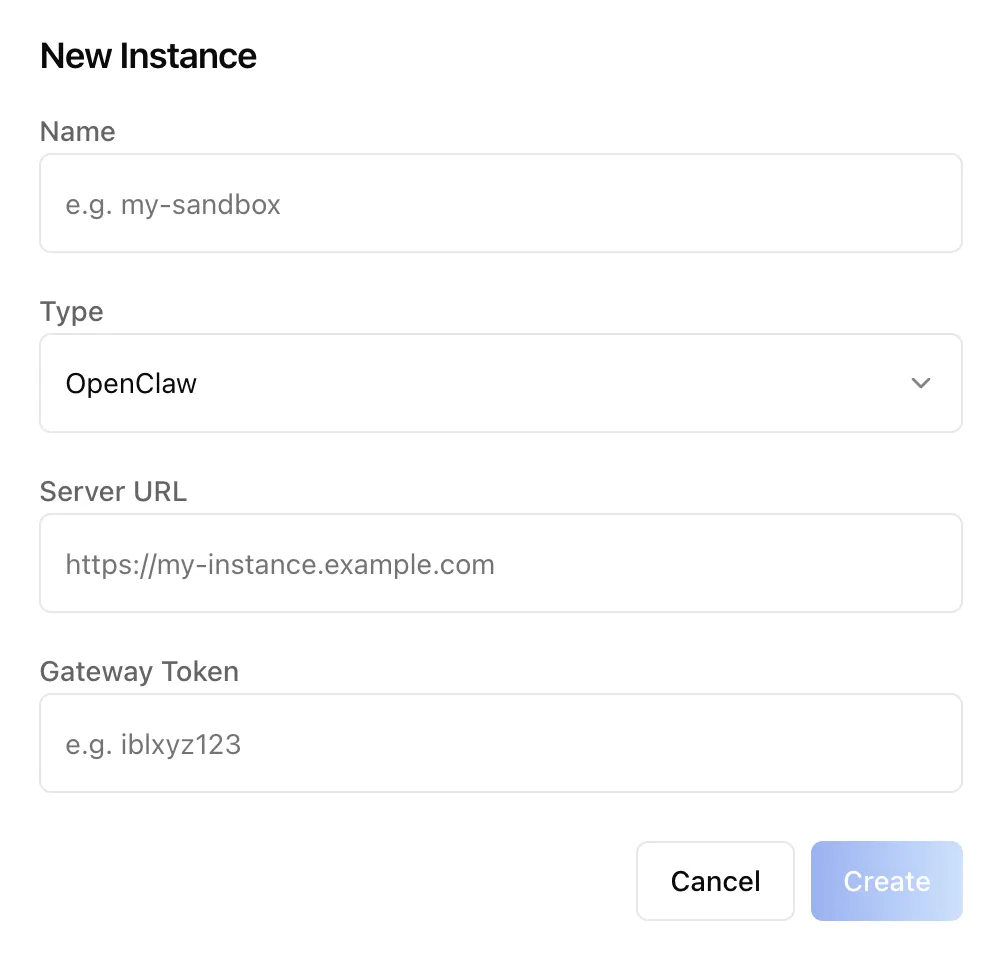
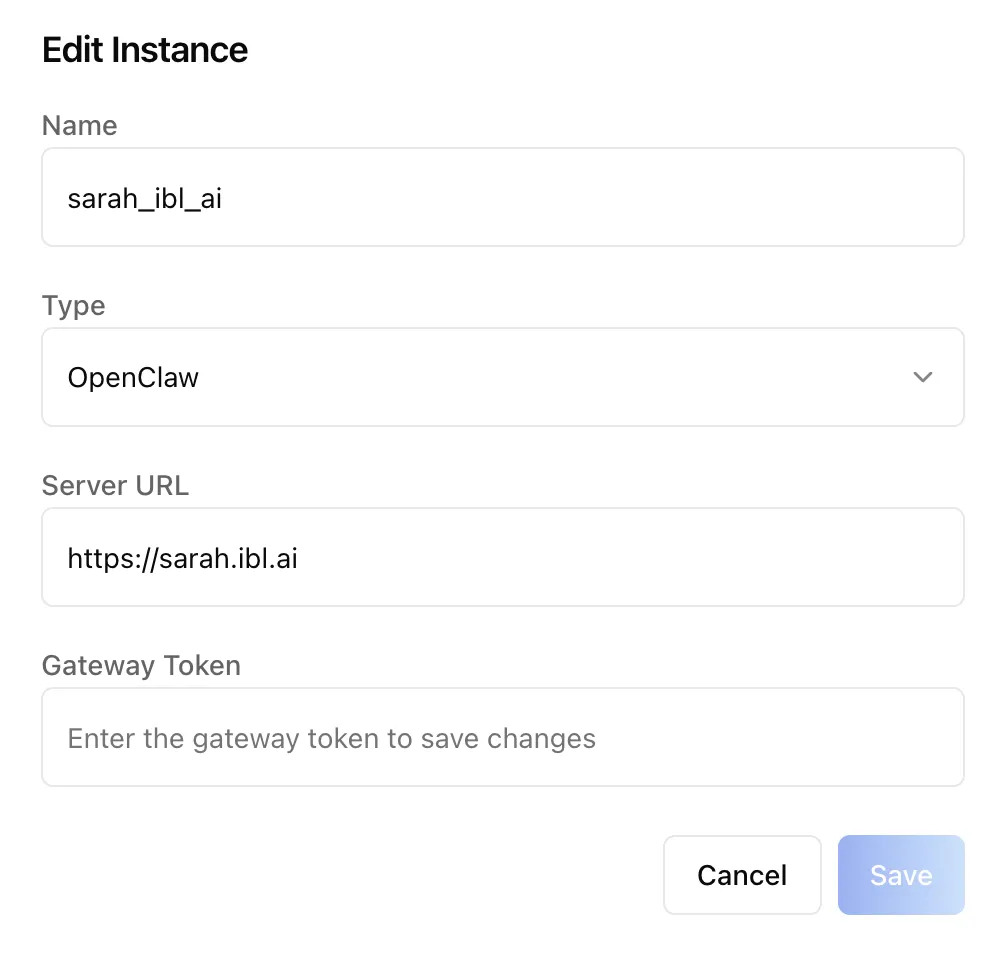
Opens the New Instance dialog for registering a sandbox runtime. The form takes a display name, a fully qualified https server URL, the instance type (openclaw, the default, or ironclaw), and an optional gateway token for authentication. The token is write-only — it is never read back from the API, so editing an instance re-prompts for it and leaving the field blank keeps the existing one.
Instance table
Each registered instance is a row with:
- NAME — the instance's display name (for example
carl_ibl_ai). - URL — the instance's server URL (for example
https://carl.ibl.ai). - TYPE — the runtime type, such as
openclaw. - STATUS — Active or Error (an em-dash when unknown).
- HEALTH — Healthy or Unhealthy (an em-dash when unknown).
- VERSION — the software version reported by the instance (for example
2026.6.8). - LAST CHECK — when the instance was last health-checked (for example "1 minute ago").
- Connect — connects this agent to the instance. Connect is blocked (dimmed, with an explanatory tooltip) when the instance is unhealthy.
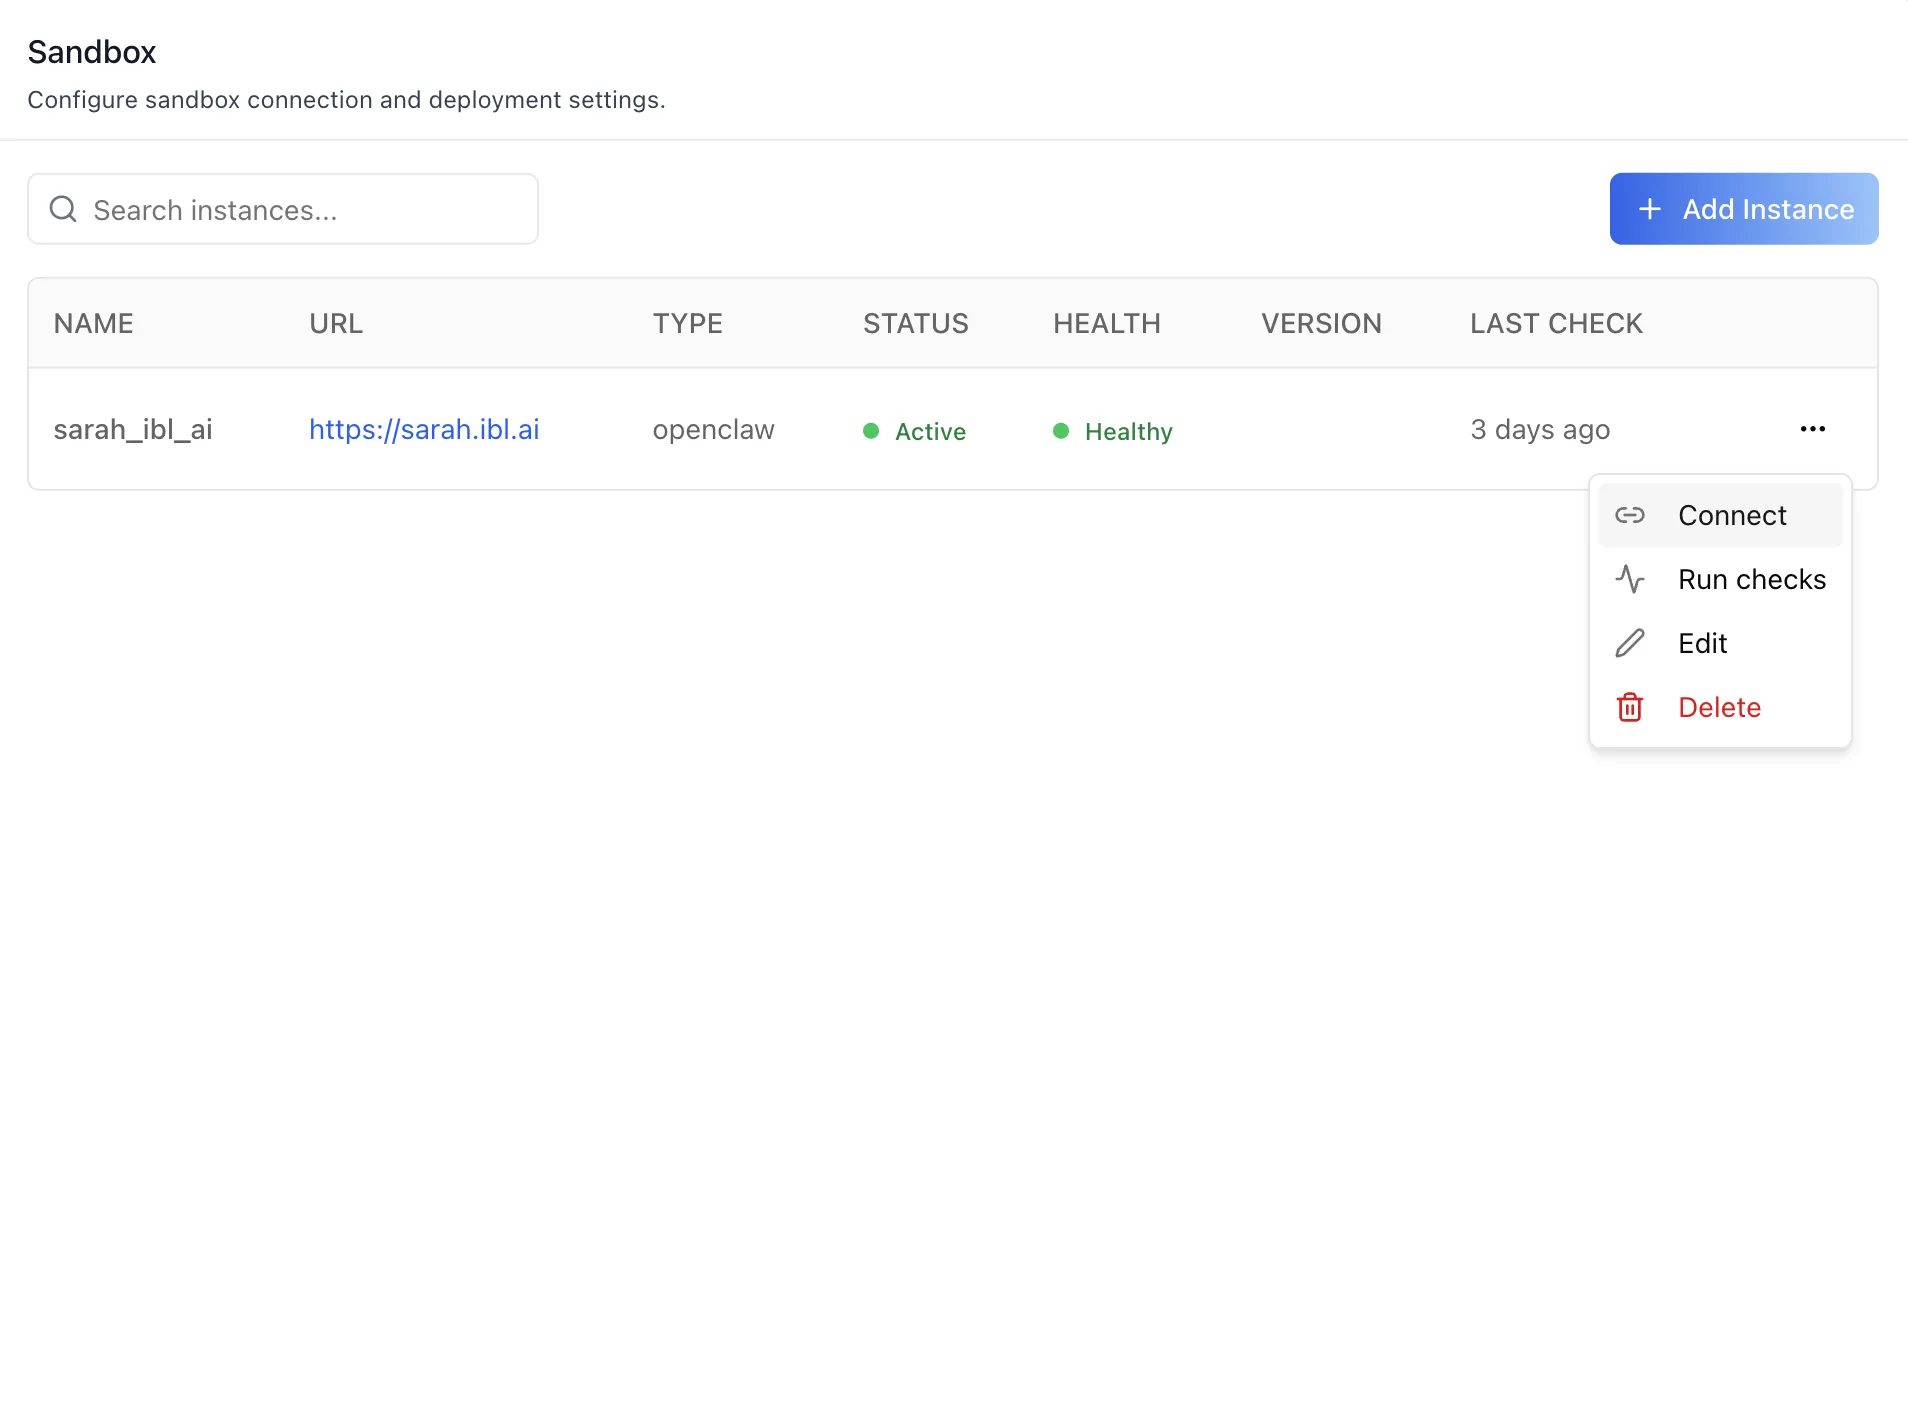
- "..." actions menu — per-instance actions including Edit (change name, server URL, or type), Delete (with confirmation), Run checks (health check plus connectivity test), and Connect.
Connected state
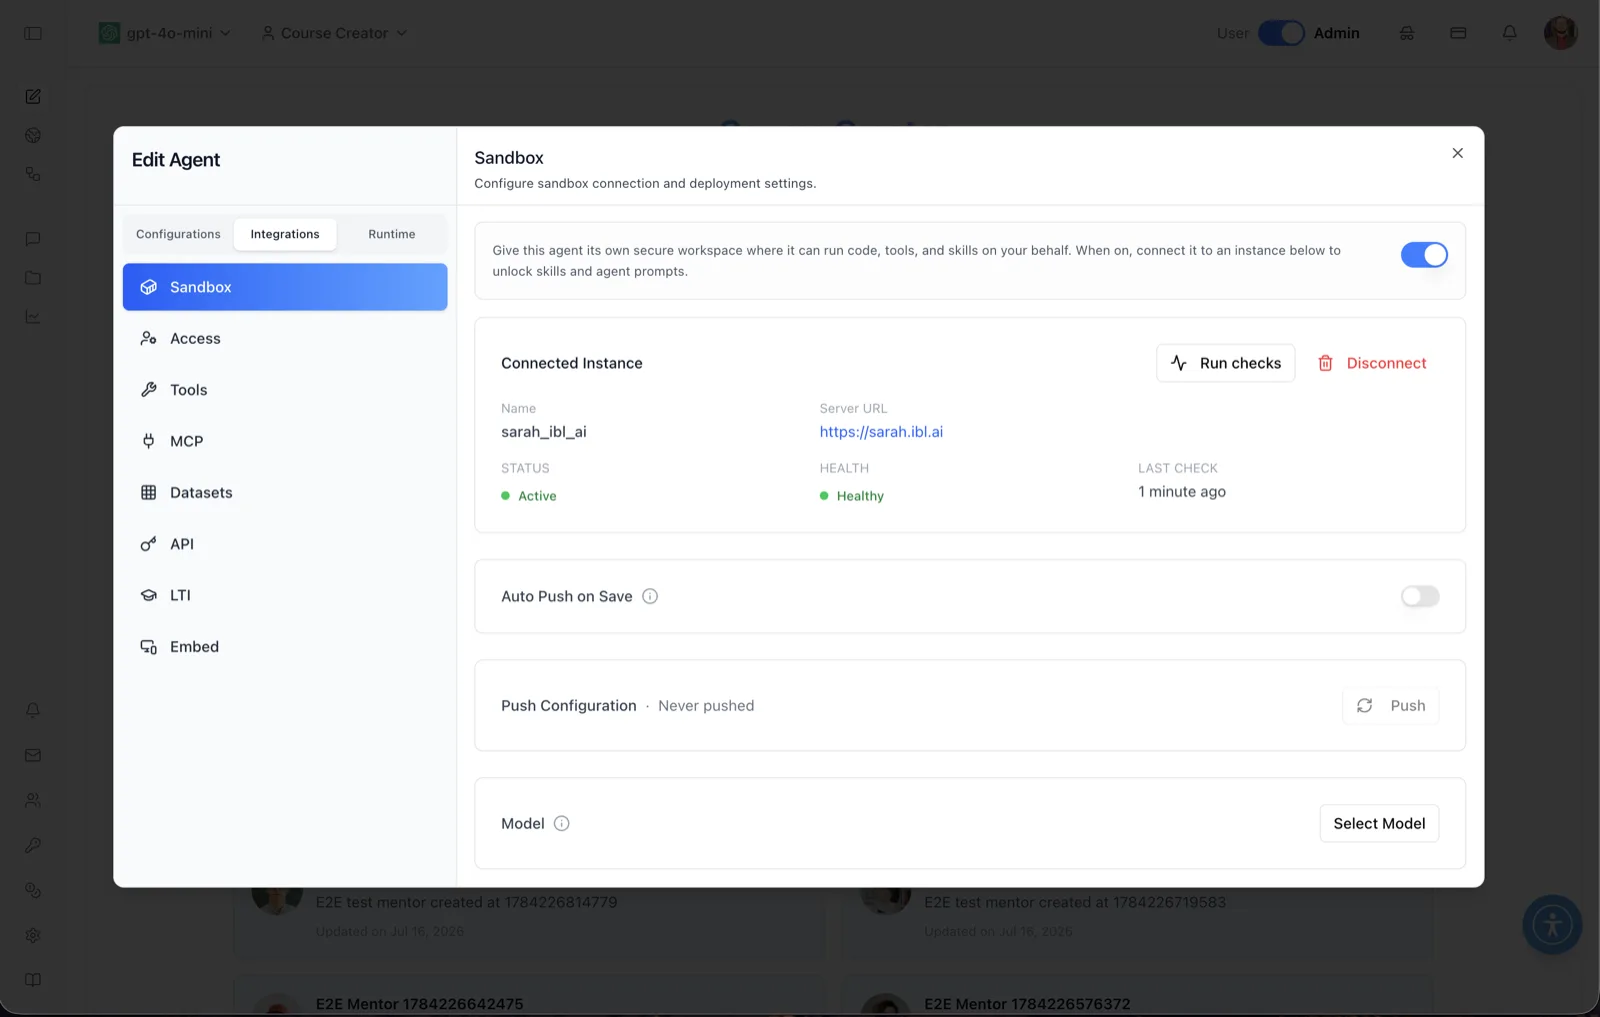
Once the agent is connected to an instance, the instance table is replaced by the connected-instance view:
Connected Instance card
Shows the connected instance's Name, Server URL (linked), STATUS (for example Active), HEALTH (for example Healthy), and LAST CHECK time. Two actions sit on the card:
- Run checks — re-runs the health check and connectivity test against the instance and reports the results.
- Disconnect — detaches the agent from the instance, after a confirmation dialog. Disconnecting hides the sandbox-gated capabilities (Skills, agent prompts) again.
Auto Push on Save
A toggle that, when on, automatically pushes the agent's configuration to the connected instance whenever it is saved, so the runtime never drifts from what is configured in the UI.
Push Configuration
Shows when the configuration was last pushed to the instance ("Never pushed" before the first push) and a Push button to push the current configuration to the connected worker on demand.
Model
The LLM the sandboxed agent runs on. Select Model opens the provider picker, where you choose a provider (for example Anthropic or OpenAI) and then a model; once chosen, the current model identifier is shown in this row and the button changes to allow changing it.
Agent Workspace Prompts
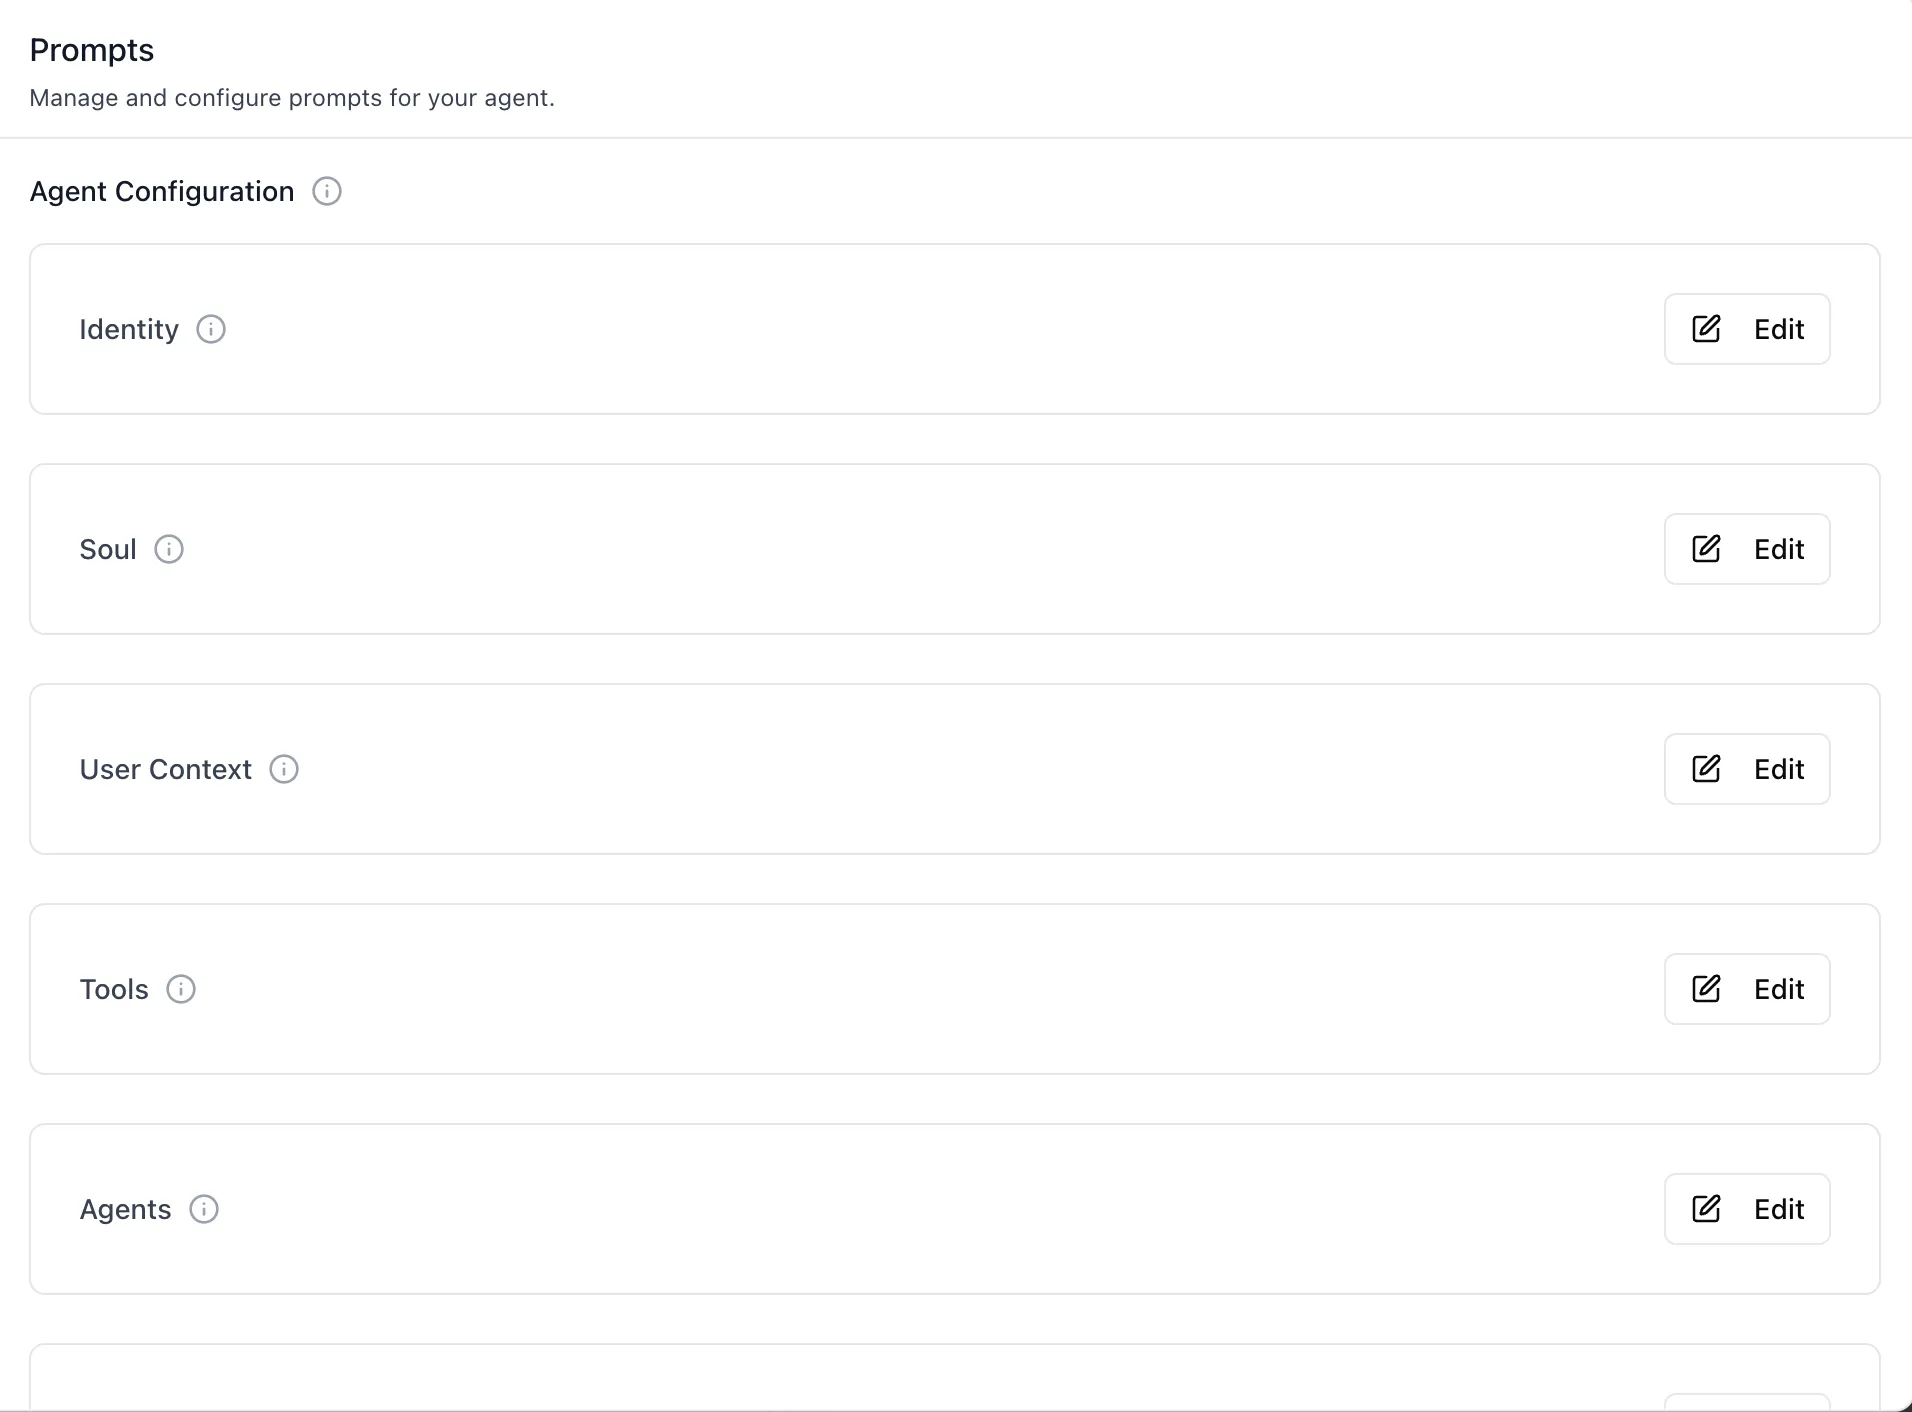
A connected agent has a workspace on the sandbox made up of eight prompt files, each editable from this panel. They are the same files an agent definition carries on disk, so what you write here is what the runtime reads.
| Field | File | What it holds |
|---|---|---|
| Identity | IDENTITY.md | The agent's persona — name, character, how it presents itself |
| Soul | SOUL.md | Behavioral guidelines, personality, communication style |
| User Context | USER.md | The deployment's context — hosts, device names, voices |
| Tools | TOOLS.md | Notes on tool usage, device names, API aliases |
| Agents | AGENTS.md | Multi-agent routing — which agent handles what |
| Bootstrap | BOOTSTRAP.md | One-time instructions for the agent's first run |
| Heartbeat | HEARTBEAT.md | Periodic tasks the agent performs on its own schedule |
| Memory | MEMORY.md | Seed memory — curated long-term facts the agent starts with |
Editing a prompt
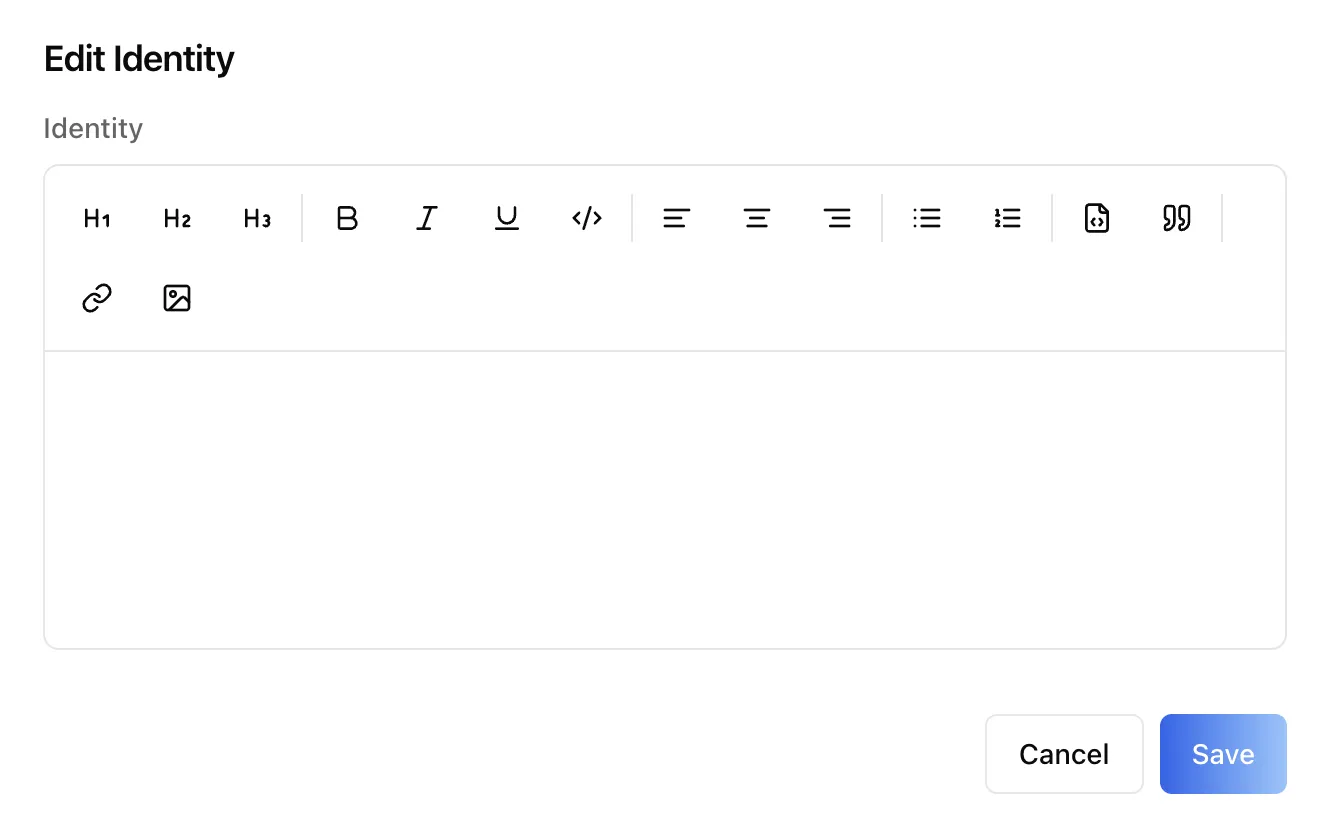
Each row carries an information tooltip explaining what the file is for and an Edit button that opens a rich-text editor. Saving writes the file, creating it if this is the first time it has been set.
How to Use
Running an agent on a virtual machine
Step 1: Select the kind
Open Edit Agent → Integrations → Sandbox and select Virtual Machine Shell in the Sandbox Type card. Selecting it deactivates whichever kind was active before. The Network Access section appears below.
The Virtual Machine Shell, its egress profiles, network policies, credential-backed secrets and per-second billing are described for a general audience in Agent Sandboxes: A Real Linux VM, Locked to Hosts You Allow.
Step 2: Choose how much network the agent needs
Pick the narrowest Egress Profile that works: No Network for pure computation, Package Registries to install dependencies, Public Internet for general access, Custom Allowlist to confine the VM to named hosts.
Step 3: Name the hosts, if you chose Custom Allowlist
Select an existing Network Policy, or use Create Policy to define one from here. Custom will not save without a policy.
Step 4: Bind any secrets the agent needs
Under Public Internet or Custom Allowlist, tick the secrets to expose to this agent, up to 20. Under Custom, every host a secret needs must be covered by the policy — if one is not, use Add Hosts to {policy} and Save to extend the policy as part of the save.
Step 5: Save
Click Save Changes. Narrowing the profile later while secrets are still bound will ask you to confirm unbinding them.
Running an agent on a Claw instance
Step 1: Select the kind
In the Sandbox Type card, select Claw. The instance surface appears.
Step 2: Register an instance
Click Add Instance. Enter a name, the https server URL of the runtime, choose the type (openclaw by default), optionally provide a gateway token, and submit. The new row appears in the instance table.
Step 3: Verify health and connect
Use Run checks from the row's actions menu to confirm the instance is Active and Healthy, then click Connect. The Connected Instance card replaces the table, and the agent's Skills tab and Agent Configuration prompts become available.
Step 4: Write the agent's workspace prompts
In the Prompts section, edit the files that define the agent on the runtime — Identity and Soul first, then the rest as the deployment needs them. Push Configuration stays unavailable until at least one prompt has content, since there is nothing to send.
Step 5: Keep the runtime in sync
Click Push in Push Configuration to push the agent's current configuration to the instance — or enable Auto Push on Save so every prompt edit is pushed automatically. Use Select Model to set the LLM the sandboxed agent should use.
Step 6: Disconnect when needed
Click Disconnect on the Connected Instance card (and confirm) to detach the agent from the instance — for example before pointing it at a different runtime. Disconnecting does not turn the sandbox off; to move the agent elsewhere, select a different kind in the Sandbox Type card.