Organization Settings: Data Source Integrations
Overview
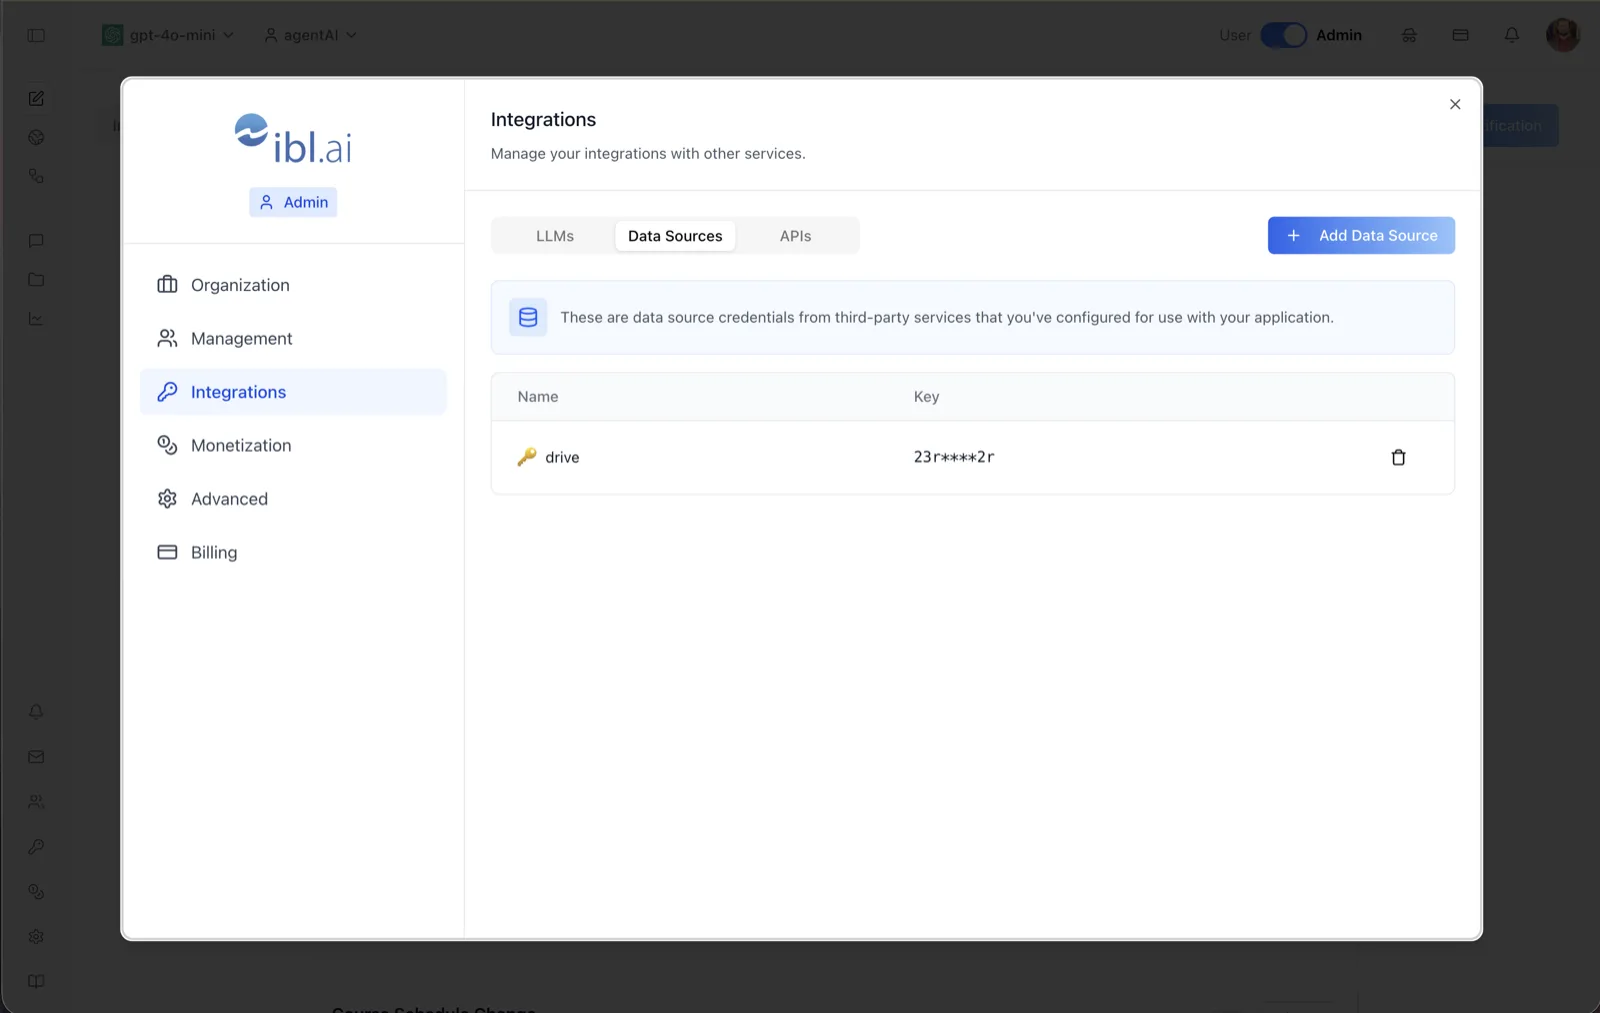
The Data Sources tab stores credentials for the third-party content and data services your agents draw on. As the on-screen banner says: "These are data source credentials from third-party services that you've configured for use with your application."
These are outbound integration credentials — for example, a Google Drive connection (shown as drive in the screenshot) that lets agents ingest documents from your organization's storage. Each credential is stored per organization and displayed with a masked key (e.g., 23r****2r) so the secret is never redisplayed.
To reach it, switch the top-bar toggle to Admin, open the settings dialog, choose Integrations in the left sidebar, and select the Data Sources tab (alongside LLMs and APIs).
Target Audience
Administrator
Fields and Controls
Add Data Source
Opens the Add Data Source dialog. Choose a Provider from the dropdown of supported services; the form then renders that provider's credential fields dynamically from its schema, with sensitive fields handled as secrets. Submit to store the credential for the organization.
Name column
The provider identifier for each stored credential (e.g., drive), shown with an icon.
Key column
The stored credential in masked form — only the outer characters are visible. To change a credential, delete it and add a new one; the full value is never redisplayed.
Delete (trash) icon
Removes the data source credential from the organization. Agents and ingestion jobs that depended on it can no longer reach that service until a new credential is added.
How to Use
Step 1: Open the Data Sources tab
In Admin mode, open the settings dialog, click Integrations, and select the Data Sources tab.
Step 2: Add a credential
Click Add Data Source, pick the provider, and fill in the fields the form presents for that service. Click Submit; a success toast confirms it was saved.
Step 3: Verify and use
The credential appears in the table with a masked key. Agents in this organization can now pull content from that data source — for example, when attaching documents from connected storage to an agent's knowledge.
Step 4: Rotate or remove
Delete the entry with the trash icon and re-add it to rotate the underlying secret. Remove credentials for services you no longer use to keep the organization's integration surface minimal.