Organization Settings: Users
Overview
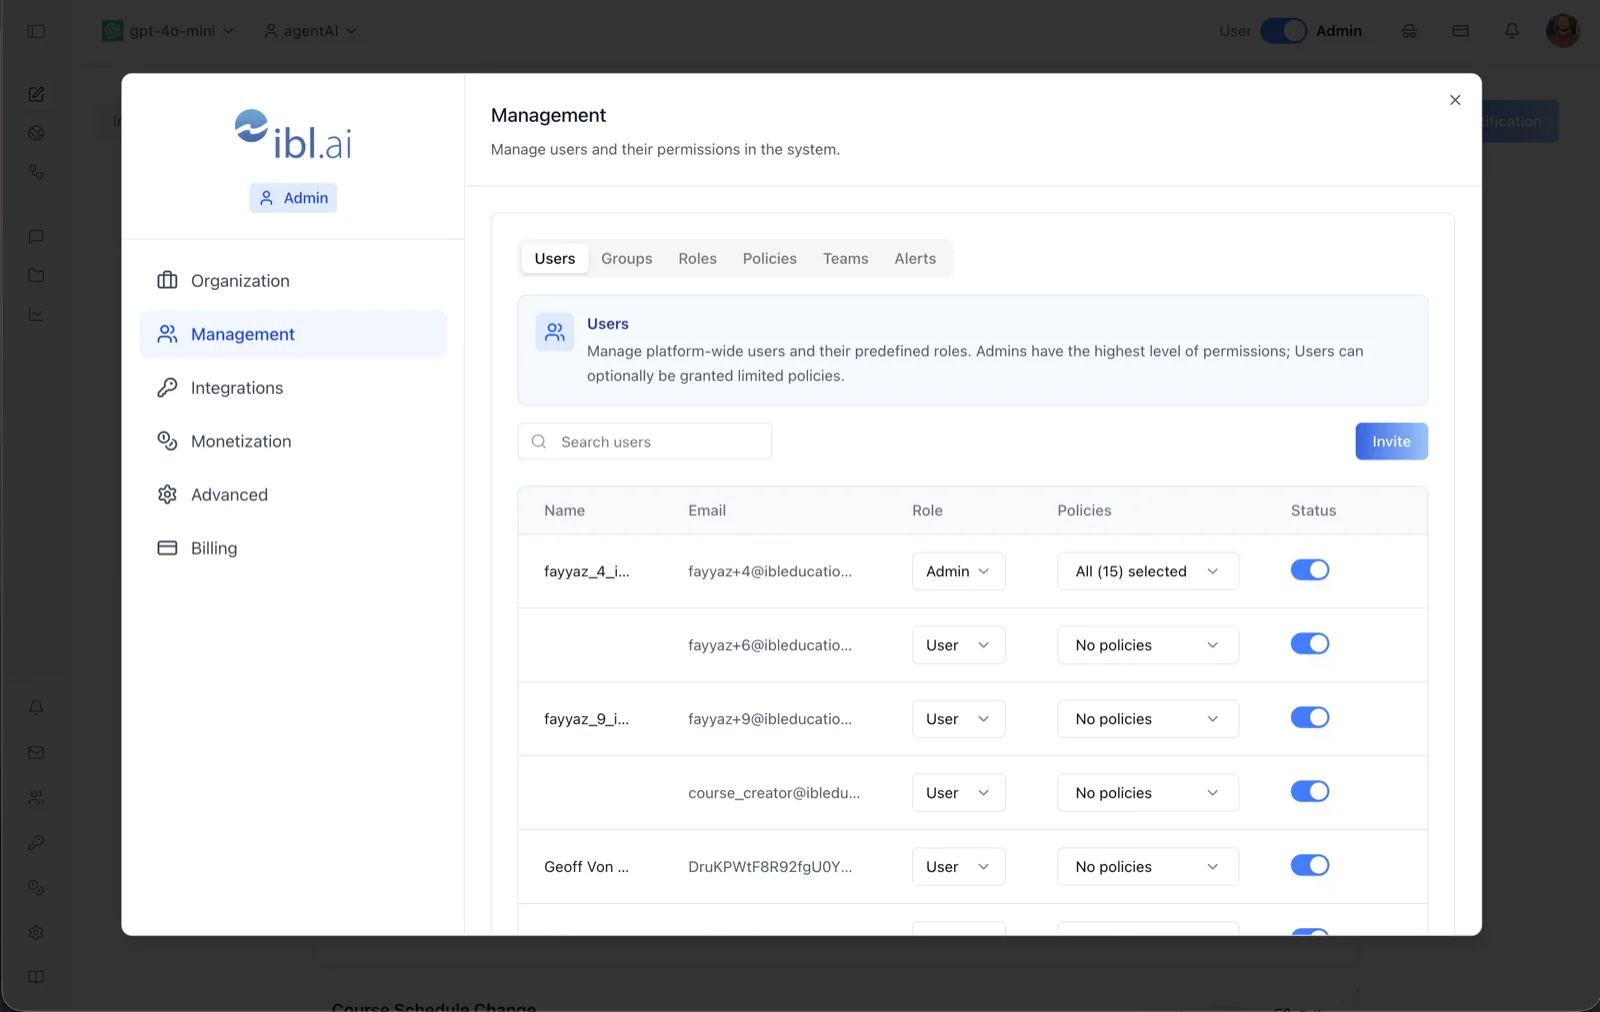
The Users tab is the organization-wide user directory. As the on-screen description says: "Manage platform-wide users and their predefined roles. Admins have the highest level of permissions; Users can optionally be granted limited policies."
Every person in the organization appears here with their role, any RBAC policies attached to them, and an active/inactive status. From this one table an administrator can promote or demote users, grant fine-grained policies, deactivate accounts, and invite new members.
To reach it, switch the top-bar toggle to Admin, open the settings dialog, choose Management in the left sidebar, and select the Users tab (alongside Groups, Roles, Policies, Teams, and Alerts).
Target Audience
Administrator
Fields and Controls
Search users
A search box that filters the table by name or email. The search is debounced and fires once you type more than three characters; results reset to the first page.
Invite
Opens the invite dialog to add new users by email. You can send a single invitation, or bulk-invite by uploading a CSV file (with an email column, plus optional first_name, last_name, platform_key, company_name, and user_group columns) and reviewing the parsed rows before sending. Invited users receive an email that brings them into the organization.
Name column
The user's display name. It may be blank for accounts that have not completed their profile.
Email column
The user's email address (or identifier for programmatically created accounts).
Role column
A dropdown per user with two predefined roles: Admin and User. Admins hold the highest level of permissions across the organization. Changing a user's role also clears their attached policies, so permissions can be reassigned cleanly for the new role.
Policies column
A dropdown per user showing attached RBAC policies. Admins display as "All (N) selected" because they implicitly hold every policy; their selection cannot be edited. Non-admin users show "No policies" or a count, and opening the dropdown lets you check or uncheck individual policies (defined on the Policies tab) to grant limited permissions.
Status column
A toggle that activates or deactivates the user in this organization. Deactivated users lose access without being deleted, and the toggle can be flipped back at any time.
Pagination
The table pages through users ten at a time, with pagination controls at the bottom when more than one page exists.
How to Use
Step 1: Open the Users tab
In Admin mode, open the settings dialog, click Management, and select the Users tab.
Step 2: Find a user
Type a name or email into Search users. The list filters as you type (after the fourth character).
Step 3: Change a role
Open the Role dropdown on the user's row and pick Admin or User. Note that switching roles clears the user's existing policies.
Step 4: Grant policies
For a non-admin user, open the Policies dropdown and check the policies to attach. Changes save immediately and a confirmation toast appears.
Step 5: Activate or deactivate
Flip the Status toggle to enable or disable the account within the organization.
Step 6: Invite new users
Click Invite, enter an email address (or upload a CSV for bulk invitations), and send. New users appear in the table once invited.