Renaming a Canvas
Overview
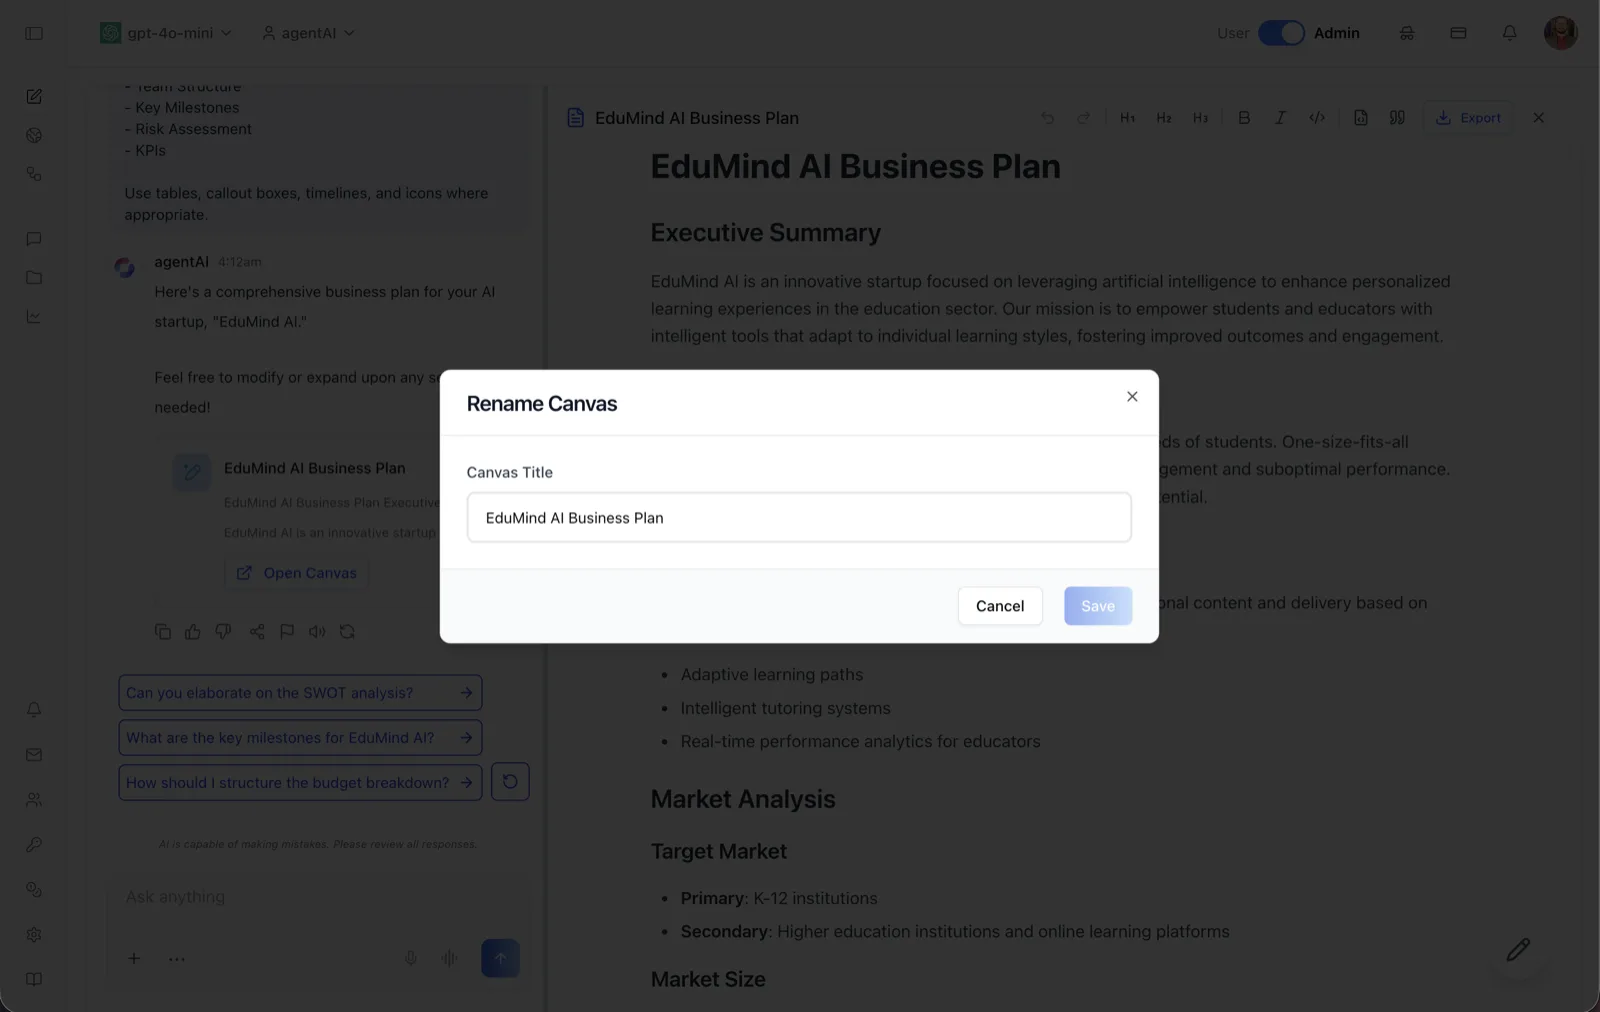
Every Canvas document has a title, shown in the panel header and on the preview card in chat. The agent names the document when it creates it (for example "EduMind AI Business Plan"), and you can rename it at any time from the Rename Canvas dialog.
The title matters beyond labeling: exported files are named after it (<title>.pdf, <title>.docx, <title>.md), so a clear title produces clean downloads. Renaming applies to the document itself, so the new name appears everywhere the Canvas is referenced.
To open the dialog, click the document title in the Canvas header — its tooltip reads "Click to rename". Renaming is temporarily unavailable while the agent is still streaming content into the document.
Target Audience
User
Features
Canvas Title field
A single text input pre-filled with the current title. Type the new name; the field placeholder reads "Enter new canvas title". Pressing Enter saves, and pressing Escape closes the dialog without saving.
Save button
Commits the new title (showing "Renaming..." while it saves). The button stays disabled when the field is empty or the title is unchanged, so you cannot save a blank or identical name.
Cancel button
Closes the dialog without changing the title. The X in the dialog corner does the same.
How to Use
Step 1: Open the rename dialog
With the Canvas open, click the document title in the panel header. The Rename Canvas dialog appears with the current title selected.
Step 2: Enter the new title
Replace the text in the Canvas Title field with the new name.
Step 3: Save
Click Save (or press Enter). The header, the preview card in chat, and future exports all use the new title. Click Cancel or press Escape to discard the change instead.