Agent Settings: Access
Overview
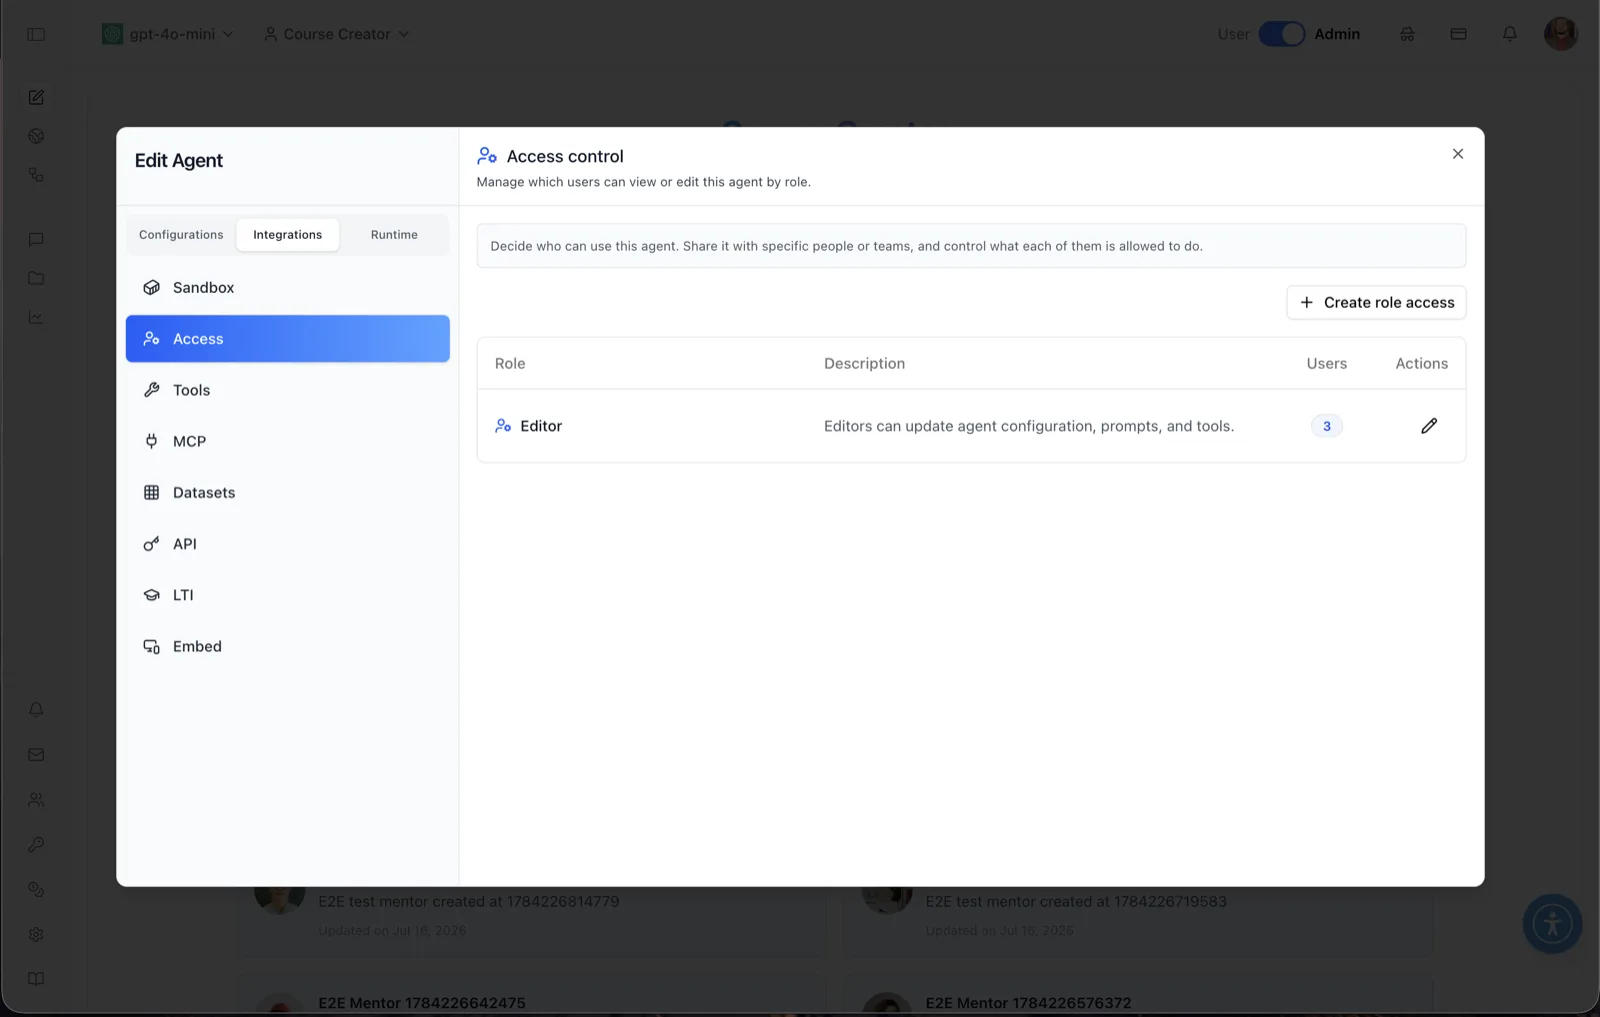
The Access panel manages per-agent, role-based access control. Its header reads "Access control — Manage which users can view or edit this agent by role," and the intro banner explains: "Decide who can use this agent. Share it with specific people or teams, and control what each of them is allowed to do."
Access is granted by creating a role policy on the agent and attaching users or groups to it. Each role appears as one row in the table, so the panel shows at a glance which roles exist on this agent and how many people hold each one.
To reach this panel, open the Edit Agent modal, switch the tab group at the top of the sidebar from Configurations to Integrations, and select Access. The Integrations sidebar also lists Sandbox, Tools, MCP, Datasets, API, LTI, and Embed.
Target Audience
Administrator
Settings Reference
Create role access
A button that opens a dialog for granting a role on this agent. In the dialog you pick a role, then attach people by searching the platform's users, entering usernames or email addresses manually, or selecting groups. The button is offered only for roles not yet assigned on the agent — each role has at most one policy.
Available roles
Three roles can be granted per agent:
- Editor — "Editors can update agent configuration, prompts, and tools."
- Chat — chat access limits users to conversations without editing capabilities.
- Analytics Viewer — allows the user to view analytics data for this agent.
Role table
The table lists each existing role policy with four columns: Role (the role name, e.g. Editor), Description (what the role permits), Users (a badge with the number of users currently holding the role — 3 in the screenshot), and Actions.
Edit action (pencil)
The pencil icon in the Actions column opens the role's access panel, where you can add or remove individual users and groups on that role. Removing everyone from a role revokes that access entirely.
How to Use
Step 1: Open the Access panel
Open the Edit Agent modal, click the Integrations tab above the sidebar, and select Access.
Step 2: Create a role policy
Click Create role access. In the dialog, choose the role to grant — Editor, Chat, or Analytics Viewer.
Step 3: Add people or teams
Search your platform's users by name, add usernames or email addresses manually, or select groups to grant the role to a whole team at once. Confirm to create the policy.
Step 4: Review and adjust
Back in the table, check the Users badge to confirm how many people hold each role. Click the pencil in the Actions column at any time to add or remove users and groups from a role.