Workflows
Overview
A workflow is an agent run you draw rather than describe. Where a prompt asks one agent to do everything in a single turn, a workflow lays the work out as a graph — an agent step here, a safety check there, a branch, a loop, a point where a human has to approve — and runs it in that order, every time.
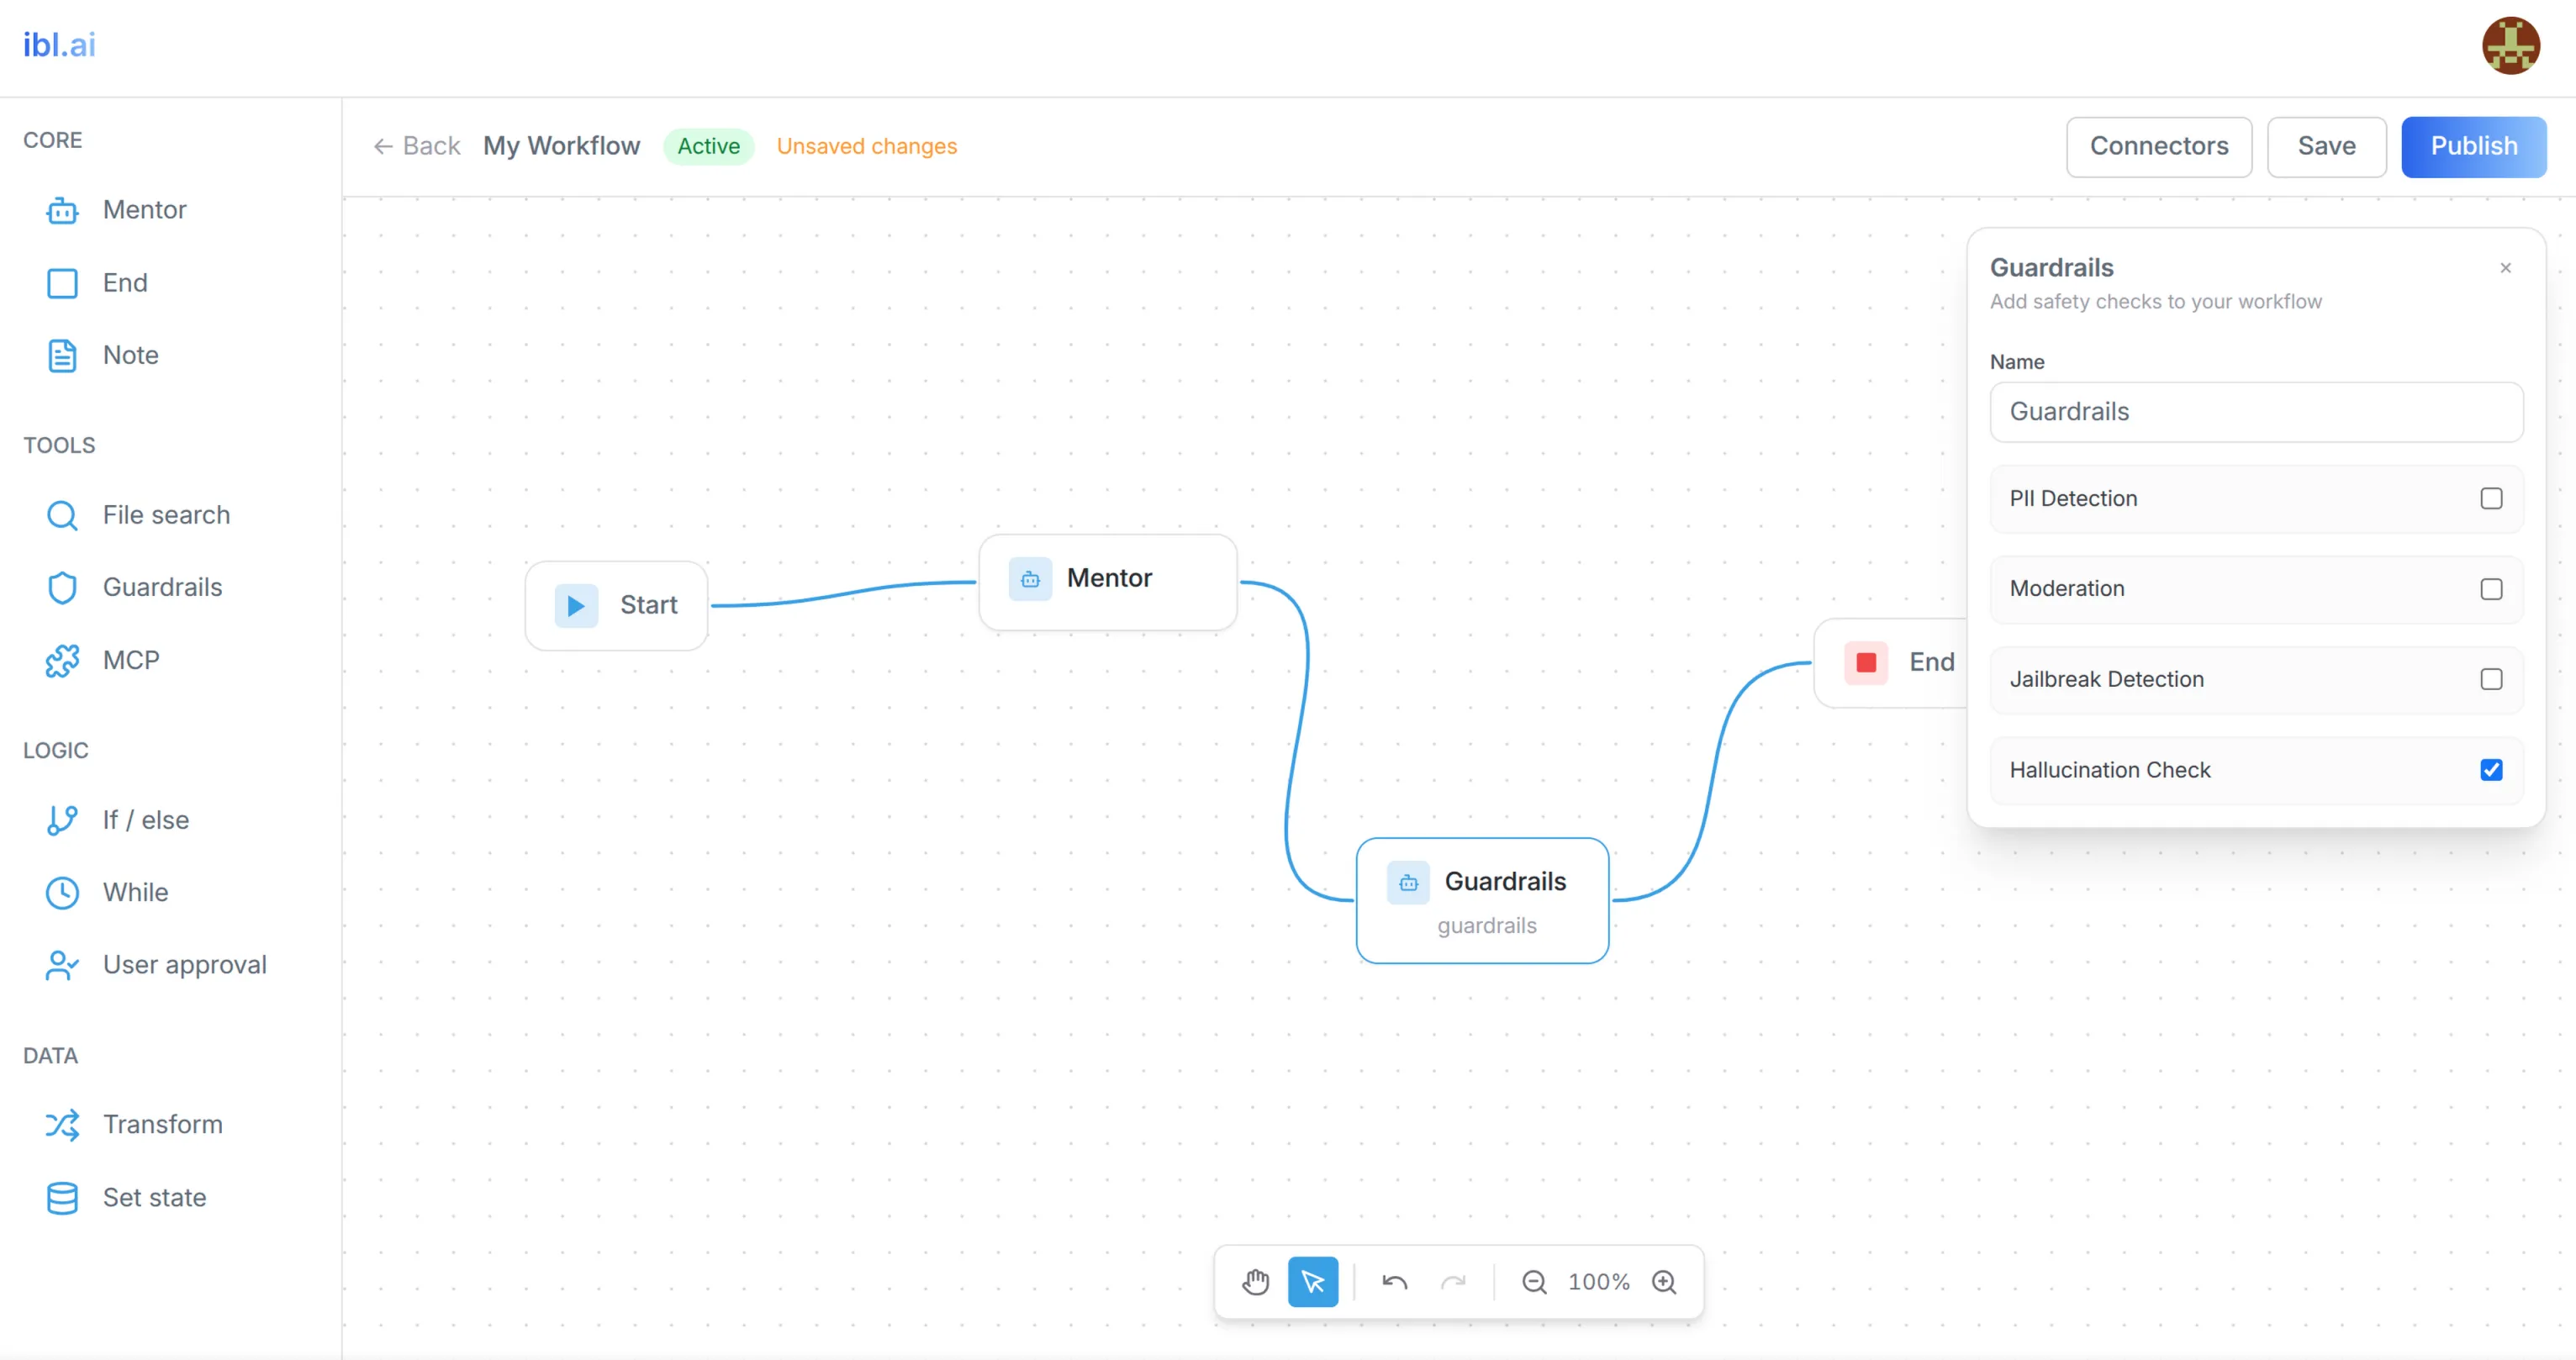
The editor has two halves. The sidebar on the left is the palette of node types, grouped by what they do. The canvas on the right is where you place nodes and connect them, with drag-and-drop, pan and zoom, undo and redo, and auto-save as you work. Above the canvas sit the workflow's name, its status, whether it has unsaved changes, and the Connectors, Save, and Publish actions.
Selecting a node opens its configuration panel, and each node type has its own — an agent node asks for instructions and a model, a guardrails node offers a checklist of safety checks, a conditional node collects the conditions to branch on.
Target Audience
Agent Builder | Administrator
Panel Reference
Node-type sidebar
The palette, grouped into four sections. Core holds the building blocks — an agent step, an End node, and a Note for annotating the graph. Tools holds File search, Guardrails, and MCP. Logic holds If / else, While, and User approval. Data holds Transform and Set state. Drag a type onto the canvas, or click it to add it.
Canvas
The graph itself: nodes joined by curved edges, with panning, zoom, and undo/redo, and a zoom control at the foot of the workspace. Changes save on their own as you work.
Workflow header
The workflow's name with an Active status badge, an Unsaved changes indicator when there is work not yet written, and a Back link out to the workflow list.
Connectors
Opens the connector management dialog, where the external connections a workflow's nodes can call are managed.
Save and Publish
Save writes the current graph. Publish promotes it to the running version — a workflow is validated before it is published, so a graph with a structural problem is refused rather than shipped.
Node configuration panel
Opening a node shows the settings for its type:
- Start — the workflow's state variables, added through a modal with a type picker (String, Number, Boolean, Object, List).
- Agent — a name, the instructions for this step, the model it runs on, and a Continue on error switch that decides whether a failure here stops the run or lets it carry on.
- If / else — the list of conditions to branch on, added and removed as needed.
- While — the expression that decides whether to loop again.
- Transform — a mode switch between expressions and object form, then the key/value pairs to produce.
- Set state — variable and value assignments.
- User approval — a name and the message shown to the person whose approval the run waits on.
- Guardrails — a checklist of safety checks: PII Detection, Moderation, Jailbreak Detection, and Hallucination Check.
- File search — a query and a maximum number of results.
- MCP — the connection to an MCP server.
- End — the output the workflow returns.
How to Use
Step 1: Create a workflow
From the workflow list, create a new one and give it a name. It opens in the editor with an empty canvas.
Step 2: Lay out the steps
Drag node types from the sidebar onto the canvas in the order the work happens, and connect them. A minimal workflow runs Start → an agent step → End.
Step 3: Configure each node
Select a node to open its panel. Give agent steps their instructions, declare the state variables the run needs on the Start node, and set the output on End.
Step 4: Add the checks the work requires
Insert a Guardrails node where output has to be screened and tick the checks that apply, and a User approval node anywhere a person must sign off before the run continues.
Step 5: Branch and loop where the work is not linear
Use If / else to take different paths on a condition, While to repeat a step until an expression stops being true, and Set state or Transform to carry values between steps.
Step 6: Save, then publish
Work is saved as you go and the header tells you when there are unsaved changes. When the graph is right, Publish validates it and promotes it to the running version.
Behavior Notes
- Publishing is gated on validation. A workflow is checked before it is published, so a structurally broken graph is refused rather than promoted.
- "Continue on error" is a per-step decision. By default a failing agent step stops the run; switching it on lets the workflow carry on past that step, which is the right choice for an enrichment step and the wrong one for a step everything downstream depends on.
- Guardrails are a node, not a global setting. Placing a guardrails node decides exactly where in the run the checks apply — the agent-level Safety and Privacy panels remain the agent-wide controls.
- State is declared, not implied. Values that travel between steps are declared on the Start node and written by Set state or Transform, so what a workflow carries is visible on the graph.
- The canvas auto-saves. The header's unsaved-changes indicator is the reliable signal of whether the version on the server matches what is on screen.
Building Workflows Into Your Own App
The workflow pieces ship in the ibl.ai SDK — the node-type sidebar, the connector management dialog, and the create and delete modals — alongside the data-layer hooks for listing, reading, creating, patching, validating, publishing, and deleting workflows. The canvas and the node configuration panel are built in your own application on top of them, which is what allows a product to define its own node set and layout.
Install the iblai/vibe skills; the reusable skill for this workflow is iblai-vibe-workflow, and the SDK overview is at Vibe SDK.