Agent Settings: Voice
Overview
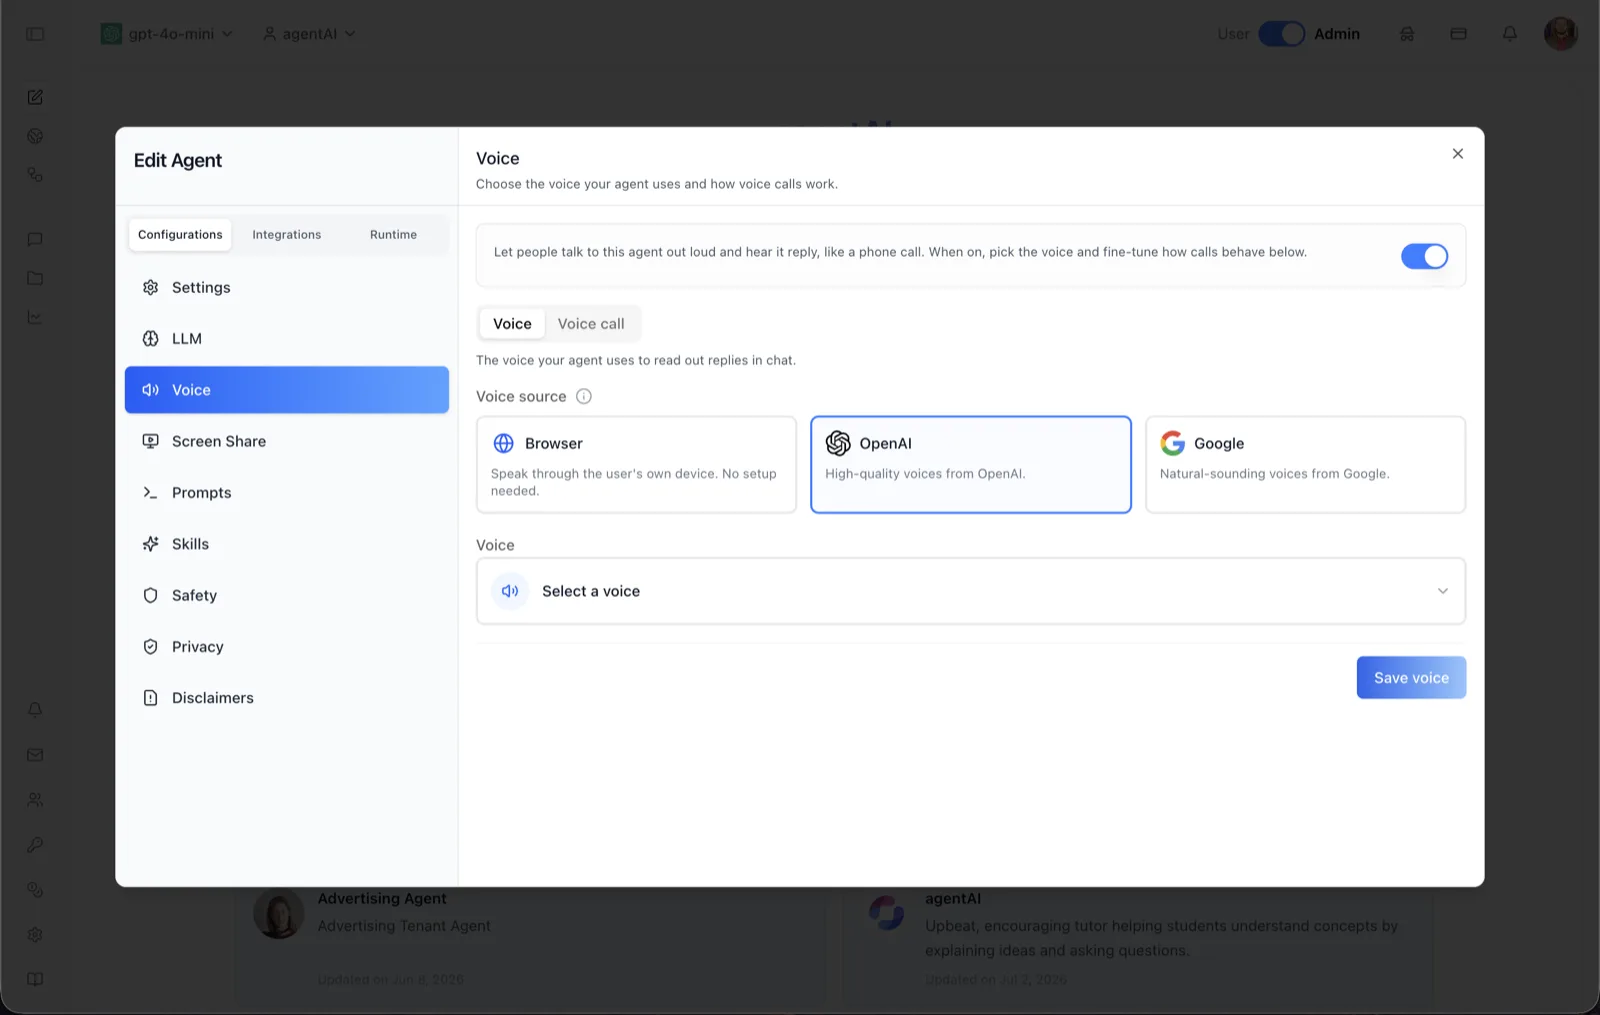
The Voice panel controls whether an agent can speak, which voice it speaks with, and how voice calls behave. Its header describes it simply: "Choose the voice your agent uses and how voice calls work." When voice is enabled, users can talk to the agent out loud and hear it reply, like a phone call.
The panel is split into two sub-tabs. The Voice sub-tab (documented on this page) selects the voice the agent uses to read out replies in chat, while the Voice call sub-tab configures how live voice calls behave. Voice calls run as real-time WebRTC sessions powered by LiveKit.
To reach this panel, open the Edit Agent modal for any agent, stay on the Configurations tab group, and select Voice in the left sidebar. The sidebar also lists Settings, LLM, Screen Share, Prompts, Skills, Safety, Privacy, and Disclaimers.
Target Audience
Administrator | Agent Builder
Settings Reference
Voice enablement toggle
The toggle at the top of the panel sits next to the text: "Let people talk to this agent out loud and hear it reply, like a phone call. When on, pick the voice and fine-tune how calls behave below." Turn it on to expose the voice and call options; the sub-tabs below let you pick the voice and adjust call behavior.
Voice / Voice call sub-tabs
Two pill-style sub-tabs switch between voice selection and call configuration. Voice covers "The voice your agent uses to read out replies in chat." Voice call covers call style, spoken language, provider, and call voice — see the Voice Call page for details.
Voice source
Three selectable cards choose where the agent's speech comes from:
- Browser — "Speak through the user's own device. No setup needed." Uses the built-in speech synthesis of the user's browser, so no voice picker appears for this source.
- OpenAI — "High-quality voices from OpenAI." Selecting this source reveals a searchable voice picker below.
- Google — "Natural-sounding voices from Google." Also reveals a searchable voice picker for Google voices.
The selected card is highlighted with a blue border (OpenAI in the screenshot).
Voice picker ("Select a voice")
When the OpenAI or Google source is selected, a Voice field appears with a "Select a voice" trigger. Clicking it opens a modal picker where you can search, browse, and preview voices before choosing one (see the Voice Selector page). Once a voice is saved, the trigger displays the currently selected voice, with an inline play button to preview it without opening the picker.
Voice instructions
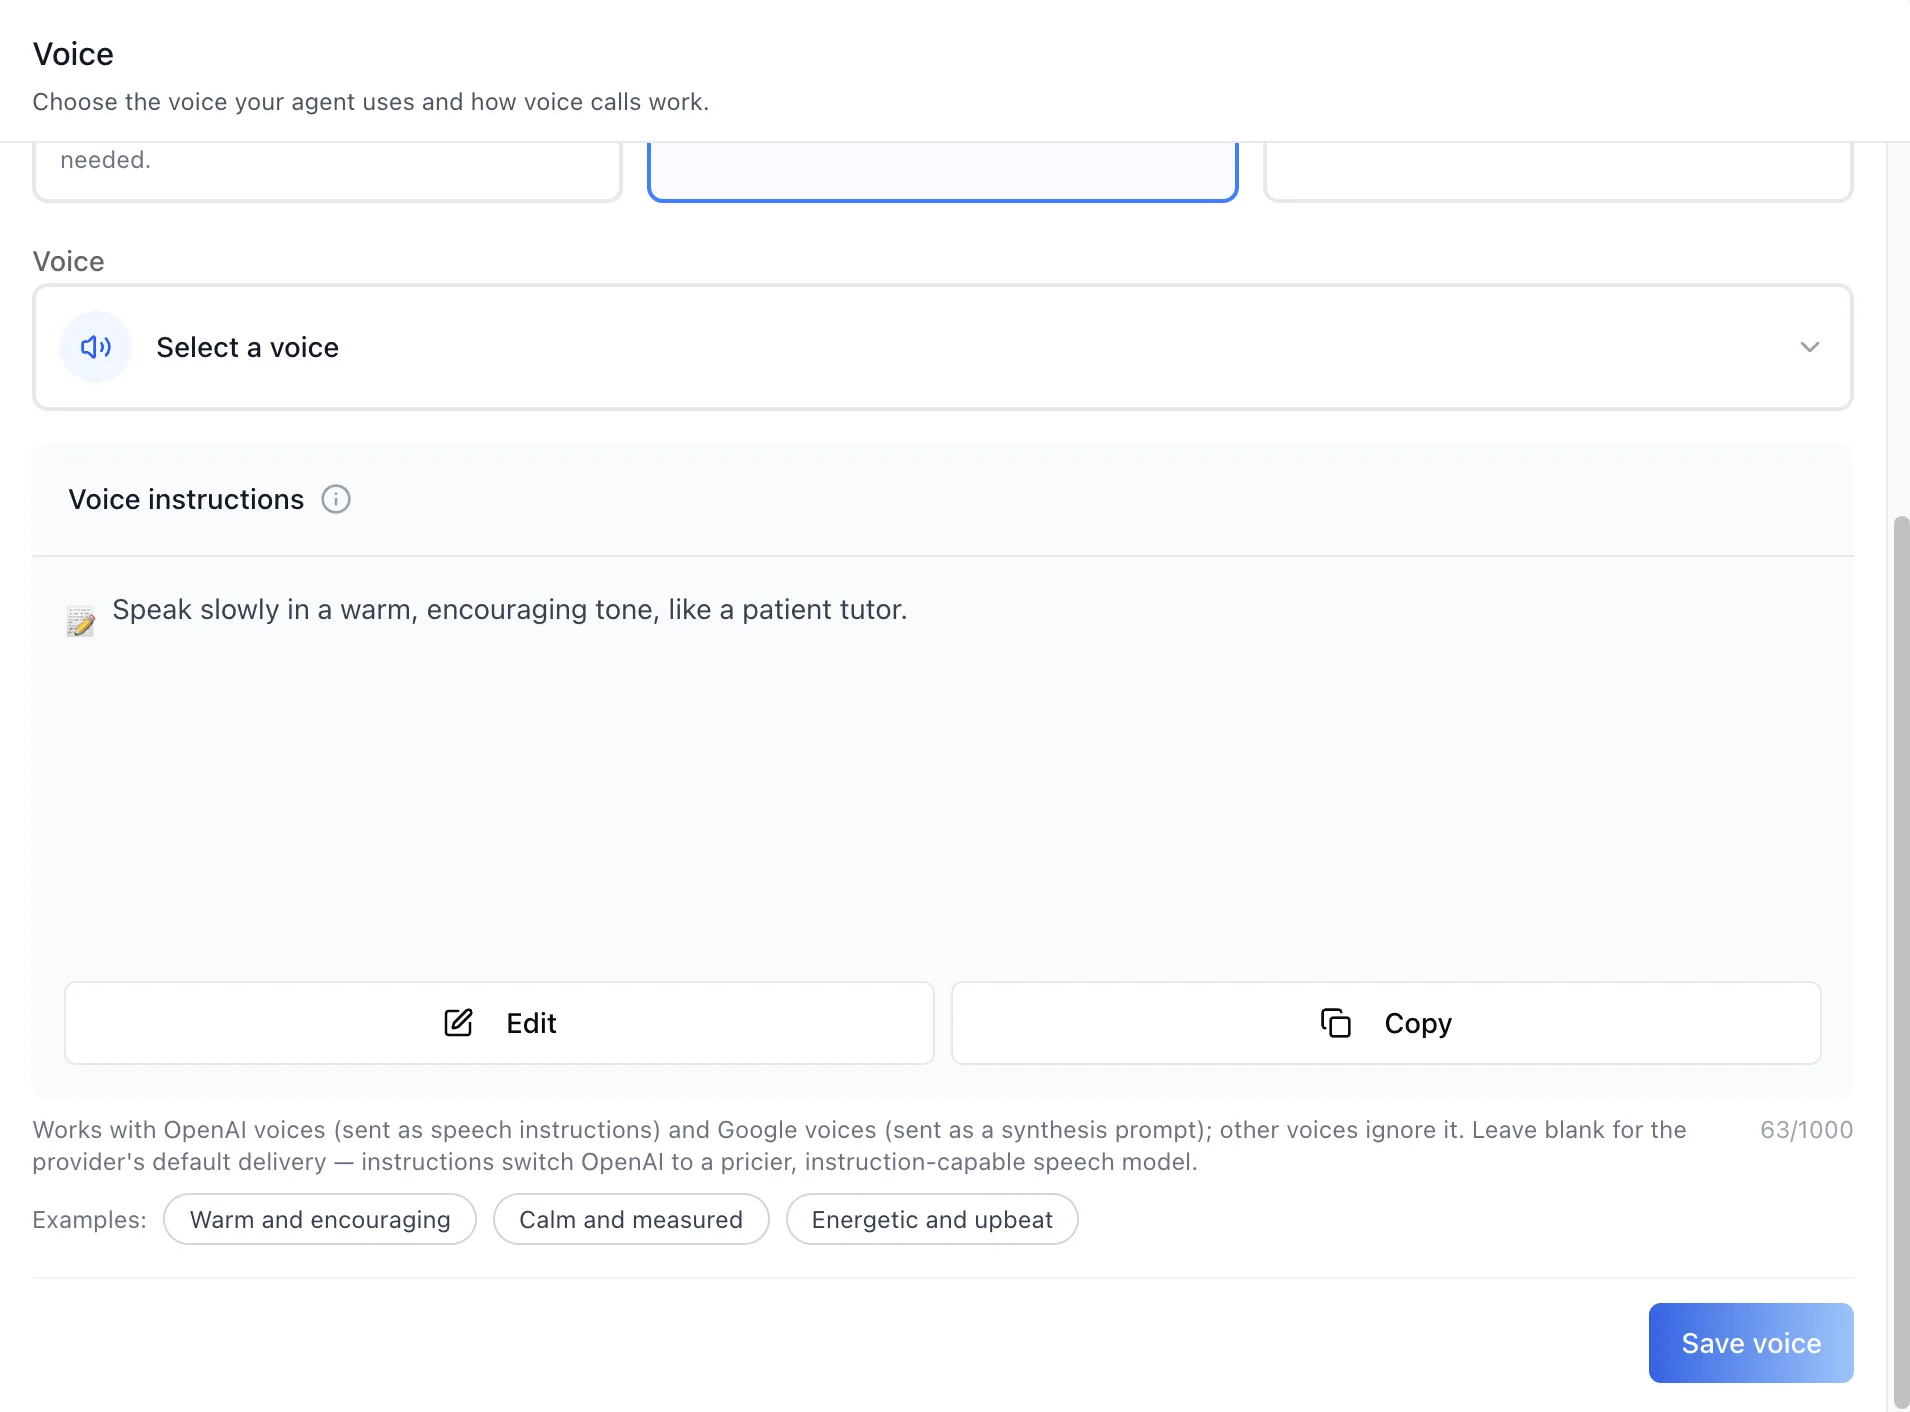
Below the voice picker sits an optional style prompt — a free-form instruction for how the voice should deliver replies, as distinct from which voice says them. "Speak slowly in a warm, encouraging tone, like a patient tutor" is the shape of it.
The card carries Edit, which opens a rich-text editor, a Copy action, an information tooltip, a counter that caps the prompt at 1,000 characters, and one-click example presets — Warm and encouraging, Calm and measured, Energetic and upbeat — for when you want a starting point rather than a blank field.
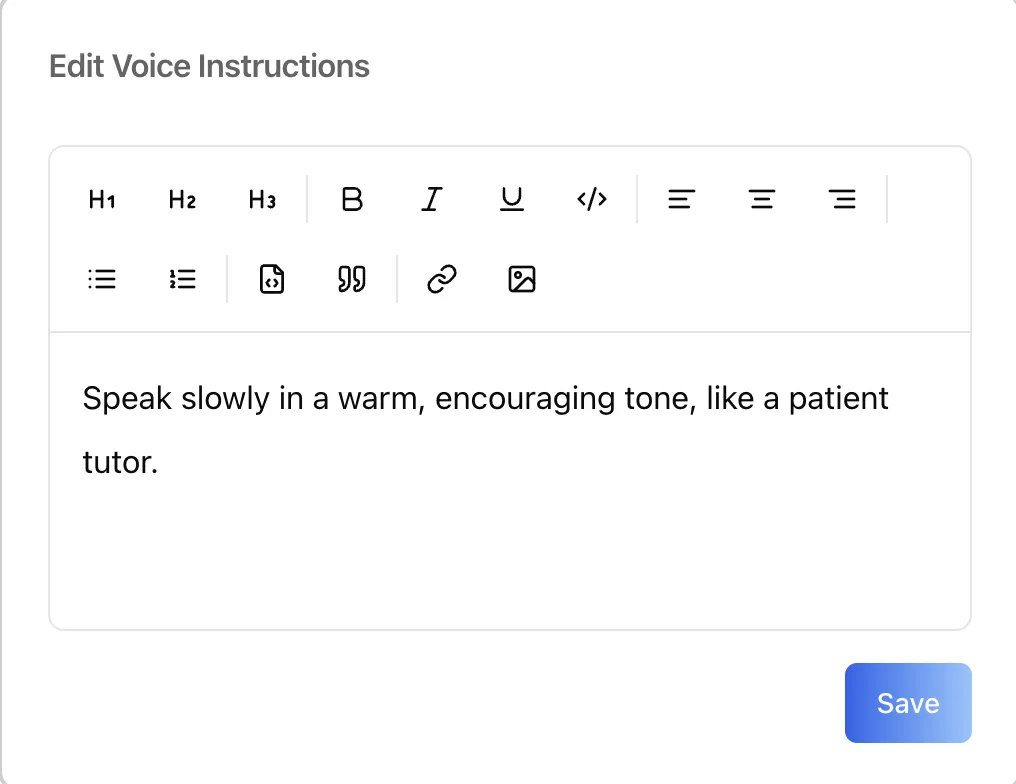
What the instruction does depends on the source: OpenAI treats it as speech instructions, Google as a synthesis prompt. Both read it as guidance on delivery, not as content to say.
Save voice
The Save voice button persists your voice source, voice selection, and voice instructions to the agent's settings. It is the save action for this sub-tab only; the Voice call sub-tab has its own Reset and Save controls.
How to Use
Step 1: Open the Voice panel
Open the Edit Agent modal, keep the Configurations tab selected, and click Voice in the sidebar.
Step 2: Enable voice
Turn on the toggle at the top so people can talk to the agent out loud and hear it reply.
Step 3: Pick a voice source
On the Voice sub-tab, click one of the three source cards: Browser (no further setup), OpenAI, or Google.
Step 4: Select a voice
If you chose OpenAI or Google, click Select a voice to open the voice picker. Search or browse the list, press a play button to hear a sample, and click a voice to select it.
Step 5: Describe how it should speak
Optionally open Voice instructions and write how the voice should deliver replies — pace, warmth, formality. Start from one of the example presets if it is easier to edit than to draft. The Browser source speaks through the listener's own device, so a style prompt has nothing to act on there; it applies to the OpenAI and Google sources.
Step 6: Save
Click Save voice. To configure how calls themselves behave (call style, spoken language, call provider and voice), switch to the Voice call sub-tab.
Behavior Notes
- A voice is only sent when you pick one. Leaving the picker untouched preserves whatever is already saved on the server rather than overwriting it — the same "absent means no change" contract applies to the voice instructions.
- Clearing an instruction is deliberate. Emptying the field and saving clears the stored prompt; not touching it leaves the existing one in place.
- The instruction guides delivery, not content. It shapes how replies are spoken; what the agent says is still governed by its prompts, tools, and guardrails.
- 1,000 characters is the ceiling. The counter is a hard cap, not a suggestion.