Agent Settings: Billing
Overview
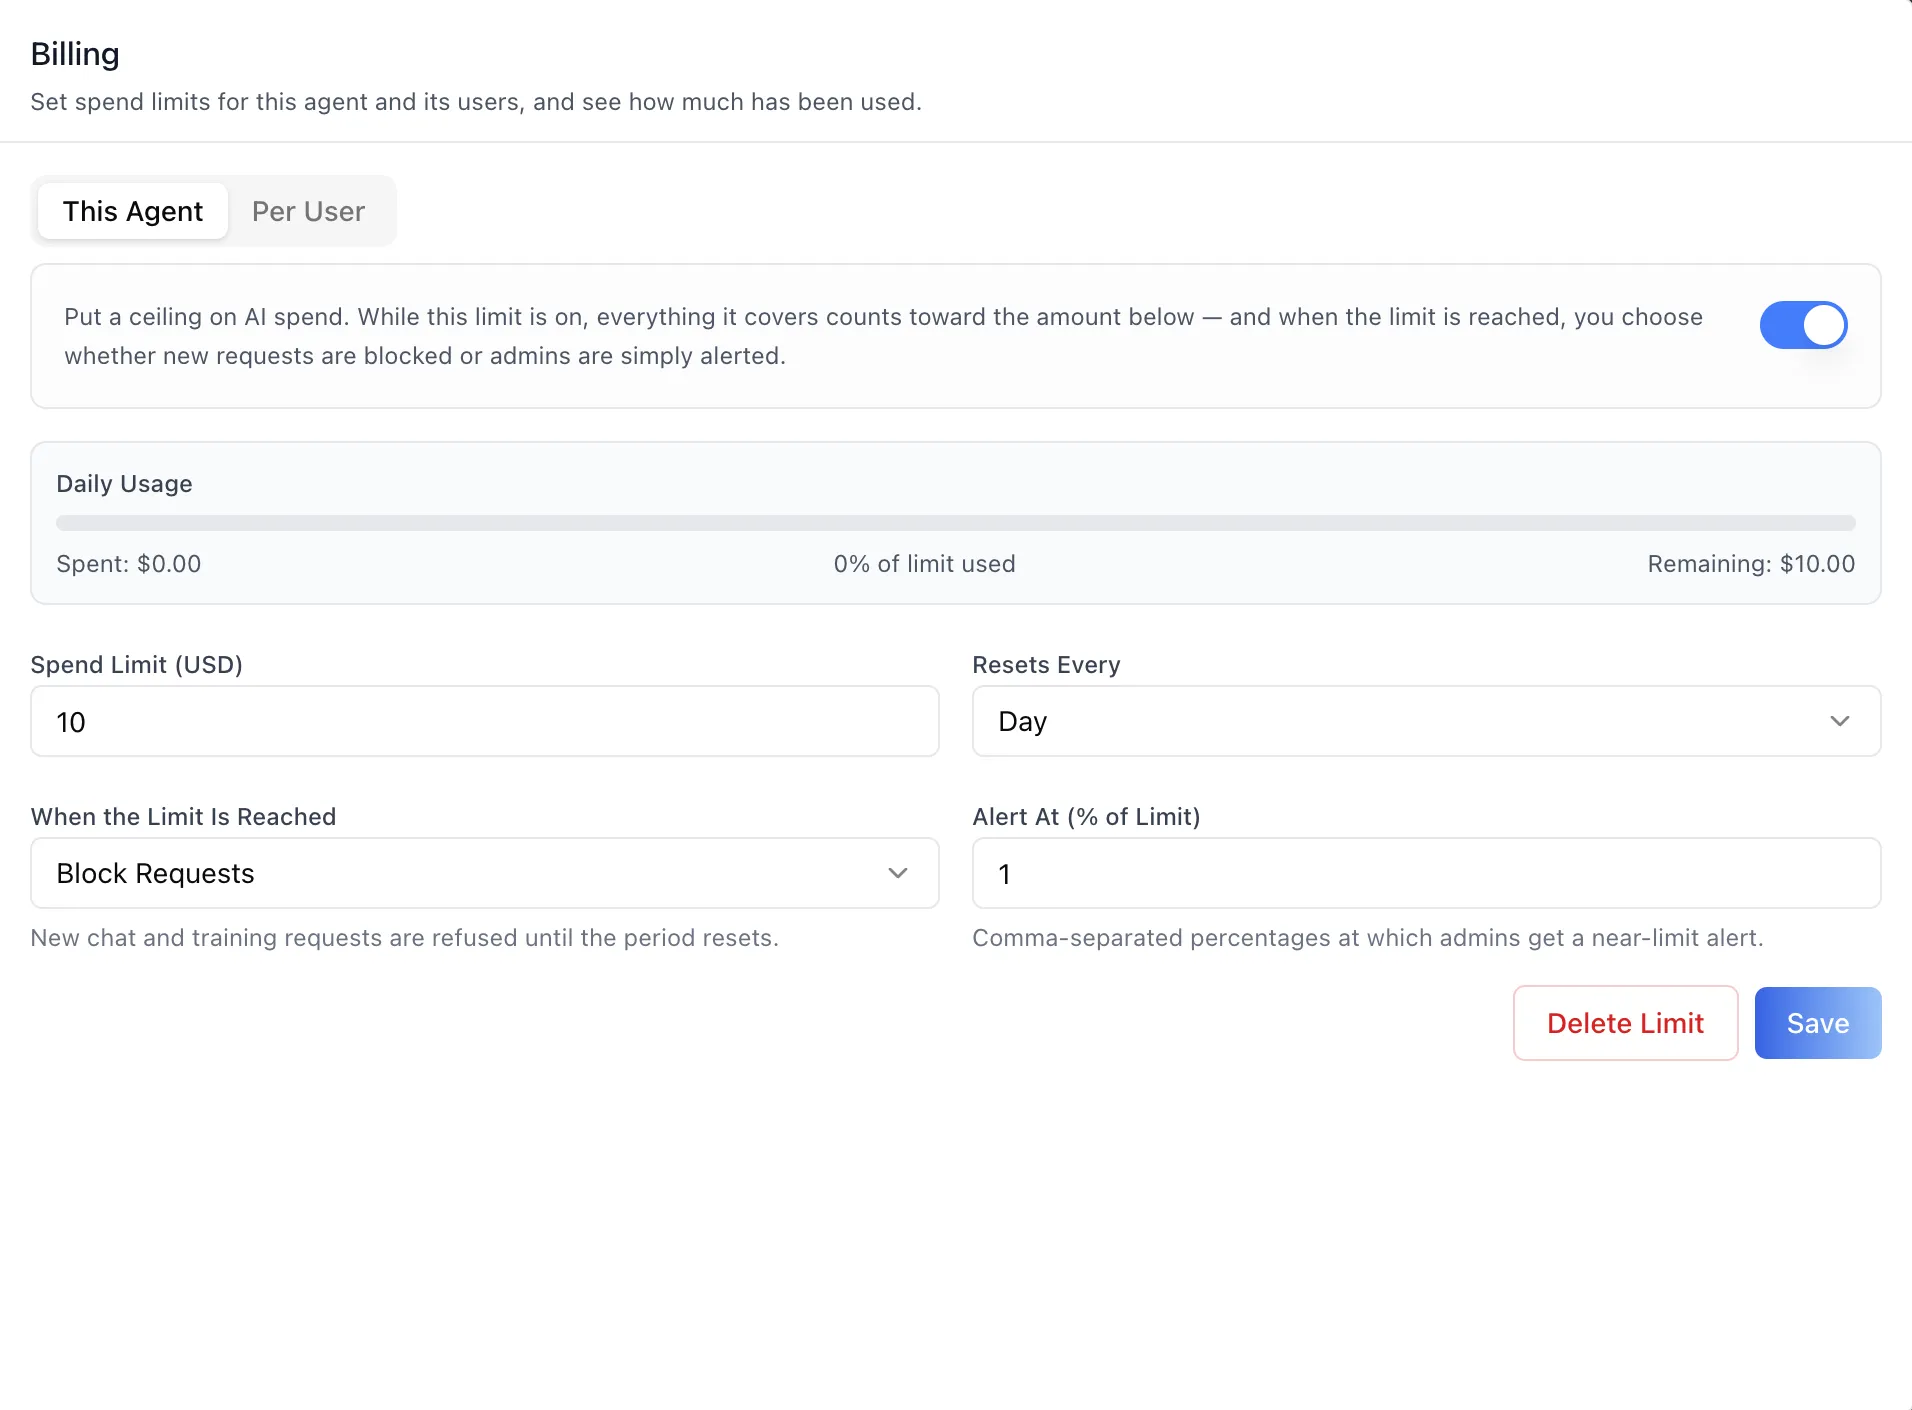
The Billing panel is where you put a ceiling on what an agent is allowed to spend on LLM calls. The panel header reads "Billing" with the subtitle "Set spend limits for this agent and its users, and see how much has been used."
Two sub-tabs match the two agent-level scopes the platform enforces. This Agent holds the agent's own cap — everything anyone spends talking to this agent counts against it. Per User holds explicit per-person caps on this same agent, so one heavy user can be limited without lowering the ceiling for everyone else.
Enforcement is server-side, not advisory. When a cap set to Block Requests is exceeded, new chat and training requests are refused until the period resets. Alongside these two sits a third, workspace-wide scope on the organization's Billing surface; when several caps apply, the tightest one governs.
To reach this screen, open the Edit Agent modal and select Billing in the left sidebar. Each sub-tab is permission-gated on its own endpoints, so a user without access to a scope sees a "no access" notice in place of that sub-tab's contents rather than an error.
Target Audience
Administrator | Finance / Operations | Agent Builder
Panel Reference
This Agent / Per User sub-tabs
The two agent-level scopes. This Agent edits the agent's single cap; Per User manages a list of caps that apply to named people on this agent. The panel ratchets its height as you switch, so moving between sub-tabs never shrinks the dialog underneath it.
Enable toggle
The capability gate on a cap — "Put a ceiling on AI spend." While it is on, everything the limit covers counts toward the amount; the fields collapse when it is switched off, and the flag is saved with the rest of the form.
Usage strip
On a cap that has been saved, a "Daily / Weekly / Monthly / Yearly Usage" strip sits above the fields with a progress bar and three figures: Spent, % of limit used, and Remaining. The bar is blue in normal use, amber from 80% of the limit, and red once the limit is passed, and it carries Disabled, Alert only, or Exceeded badges where they apply. Until a cap exists the panel reads "No spend limit configured yet — set an amount and save to create one."
Spend Limit (USD)
The ceiling itself, as a positive dollar amount.
Resets Every
The period the ceiling covers — Day, Week, Month, or Year. Spend accumulates within the period and starts again from zero when it rolls over.
When the Limit Is Reached
The enforcement mode. Block Requests refuses new chat and training requests until the period resets; Alert Only lets requests continue and alerts administrators instead. This is the single most consequential field on the panel — it decides whether a limit is a hard stop or a warning.
Alert At (% of Limit)
Comma-separated percentages, 80, 95 by default, at which administrators receive a near-limit alert. These fire under either enforcement mode.
Save and Delete Limit
Save creates the cap on the first save and updates it thereafter. Delete Limit appears once a cap exists and asks for confirmation before removing it.
Per User table
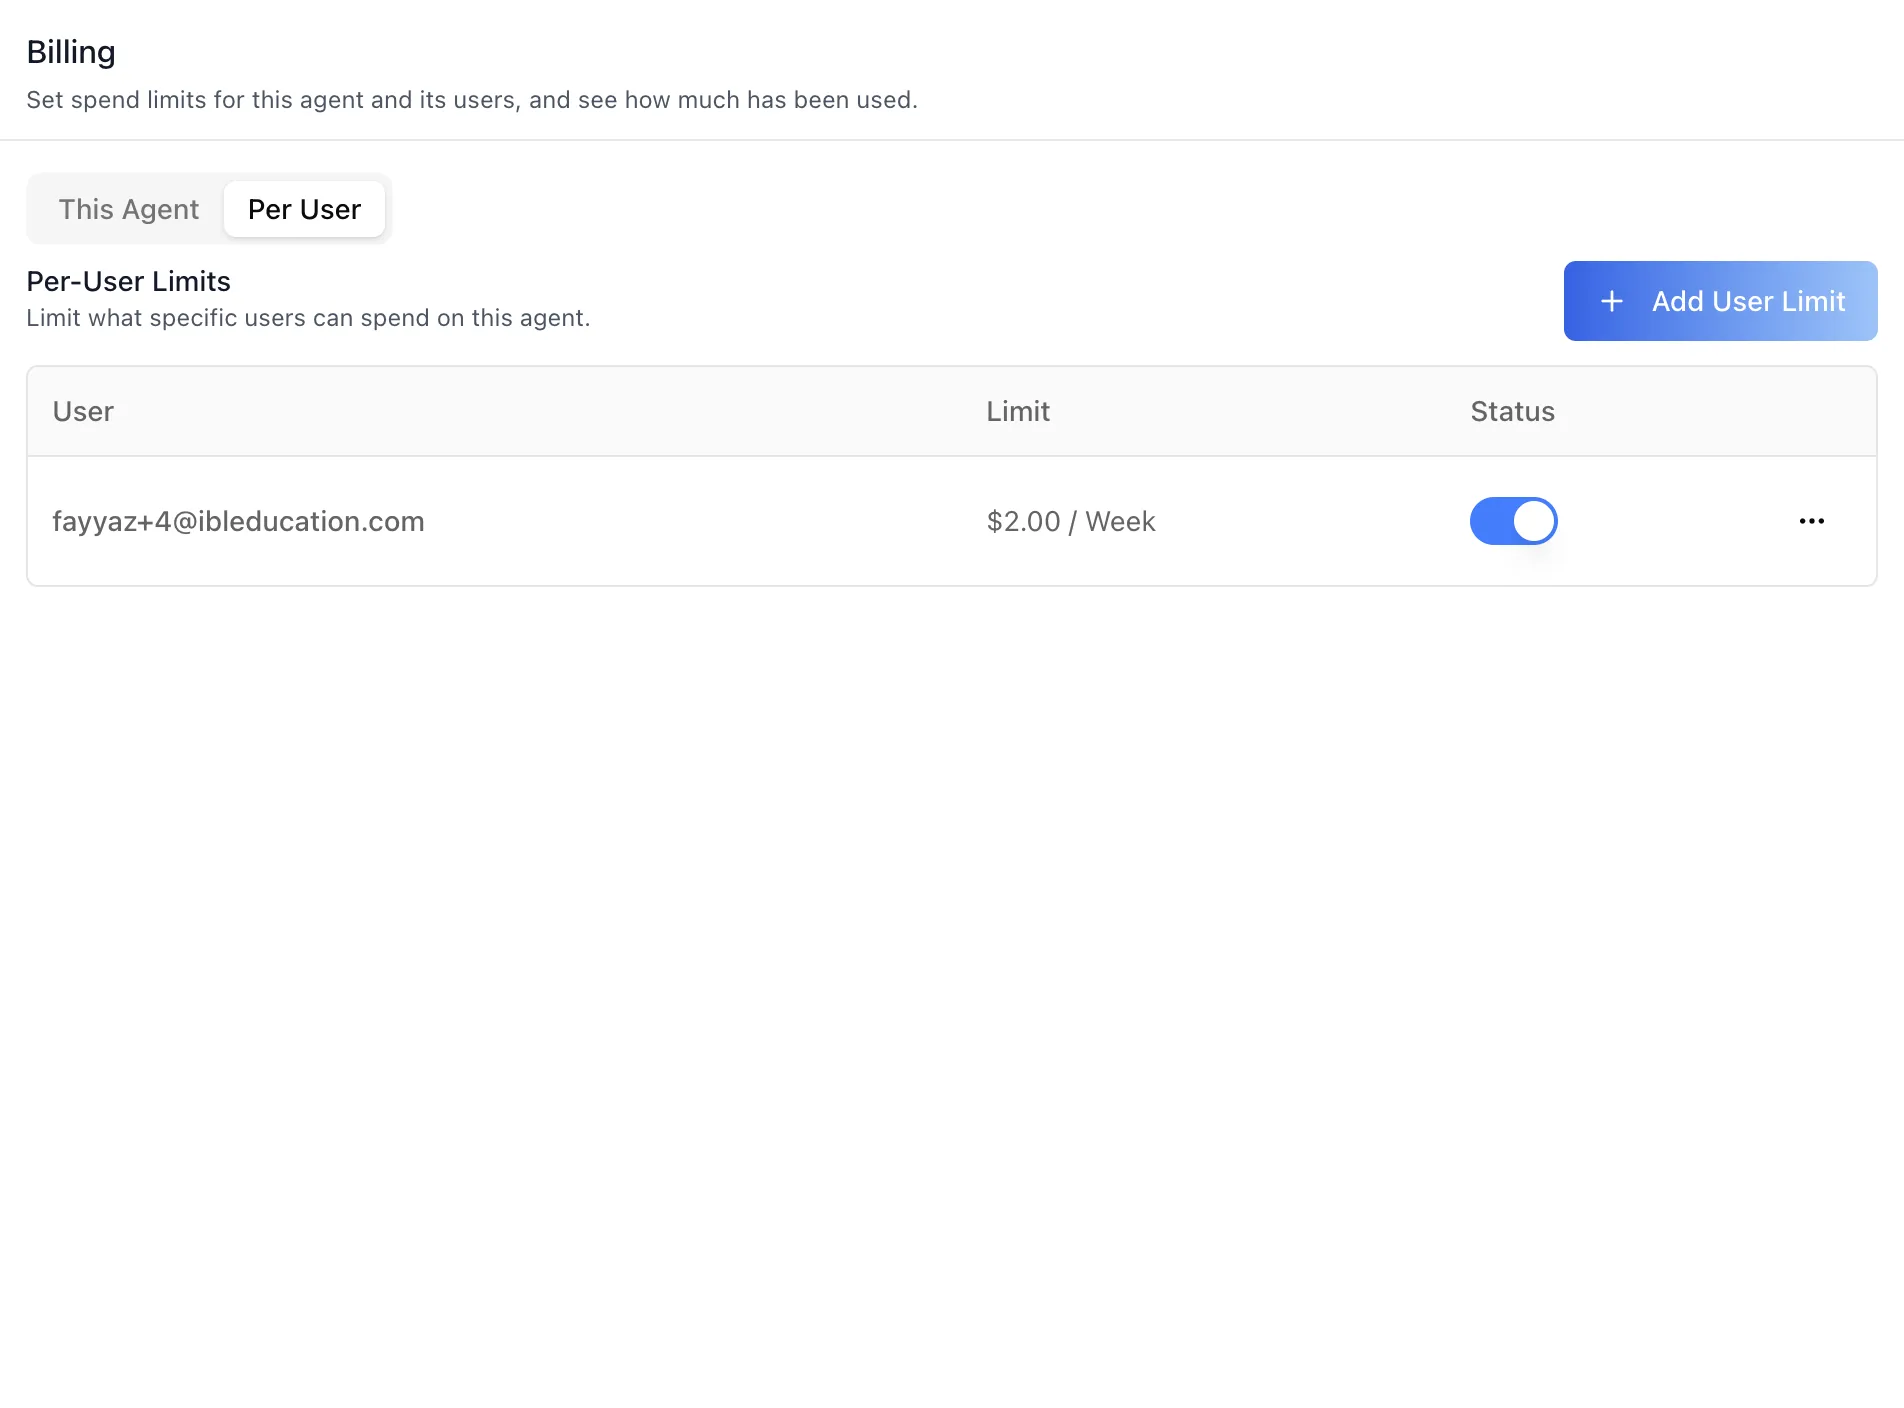
Each row is one person's cap on this agent: the User (shown by email, and clickable through to the same profile viewer the Management area uses), the Limit written as amount and period ($2.00 / Week), and a Status column whose toggle saves immediately, along with Exceeded and Alert-only badges where they apply.
Row actions menu
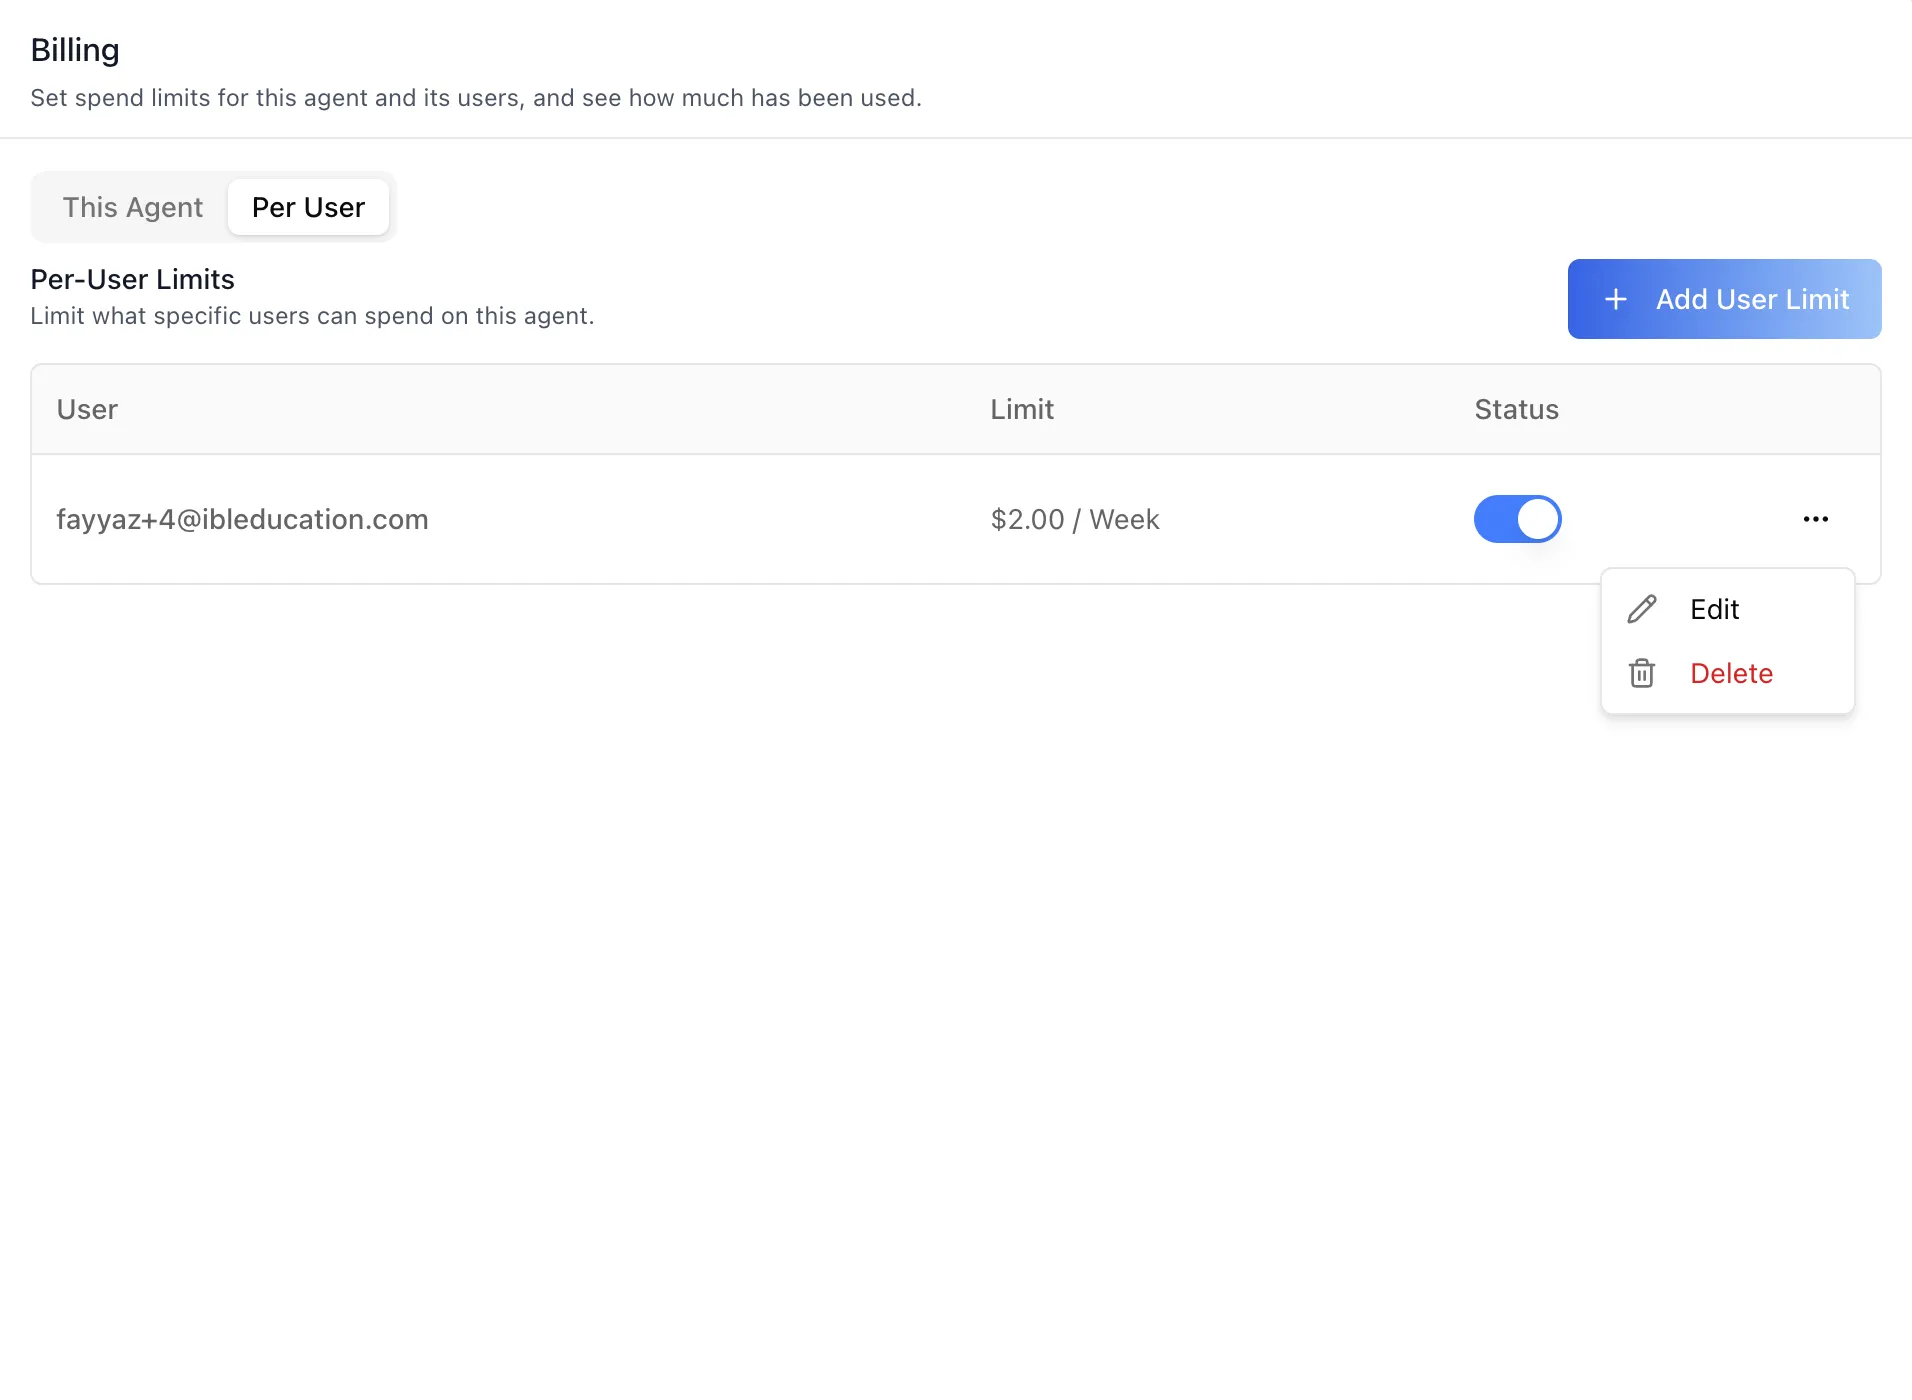
The per-row menu offers Edit — which opens the same spend-cap form for that person — and Delete, which confirms against the user's email before removing the cap.
Add User Limit
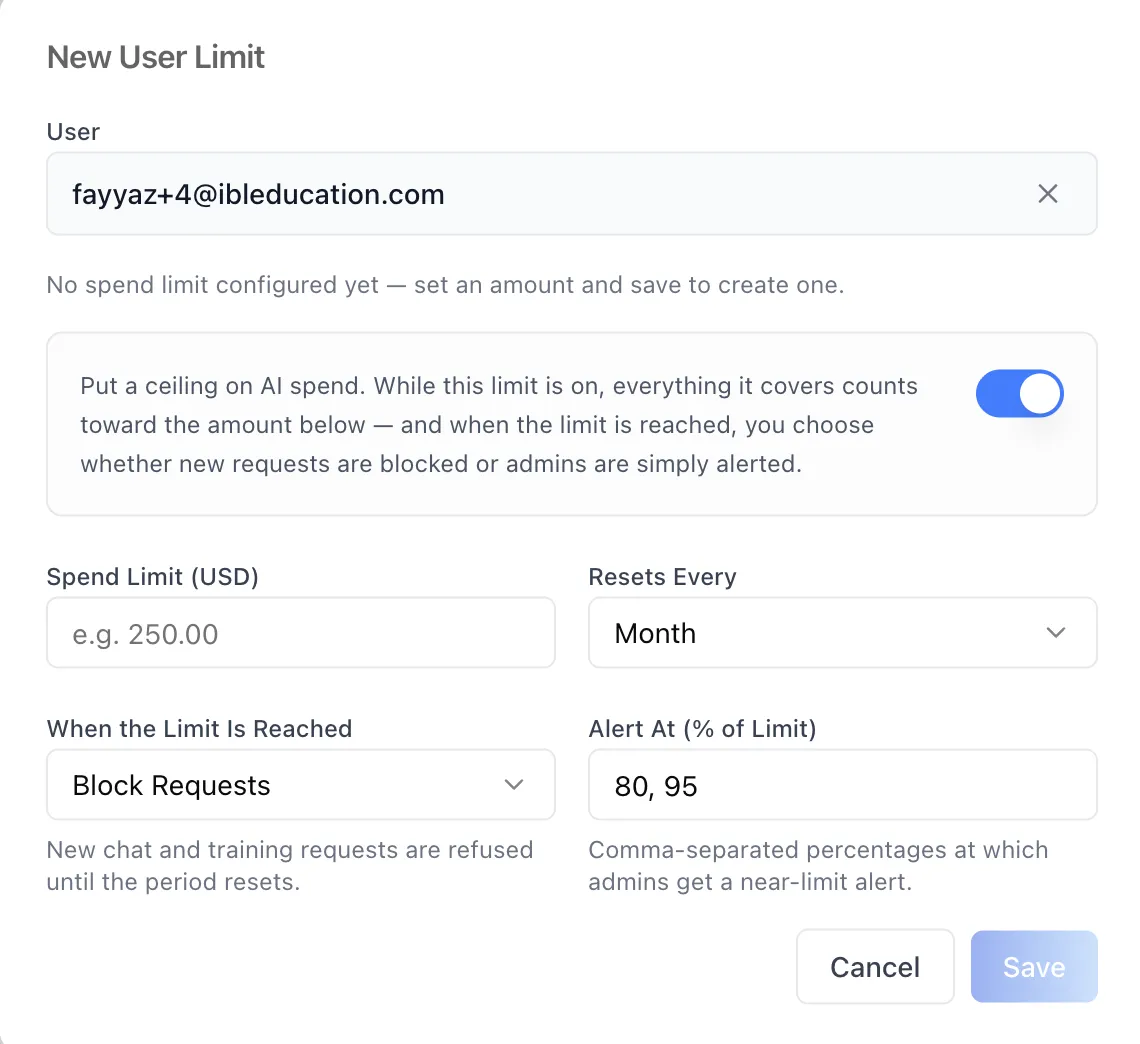
Opens the New User Limit modal. Pick the person through the platform-user search — it needs at least two characters and offers only real accounts, so a limit can never be attached to a mistyped name — then fill in the same fields as the agent's own cap.
Edit User Limit
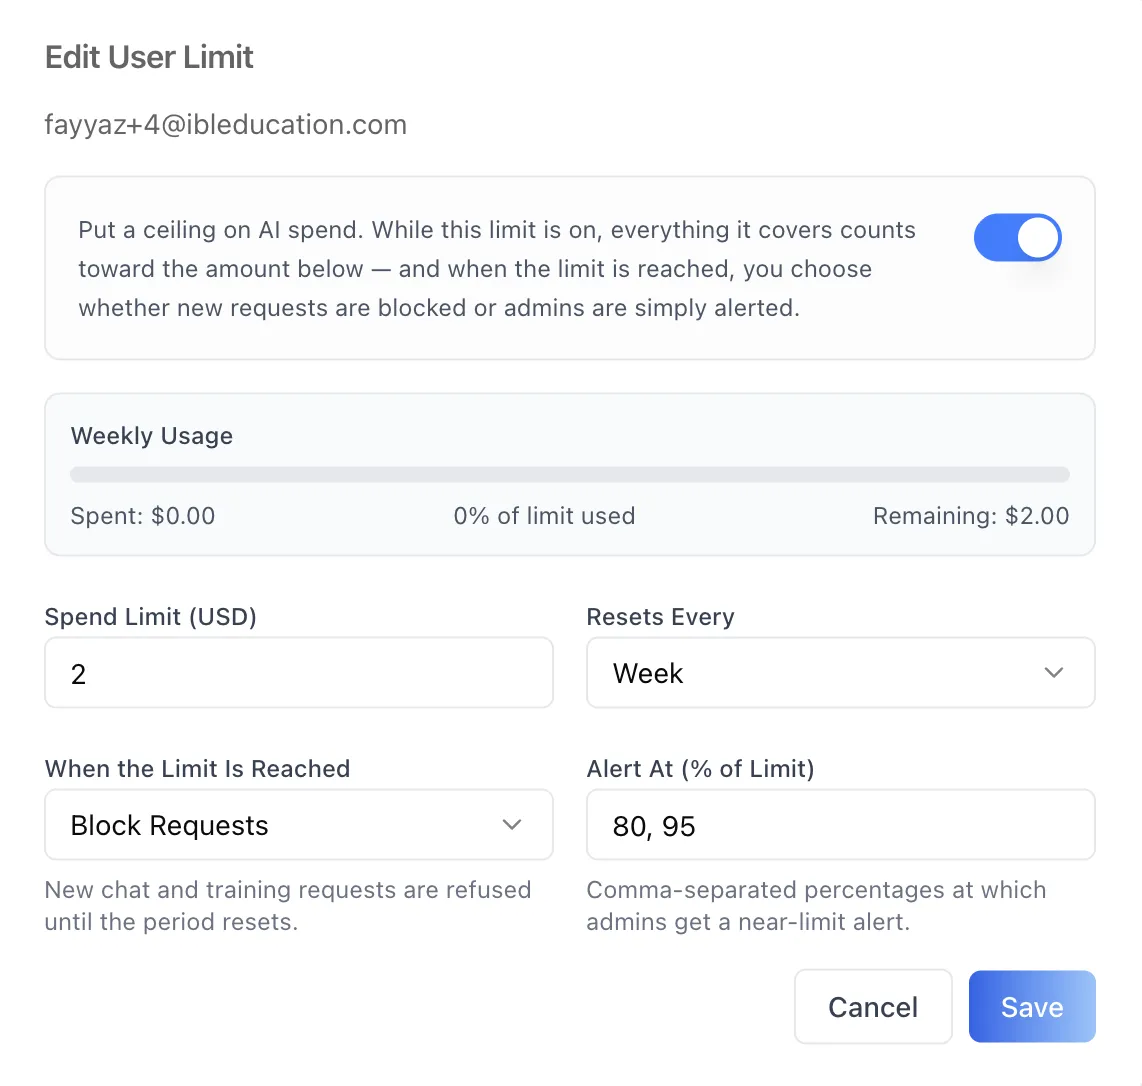
Editing skips the picker and opens the form directly on the existing cap, since the person it belongs to is already settled.
How to Use
Step 1: Open the Billing panel
In the Edit Agent modal, select Billing in the left sidebar. It opens on This Agent.
Step 2: Set the agent's own ceiling
Switch the enable toggle on, enter a Spend Limit (USD), and choose how often it resets. A brand-new agent has no cap yet, so the panel shows the "no spend limit configured" state until your first save.
Step 3: Decide whether the limit stops work or warns
Under When the Limit Is Reached, choose Block Requests for a hard ceiling — a runaway agent stops costing money — or Alert Only where interrupting the work would be worse than the overspend.
Step 4: Set the alert thresholds
Leave the default 80, 95, or enter your own percentages. These are what give an administrator time to act before a hard block lands.
Step 5: Save, then watch the usage strip
Save to create the cap. From then on the panel shows spend against the limit every time you open it, and the bar turns amber at 80% and red once the limit is passed.
Step 6: Limit individual users where needed
Switch to Per User, click Add User Limit, search for the person, and give them their own amount, period, and enforcement mode. Their spend still counts toward the agent's cap — a per-user limit narrows one person's share, it does not exempt them.
Behavior Notes
- The tightest cap governs. Three scopes exist: the workspace-wide limit on the organization's Billing surface, this agent's limit, and a per-user limit on this agent. A request has to clear all of the ones that apply, so the strictest is the one that decides.
- Enforcement really is server-side. With Block Requests, an exceeded cap makes chat and training requests fail with an HTTP
429whose body carries the error codespend_cap_exceeded— a distinct code, so a spend block can be told apart from a genuine provider rate limit. - An empty first run is normal. Until a cap is saved there is no record to read, and the panel treats that as its first-run state rather than an error. The first save creates it.
- Usage figures are read-only. Spend, remaining, and exceeded status are all reconciled on the server and only displayed. What you set is the amount, the period, the enforcement mode, the alert thresholds, and whether the cap is enabled.
- Toggling status saves immediately. The Status switch in the Per User table writes straight away, without opening the form — it re-submits the cap with the enabled flag flipped.
- Caps are keyed by account, displayed by email. The API identifies a per-user cap by username, while the panel deliberately shows the email everywhere, which is why the user is chosen from a search rather than typed in.
- Each scope is permission-gated separately. A role may be allowed to see the agent's own cap but not the per-user list, or the reverse; the sub-tab you cannot see is replaced by a no-access notice rather than hidden.
Building Spend Limits Into Your Own App
The Billing panel is one of the agent-settings tabs published in the ibl.ai SDK, so the same limits can be managed from a product you build yourself. Install the iblai/vibe skills and mount <AgentSpendCapsTab> from @iblai/iblai-js/web-containers/next inside an AgentSettingsProvider; every label is overridable through a labels prop.
For chat surfaces there is also SpendCapUsage, a learner-safe indicator that renders progress zones and percentages but never dollar amounts, warns as a user nears a limit, and shows a blocked banner once a hard cap is exceeded. The reusable skill for this workflow is iblai-vibe-agent-billing, and the SDK overview is at Vibe SDK.