Organization Settings: Alerts
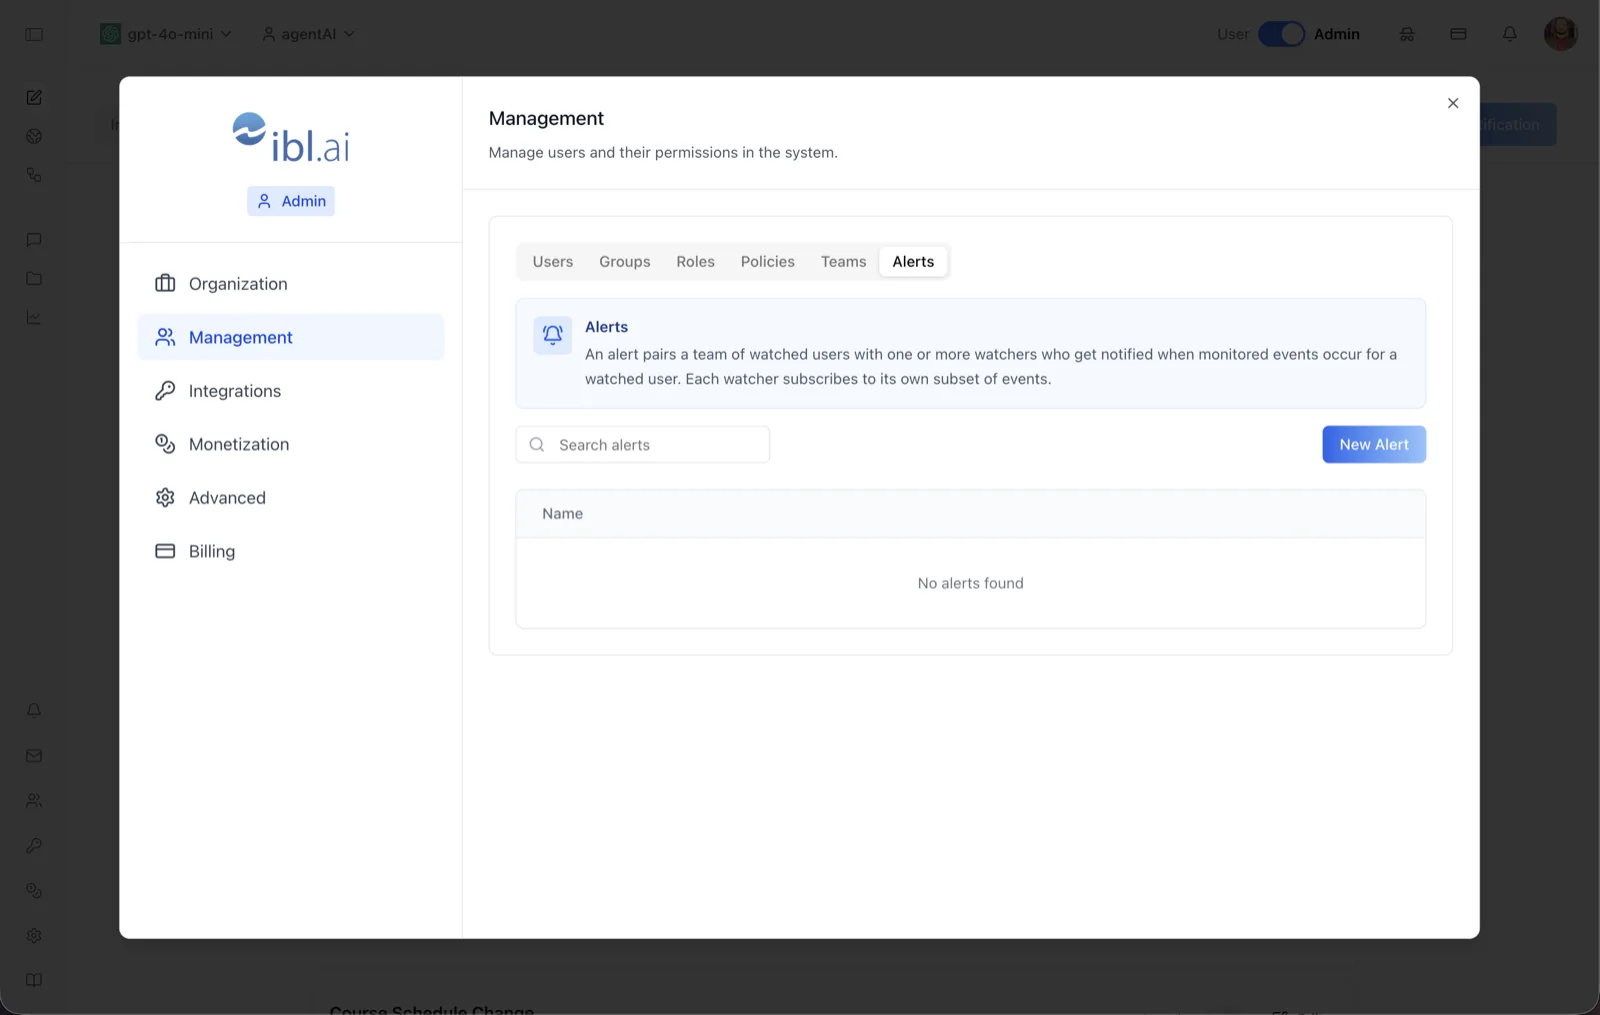
Overview
The Alerts tab configures activity monitoring. As the on-screen description says: "An alert pairs a team of watched users with one or more watchers who get notified when monitored events occur for a watched user. Each watcher subscribes to its own subset of events."
Alerts are how supervisors stay informed without polling dashboards: pick the users whose activity matters, pick who should hear about it, and choose which events each watcher cares about. Different watchers on the same alert can subscribe to different event sets.
To reach it, switch the top-bar toggle to Admin, open the settings dialog, choose Management, and select the Alerts tab (alongside Users, Groups, Roles, Policies, and Teams).
Target Audience
Administrator
Fields and Controls
Search alerts
A search box that filters the alert list by name as you type.
New Alert
Opens the New Alert dialog with three parts. Name (required) labels the alert. Watched Users — described in the dialog as "Users whose activity is monitored" — is a type-to-search picker for the accounts being observed. Watchers — "Users who receive notifications when watched users perform selected actions" — is a second picker where each added watcher gets their own events dropdown.
Events selector (per watcher, in the dialog)
Each watcher row has a combobox (showing "No events" or "N events selected") that opens a checkbox list of monitored event types. Checking events subscribes that watcher to exactly those occurrences for the alert's watched users.
Name column
The alert's name. Each row has edit (pencil) and delete (trash) actions on the right.
Empty state
When nothing is configured yet, the table shows "No alerts found."
Pagination
Alerts page through with pagination controls below the table when the list grows.
How to Use
Step 1: Open the Alerts tab
In Admin mode, open the settings dialog, click Management, and select Alerts.
Step 2: Create an alert
Click New Alert and give it a descriptive name (e.g., "New student activity").
Step 3: Choose watched users
In Watched Users, search for and add each account whose activity should be monitored.
Step 4: Add watchers and their events
In Watchers, add each person who should be notified, then open their events dropdown and check the event types they want. Repeat per watcher — each keeps an independent subscription.
Step 5: Save and maintain
Save the alert; it appears in the table. Use the pencil icon to adjust users, watchers, or event subscriptions later, or the trash icon to remove the alert.