Organization Settings: Monetization
Overview
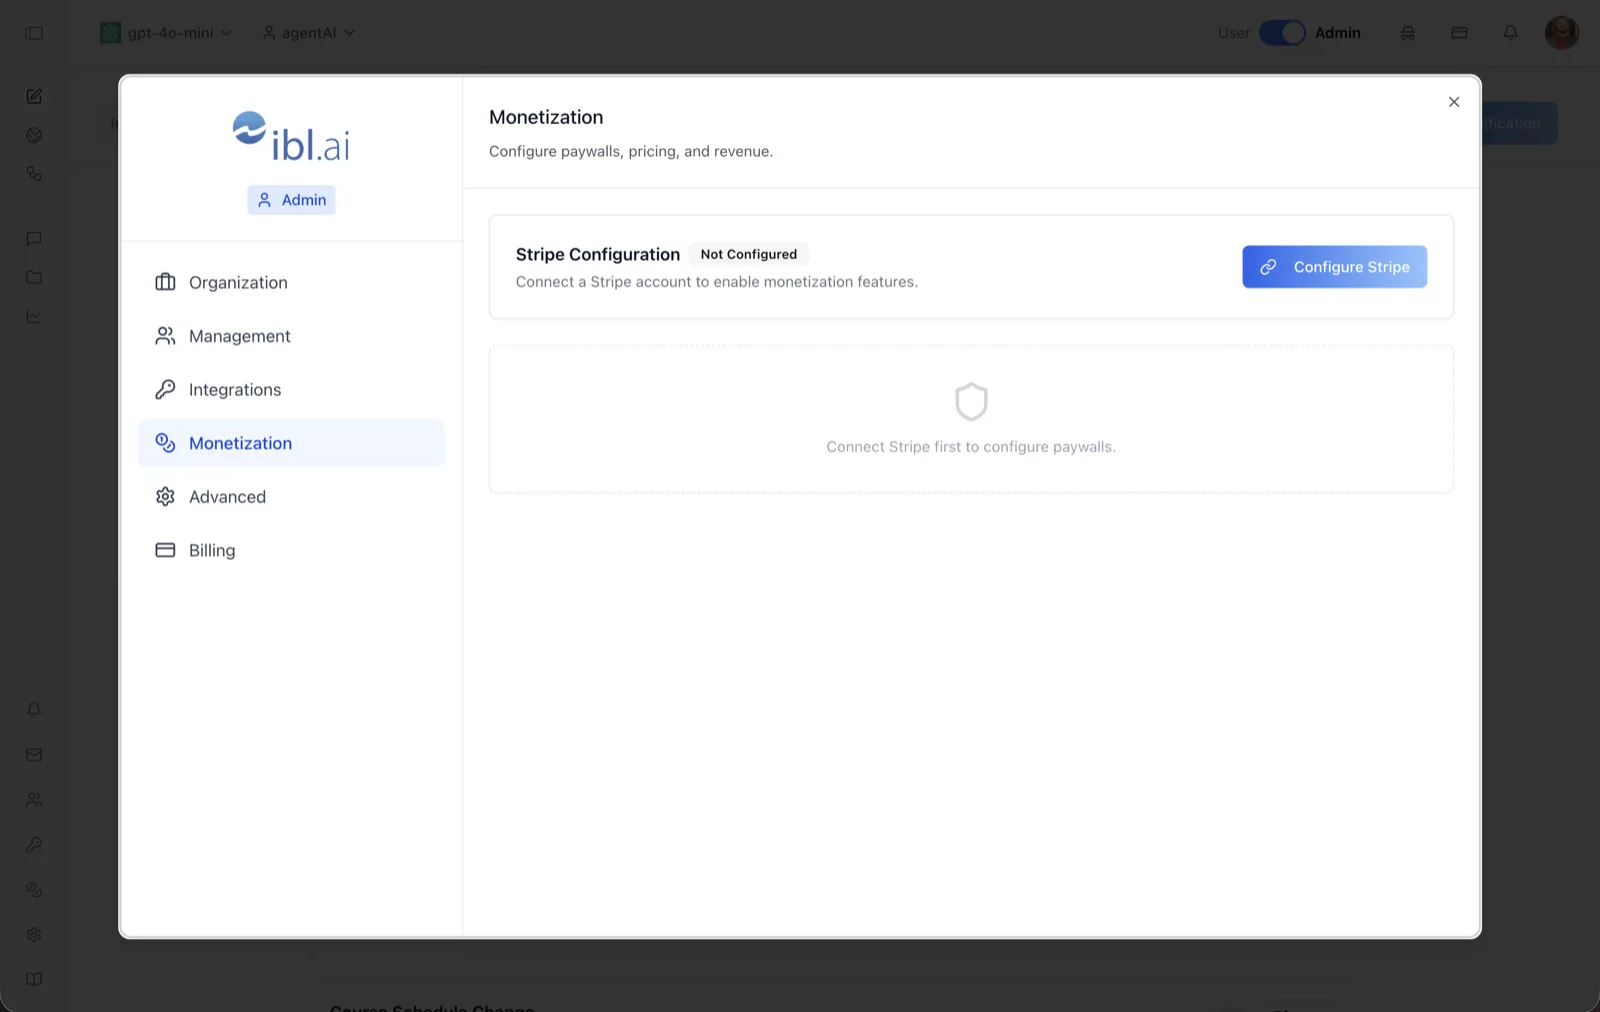
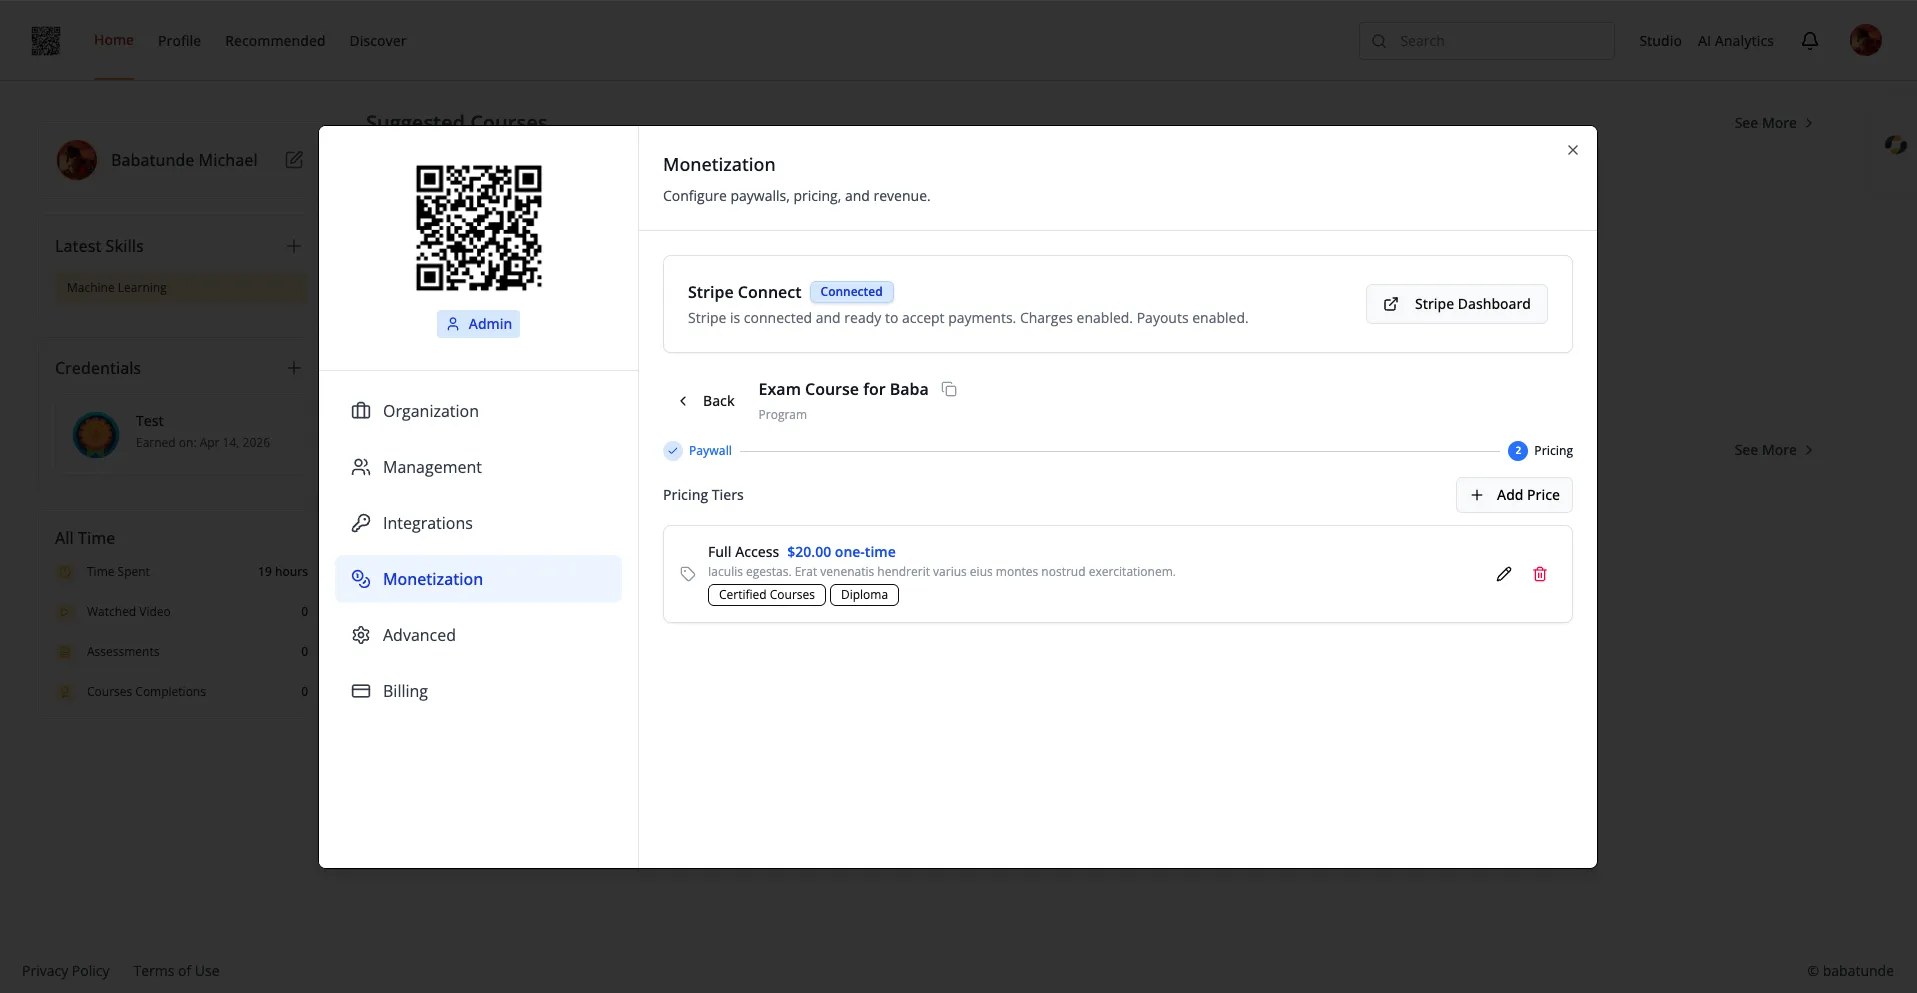
The Monetization page lets an organization sell access to its content and agents. The header reads "Monetization — Configure paywalls, pricing, and revenue," and everything on it is powered by a connected Stripe account that receives the payments.
Setup is two-stage: first connect Stripe, then configure paywalls. Until Stripe onboarding is complete, the paywall area stays disabled with the message "Connect Stripe first to configure paywalls." — which is the state shown in the screenshot.
To reach it, switch the top-bar toggle to Admin, open the settings dialog, and select Monetization in the left sidebar. (The entry appears when monetization is enabled for the organization and you have permission to manage it.)
Target Audience
Administrator
Sections and Controls
Stripe Configuration status badge
Shows the connection state: Not Configured (no Stripe account yet — "Connect a Stripe account to enable monetization features."), Incomplete (account created but onboarding unfinished), or Configured (connected and ready, with charges and payouts enabled).
Configure Stripe
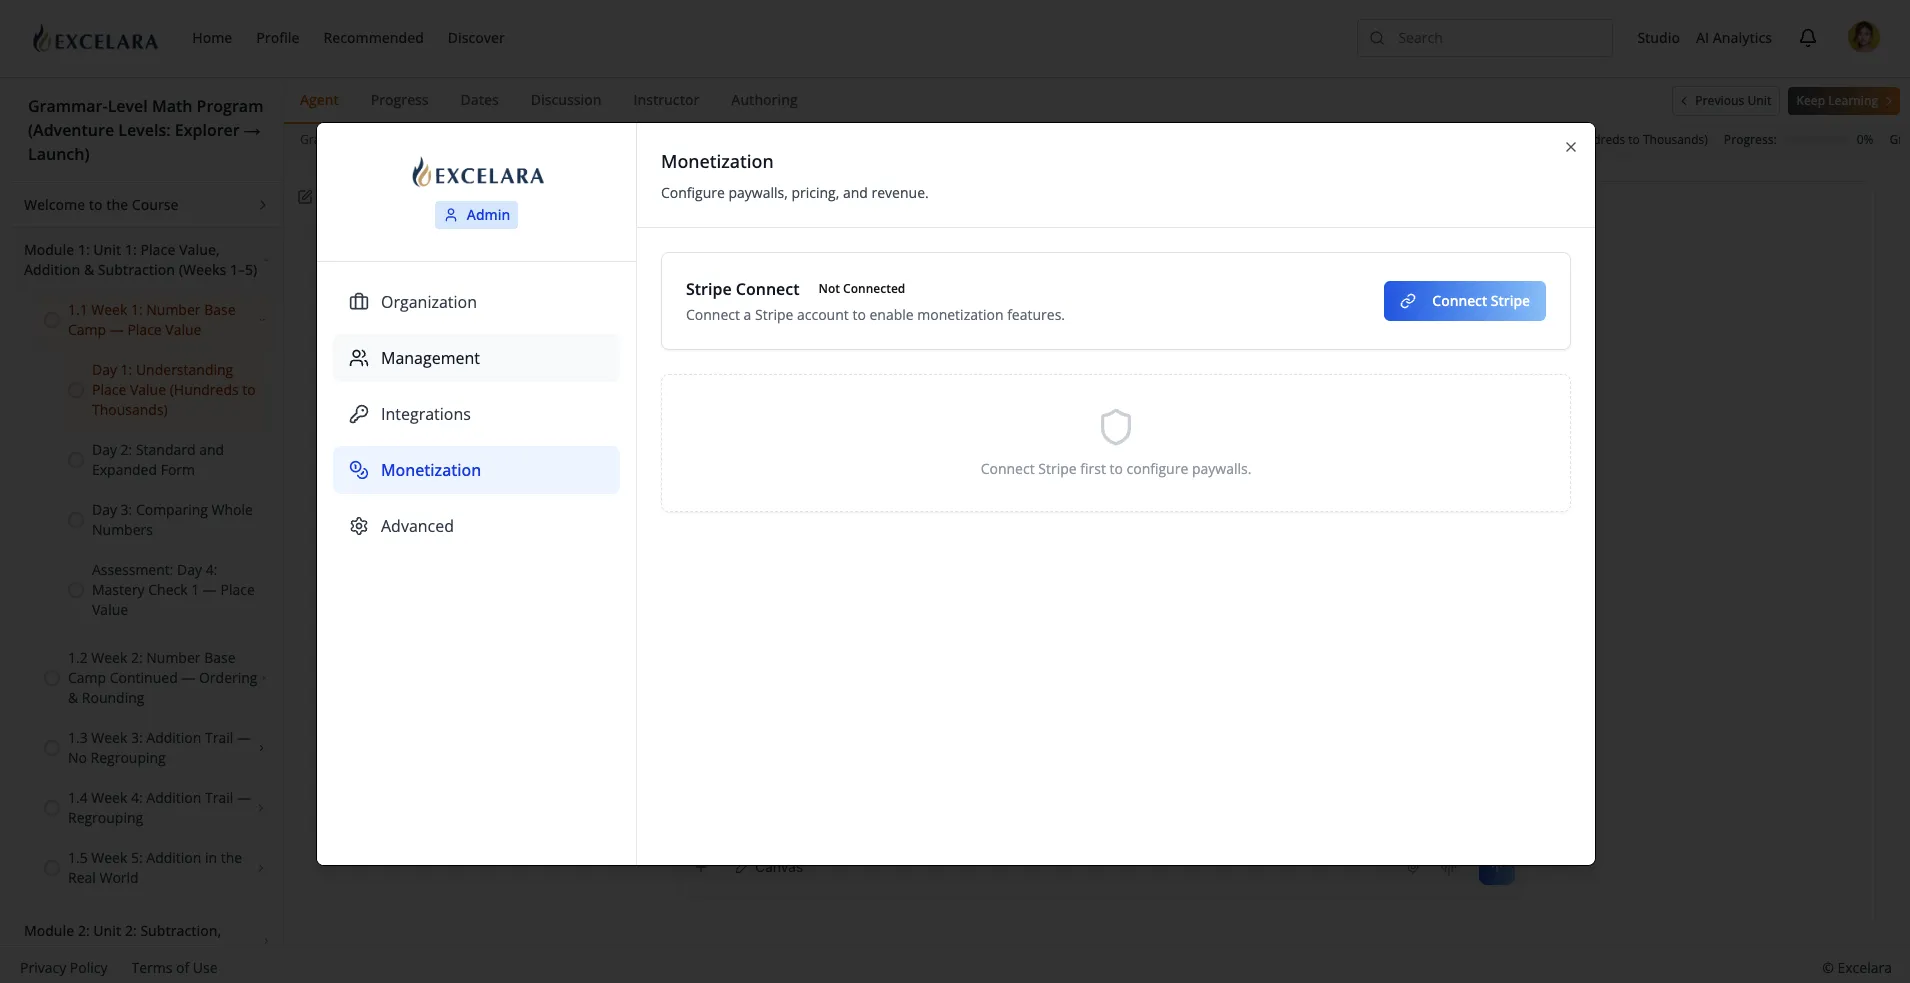
Starts Stripe Connect onboarding: you are redirected to Stripe to create or link an account (as a company), then returned to this page. If onboarding was interrupted, the button reads Complete Setup; once configured it becomes Stripe Dashboard, which opens your Stripe account in a new tab.
Paywall configuration area
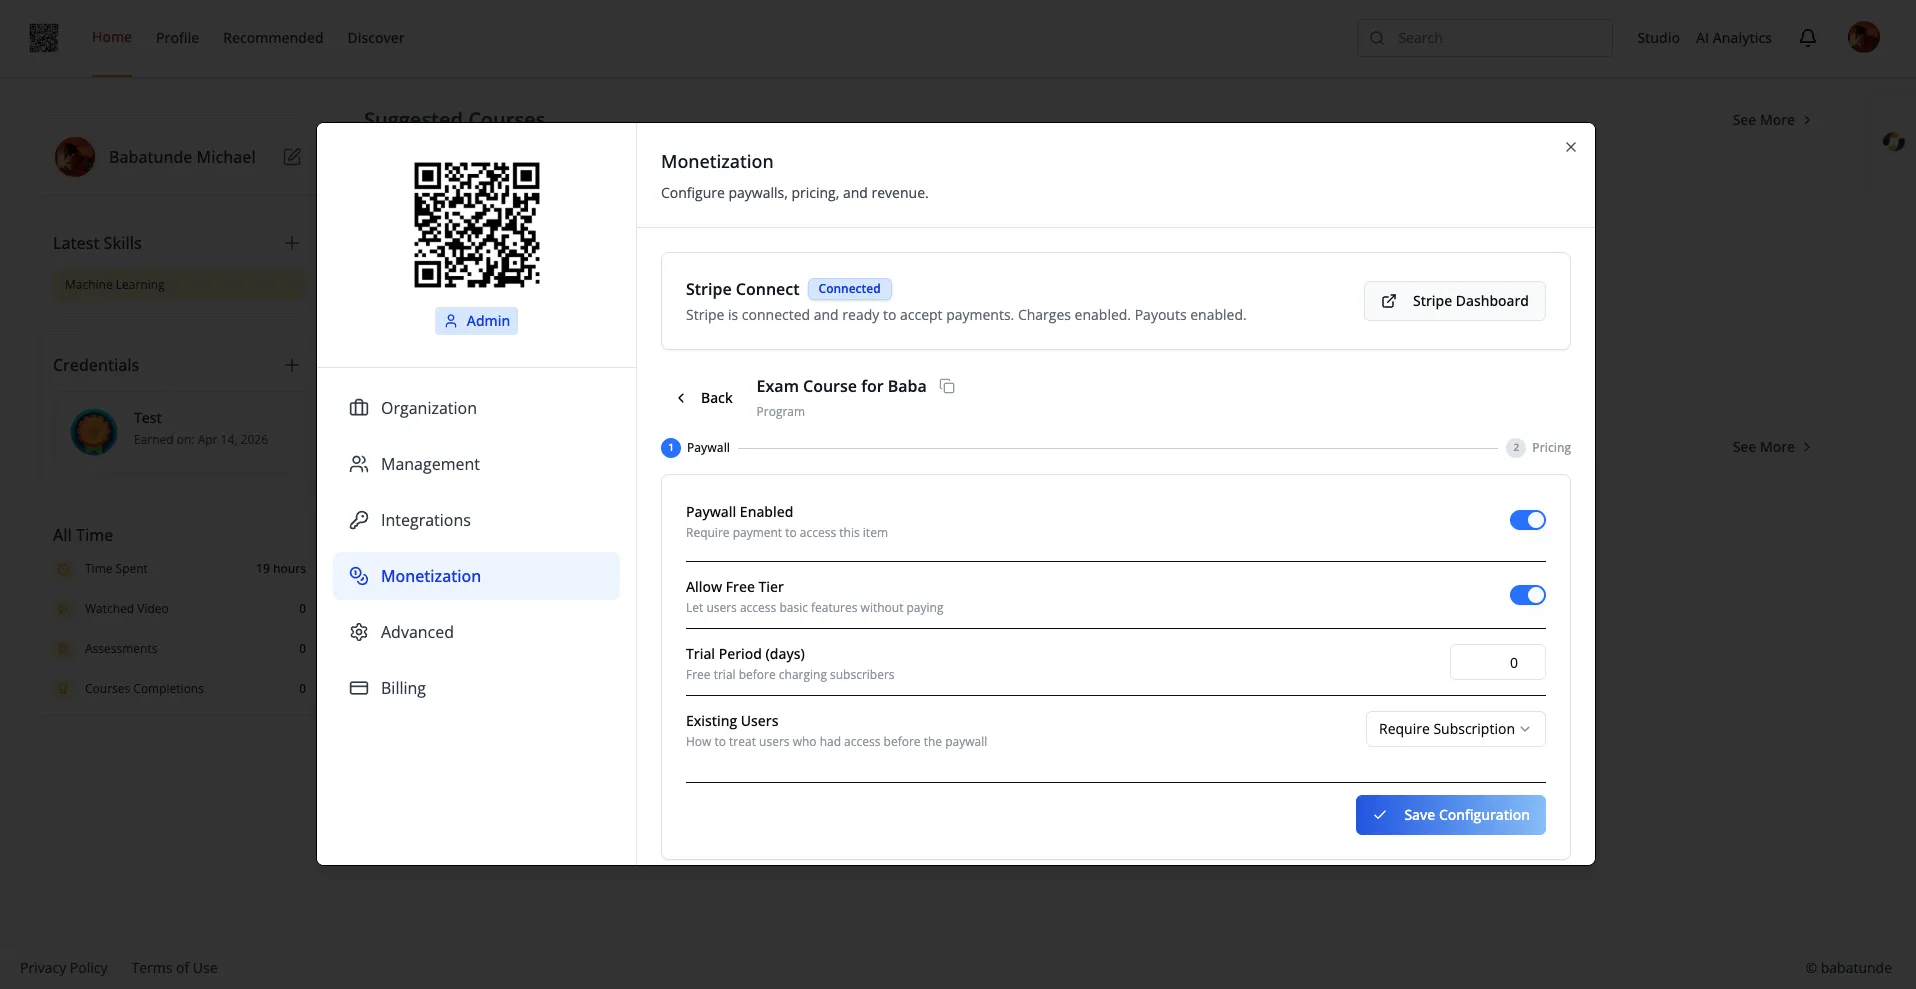
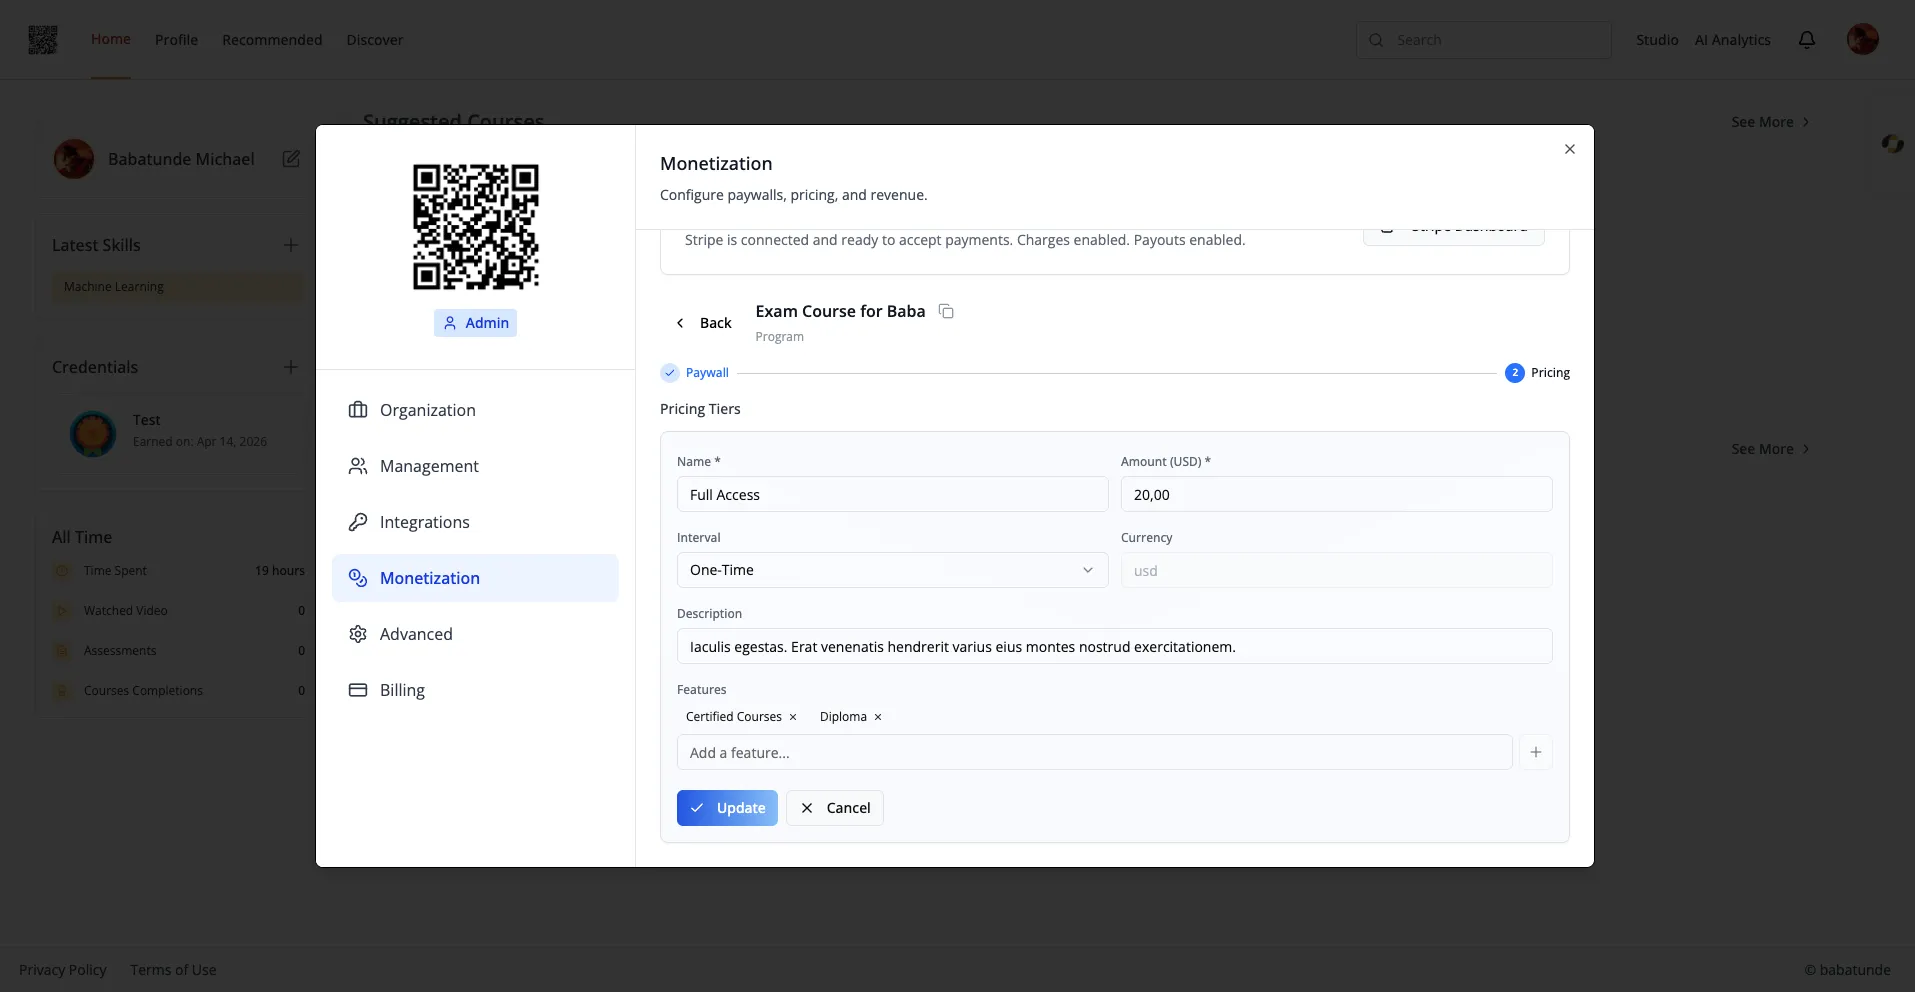
Disabled (dashed placeholder) until Stripe is ready. Once connected, it lists your configured items for sale and lets you add more: search for an existing item to paywall or add a custom item, filter configured items by All/Active/Disabled, set pricing, and choose a grandfathering policy for pre-paywall users (Free Forever or Require Subscription).
How to Use
Step 1: Open Monetization
In Admin mode, open the settings dialog and click Monetization in the left sidebar.
Step 2: Connect Stripe
Click Configure Stripe and complete the Stripe Connect onboarding flow — business details, bank account, and identity verification. You are returned here afterward; the badge should now read Configured.
Step 3: Finish interrupted onboarding
If the badge shows Incomplete, click Complete Setup to resume where Stripe left off. Payments cannot be accepted until onboarding finishes.
Step 4: Configure a paywall
With Stripe ready, use the paywall area to pick the item to sell (or add a custom item), set its pricing, and save the configuration. Decide how existing users are treated via the grandfathering setting.
Step 5: Track revenue
Click Stripe Dashboard anytime to open your Stripe account and review payments, payouts, and customers.