Organization Settings: Organization
Overview
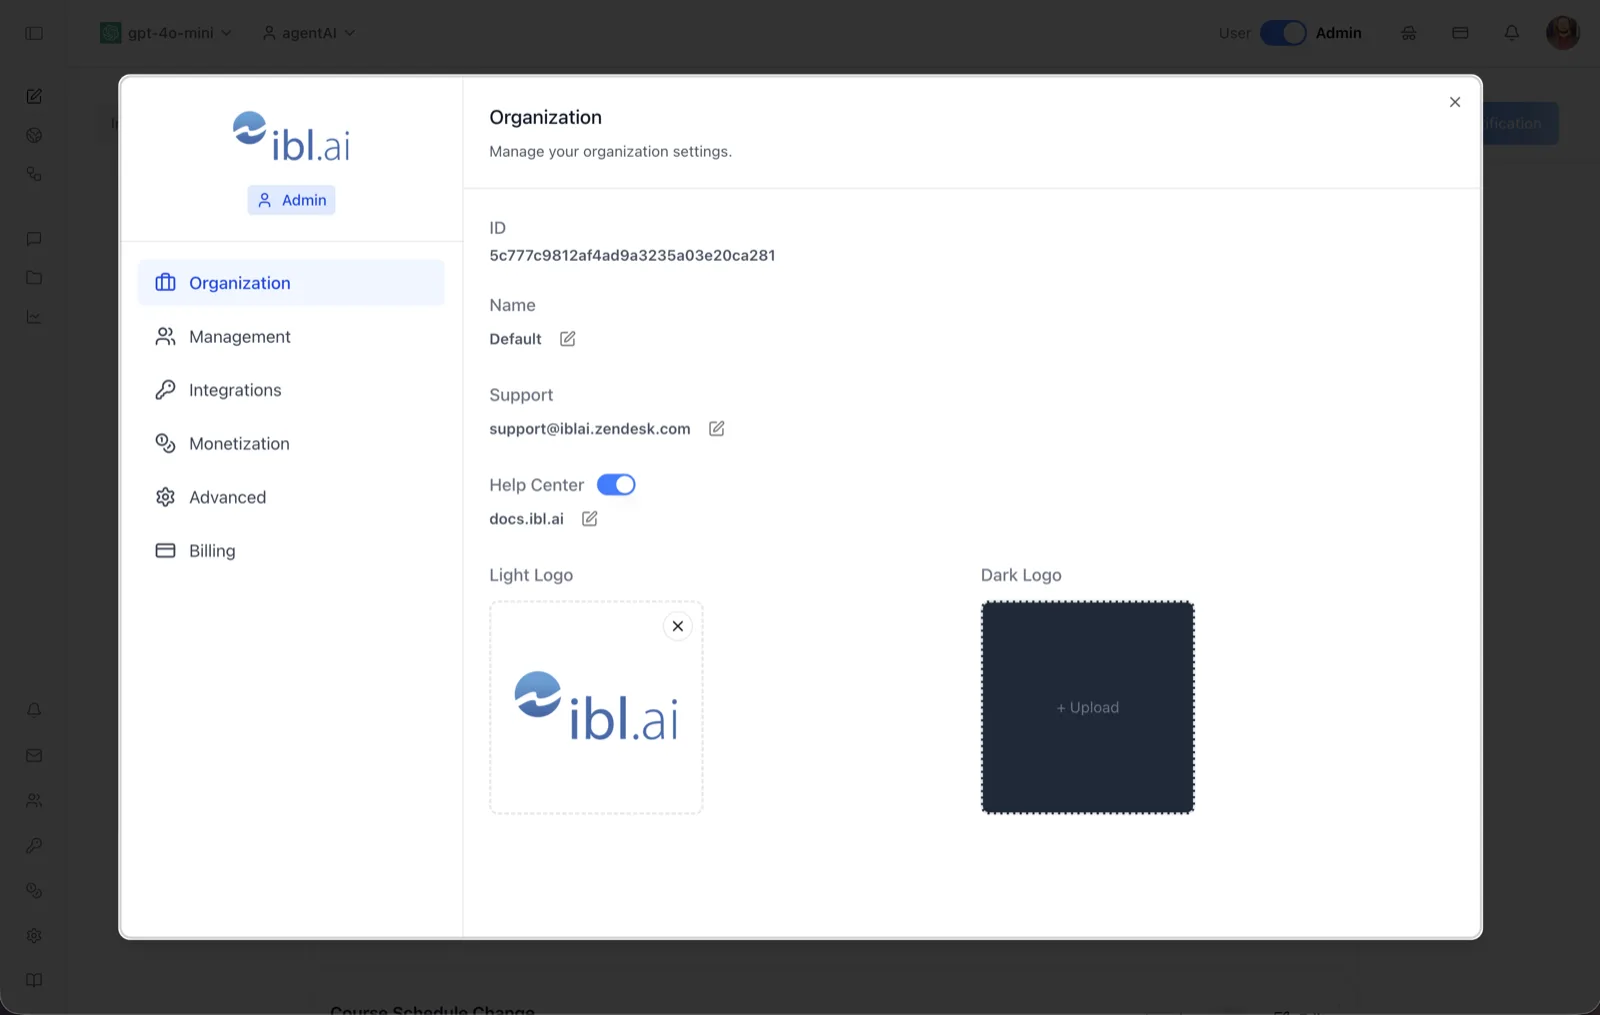
The Organization page holds your organization's identity and branding: its unique ID, display name, support contact, Help Center link, and the logos shown throughout the workspace. Changes made here apply to the entire organization and to every user who signs in to it.
Because OS is multi-organization, each organization carries its own configuration and branding. This page is where administrators set the values that make an organization look and feel like their own product — the name in the interface, the logo in the sidebar, and where users go for help.
To reach it, sign in as an administrator (switch the User/Admin toggle in the top bar to Admin), open the settings dialog, and select Organization in the left navigation. The header reads "Organization — Manage your organization settings."
Target Audience
Administrator
Fields and Controls
ID
The organization's unique identifier — a read-only alphanumeric string (for example, 5c777c9812af4ad9a3235a03e20ca281). Use it when referencing the organization in API calls or support requests. It cannot be edited.
Name
The organization's display name, shown with an edit (pencil) icon. Click the icon to type a new name and save it; the platform updates the organization's platform info record. A newly created organization may show "Default" until you rename it.
Support
The support email address for the organization (default: support@iblai.zendesk.com). Click the pencil icon to replace it with your own helpdesk address. This address receives user-submitted reports, such as inappropriate-content reports sent from chat.
Help Center
A toggle that controls whether the Help entry is shown to users, paired with an editable Help Center URL (default: docs.ibl.ai). When enabled, users can open your documentation site from the workspace. Click the pencil icon to point it at your own help center; the protocol (https://) is added automatically.
Light Logo
The logo used on light backgrounds. Click the upload area to choose an image file; once uploaded, a preview is shown with an × button to remove it. The light logo replaces the default branding across the workspace immediately after upload.
Dark Logo
The logo used on dark backgrounds and in dark mode. The dark preview tile shows + Upload until a file is chosen. Uploading works the same way as the light logo and is stored separately, so you can provide a variant with appropriate contrast for each theme.
How to Use
Step 1: Open Organization settings
Switch to Admin mode using the toggle in the top navigation bar, open the settings dialog, and click Organization in the left sidebar.
Step 2: Rename the organization
Click the pencil icon next to Name, enter the new organization name, and confirm. The name updates across the organization.
Step 3: Set your support email
Click the pencil icon next to Support, enter your helpdesk address, and save. User reports and support links now route to this address.
Step 4: Configure the Help Center
Leave the Help Center toggle on to show help links to users, and edit the URL to point at your own documentation site. Turn the toggle off to hide help entries entirely.
Step 5: Upload logos
Click the Light Logo area and select an image for light backgrounds, then use the Dark Logo tile's + Upload to add a dark-mode variant. Use the × on a preview to remove a logo and revert to the default.