Agent Settings: Tools
Overview
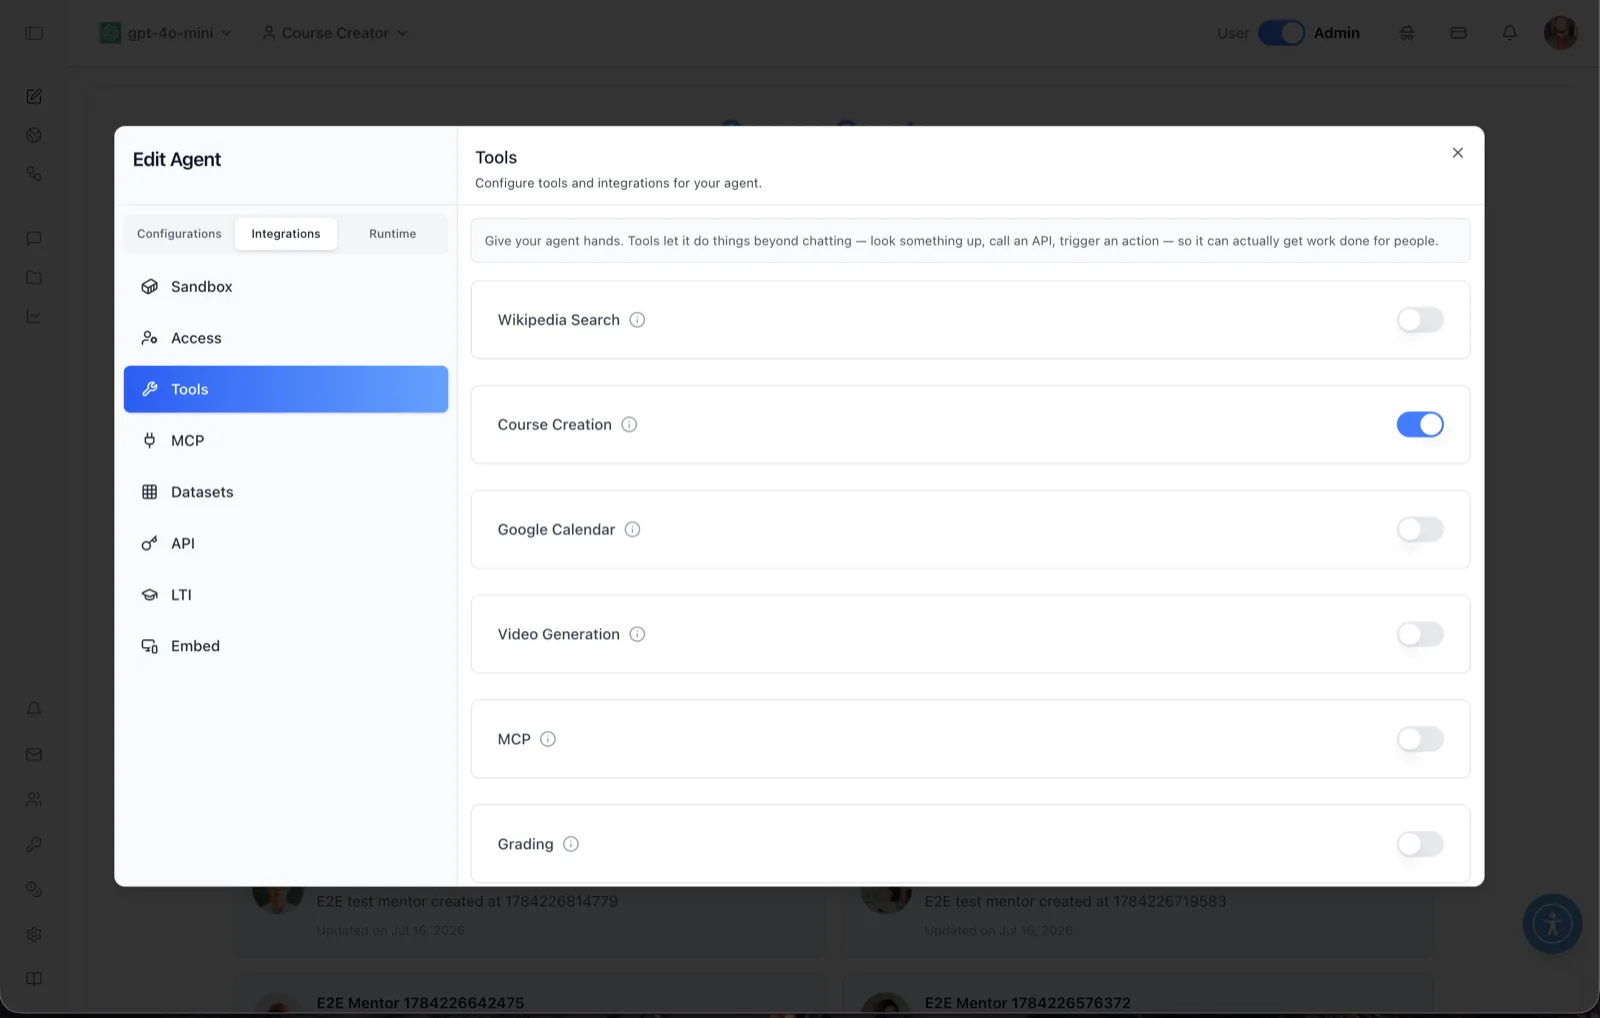
The Tools panel enables or disables the built-in tools an agent can call during a conversation. The panel header reads: "Configure tools and integrations for your agent," and the helper text explains: "Give your agent hands. Tools let it do things beyond chatting — look something up, call an API, trigger an action — so it can actually get work done for people."
Each tool is a row with a name, an info tooltip describing what it does, and an on/off toggle. The tool catalog is served by the platform, so the exact list can vary by organization; the screenshot shows Wikipedia Search, Course Creation (enabled), Google Calendar, Video Generation, MCP, and Grading. Toggling a tool updates the agent's enabled-tools list immediately — there is no separate save step.
To reach this screen, open the Edit Agent modal, switch to the Integrations tab group, and select Tools in the left sidebar.
Target Audience
Administrator | Agent Builder
Tools Reference
Wikipedia Search
Lets the agent look up information on Wikipedia during a conversation. Shown off in the screenshot.
Course Creation
Lets the agent create course content — the enabled tool in the screenshot, fitting the "Course Creator" agent being edited. With it on, the agent can generate and assemble courses from chat.
Google Calendar
Connects the agent to Google Calendar actions. Shown off in the screenshot.
Video Generation
Lets the agent generate video content. Shown off in the screenshot.
MCP
Lets the agent call the Model Context Protocol connectors configured on the MCP panel. Turning this on is what allows connected MCP servers to be used inside conversations. Shown off in the screenshot.
Grading
Lets the agent perform grading tasks. Shown off in the screenshot.
Info tooltips
The info icon next to each tool shows the tool's description as provided by the platform, so you can confirm exactly what a tool does before enabling it.
How to Use
Step 1: Open the Tools panel
Open the Edit Agent modal, click the Integrations tab group at the top of the sidebar, then select Tools.
Step 2: Review the available tools
Read each tool's info tooltip to understand what it lets the agent do. The catalog you see is the set of tools your platform makes available.
Step 3: Toggle tools on
Switch on each tool the agent should be able to use — for example, Course Creation for a course-building agent. The change is applied to the agent immediately.
Step 4: Toggle tools off
Switch off any tool the agent should no longer call. Keeping the enabled set minimal keeps the agent focused and predictable.